Cloudinary Blog

CSS Image Overlay: Overlaying Text and Images for Visual Effect

Basic and Bonus CSS Image-Overlay Effects

CSS image overlays are a common technique for transposing text or images over each other. For example, you can combine images and text on a website when captioning an image, or place a live text element over a button.

CSS image overlays can be a solid color, a gradient, a color block with transparency, or a blur.

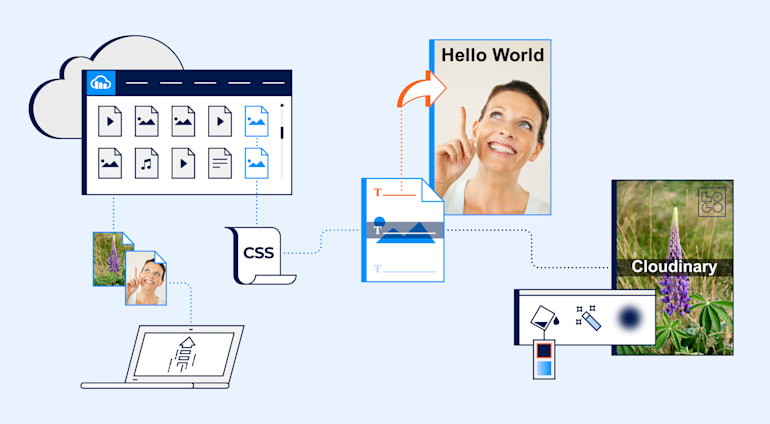
This post explains how to overlay images with CSS and how to create seven cool overlay effects with only one codeline in Cloudinary, which is tough to do in CSS.

Here are the topics:

Overlaying Text on Images in CSS

To combine image and interactive text elements, for example, menus and buttons, in your website, dynamically overlay text on images in CSS. Note an important caveat, however: the image delivered to the site does not include the overlaid text. Even though the text is visible in their browser, if users download and share the image, the text disappears. Therefore, do not, for example, add your brand to images by means of CSS overlays for watermarks. Instead, turn to Cloudinary for that task. See the details below.

The following example demonstrates the HTML and CSS code that produces and customizes a text overlay in color. Note that you can apply any text properties. Most important of all, align your elements. Generally, set your container element to be position: relative and your text elements to be position: absolute.

See the Pen qBOGygN by Nic-Sevic (@Nic_Sevic) on CodePen.

Rendering Text on Images Readable

To ensure that the text in your overlays is readable, adopt one of these techniques:

  • Color overlays, which apply a single color or shade over an image, ideal for muting details and colors. That makes your text sharp since it competes with only one color family.
  • Gradient overlays, which apply a gradient of colors or shades over an image for more visual appeal. Depending on your value settings, these overlays can reduce the number of competing colors behind the text.
  • An image blur, which reduces the details by adding a background for the text without competing edges, making it easier to see where the letters begin and end regardless of color.
  • Background color, which applies a small block of pigment behind the text, leaving the rest of the image unchanged. Use this trick for captions or text on images that remain sharp if certain areas are obscure.

Adding Transparent Overlays to Images

You can also add color filters or backgrounds behind text to improve readability (as described above) or to spruce up visuals. Such overlays offer the added benefit of access-to-hover events, enabling you to make images interactive or to change settings to grab attention.

To create transparent or translucent CSS image overlays, configure the opacity property with a value between 0 (translucent) and 1 (opaque). We recommend that you define RGBA values for opacity so that you can transform child elements separately.

See this example of a standard opacity application (with a 50-percent transparency) for the parent only (also with a 50-percent transparency):

Copy to clipboard
.overlay {opacity: 0.5;}

.overlay {background: rgba(76, 175, 80, 0.5);}

To tweak the transparency level, add the hover selector to the element in question. The changes you apply are live on a cursor hover of that element. Here’s an example that changes the opacity and color of a sheer-color layer on top of an image:

Copy to clipboard
.overlay {
  opacity: 0;
}

.overlay:hover  { 
  opacity: 0.25;
  background-color: yellow;
}

This example makes use of translucent overlays, hover effects, and text overlays:

Copy to clipboard
<script async src="//jsfiddle.net/digamber89/x4mc2gaz/13/embed/html,css,result/dark/"></script>

To learn more, check out these articles on CSS image effects and resizing.

Creating Image-Overlay Effects in Cloudinary

A cloud-based service for managing images and videos, Cloudinary offers a generous free plan. While on that platform, you can intuitively upload images, apply complex overlays, and automatically position and organize them for images. Cloudinary does all that dynamically without modifying the original images.

Applying filters and effects to images on Cloudinary takes only one line of code, which would be a major challenge in CSS. You do that either with changes to the related URLs or through convenient SDKs, tailored for all popular programming languages.

The list below describes seven overlay effects you can apply to images with Cloudinary. Each of the items links to a resource that contains more details of the effect.

Text overlay with gravity

You can display text over an image, automatically positioning the text in different areas. For example, to position the text Hello World at the bottom of the image, code its URL this way:

Ruby:
Copy to clipboard
cl_image_tag("face_center.jpg", :overlay=>{:font_family=>"Arial", :font_size=>45, :font_weight=>"bold", :text=>"Hello%20World"}, :gravity=>"south")
PHP v1:
Copy to clipboard
cl_image_tag("face_center.jpg", array("overlay"=>array("font_family"=>"Arial", "font_size"=>45, "font_weight"=>"bold", "text"=>"Hello%20World"), "gravity"=>"south"))
PHP v2:
Copy to clipboard
(new ImageTag('face_center.jpg'))
  ->overlay(
      Overlay::source(
          Source::text('Hello World', (new TextStyle('Arial', 45))
            ->fontWeight(FontWeight::bold())))
        ->position((new Position())
          ->gravity(Gravity::compass(Compass::south()))
      
      ));
Python:
Copy to clipboard
CloudinaryImage("face_center.jpg").image(overlay={'font_family': "Arial", 'font_size': 45, 'font_weight': "bold", 'text': "Hello%20World"}, gravity="south")
Node.js:
Copy to clipboard
cloudinary.image("face_center.jpg", {overlay: {font_family: "Arial", font_size: 45, font_weight: "bold", text: "Hello%20World"}, gravity: "south"})
Java:
Copy to clipboard
cloudinary.url().transformation(new Transformation().overlay(new TextLayer().fontFamily("Arial").fontSize(45).fontWeight("bold").text("Hello%20World")).gravity("south")).imageTag("face_center.jpg");
JS:
Copy to clipboard
cloudinary.imageTag('face_center.jpg', {overlay: new cloudinary.TextLayer().fontFamily("Arial").fontSize(45).fontWeight("bold").text("Hello%20World"), gravity: "south"}).toHtml();
jQuery:
Copy to clipboard
$.cloudinary.image("face_center.jpg", {overlay: new cloudinary.TextLayer().fontFamily("Arial").fontSize(45).fontWeight("bold").text("Hello%20World"), gravity: "south"})
React:
Copy to clipboard
<Image publicId="face_center.jpg" >
  <Transformation overlay={{fontFamily: "Arial", fontSize: 45, fontWeight: "bold", text: "Hello%20World"}} gravity="south" />
</Image>
Vue.js:
Copy to clipboard
<cld-image publicId="face_center.jpg" >
  <cld-transformation :overlay="{fontFamily: 'Arial', fontSize: 45, fontWeight: 'bold', text: 'Hello%20World'}" gravity="south" />
</cld-image>
Angular:
Copy to clipboard
<cl-image public-id="face_center.jpg" >
  <cl-transformation overlay="text:Arial_45_bold:Hello%20World" gravity="south">
  </cl-transformation>
</cl-image>
.NET:
Copy to clipboard
cloudinary.Api.UrlImgUp.Transform(new Transformation().Overlay(new TextLayer().FontFamily("Arial").FontSize(45).FontWeight("bold").Text("Hello%20World")).Gravity("south")).BuildImageTag("face_center.jpg")
Android:
Copy to clipboard
MediaManager.get().url().transformation(new Transformation().overlay(new TextLayer().fontFamily("Arial").fontSize(45).fontWeight("bold").text("Hello%20World")).gravity("south")).generate("face_center.jpg");
iOS:
Copy to clipboard
imageView.cldSetImage(cloudinary.createUrl().setTransformation(CLDTransformation().setOverlay("text:Arial_45_bold:Hello%20World").setGravity("south")).generate("face_center.jpg")!, cloudinary: cloudinary)
Text Overlay

To make the positioning more accurate, add the xand y offsets. For example, to position the text northwest of the image with an offset, code the URL like this:

Ruby:
Copy to clipboard
cl_image_tag("face_center.jpg", :overlay=>{:font_family=>"Arial", :font_size=>45, :font_weight=>"bold", :text=>"Hello%20World"}, :gravity=>"north_west", :x=>20, :y=>20)
PHP v1:
Copy to clipboard
cl_image_tag("face_center.jpg", array("overlay"=>array("font_family"=>"Arial", "font_size"=>45, "font_weight"=>"bold", "text"=>"Hello%20World"), "gravity"=>"north_west", "x"=>20, "y"=>20))
PHP v2:
Copy to clipboard
(new ImageTag('face_center.jpg'))
  ->overlay(
      Overlay::source(
          Source::text('Hello World', (new TextStyle('Arial', 45))
            ->fontWeight(FontWeight::bold())))
        ->position((new Position())
          ->gravity(Gravity::compass(Compass::northWest()))
          ->offsetX(20)->offsetY(20)
      
      ));
Python:
Copy to clipboard
CloudinaryImage("face_center.jpg").image(overlay={'font_family': "Arial", 'font_size': 45, 'font_weight': "bold", 'text': "Hello%20World"}, gravity="north_west", x=20, y=20)
Node.js:
Copy to clipboard
cloudinary.image("face_center.jpg", {overlay: {font_family: "Arial", font_size: 45, font_weight: "bold", text: "Hello%20World"}, gravity: "north_west", x: 20, y: 20})
Java:
Copy to clipboard
cloudinary.url().transformation(new Transformation().overlay(new TextLayer().fontFamily("Arial").fontSize(45).fontWeight("bold").text("Hello%20World")).gravity("north_west").x(20).y(20)).imageTag("face_center.jpg");
JS:
Copy to clipboard
cloudinary.imageTag('face_center.jpg', {overlay: new cloudinary.TextLayer().fontFamily("Arial").fontSize(45).fontWeight("bold").text("Hello%20World"), gravity: "north_west", x: 20, y: 20}).toHtml();
jQuery:
Copy to clipboard
$.cloudinary.image("face_center.jpg", {overlay: new cloudinary.TextLayer().fontFamily("Arial").fontSize(45).fontWeight("bold").text("Hello%20World"), gravity: "north_west", x: 20, y: 20})
React:
Copy to clipboard
<Image publicId="face_center.jpg" >
  <Transformation overlay={{fontFamily: "Arial", fontSize: 45, fontWeight: "bold", text: "Hello%20World"}} gravity="north_west" x="20" y="20" />
</Image>
Vue.js:
Copy to clipboard
<cld-image publicId="face_center.jpg" >
  <cld-transformation :overlay="{fontFamily: 'Arial', fontSize: 45, fontWeight: 'bold', text: 'Hello%20World'}" gravity="north_west" x="20" y="20" />
</cld-image>
Angular:
Copy to clipboard
<cl-image public-id="face_center.jpg" >
  <cl-transformation overlay="text:Arial_45_bold:Hello%20World" gravity="north_west" x="20" y="20">
  </cl-transformation>
</cl-image>
.NET:
Copy to clipboard
cloudinary.Api.UrlImgUp.Transform(new Transformation().Overlay(new TextLayer().FontFamily("Arial").FontSize(45).FontWeight("bold").Text("Hello%20World")).Gravity("north_west").X(20).Y(20)).BuildImageTag("face_center.jpg")
Android:
Copy to clipboard
MediaManager.get().url().transformation(new Transformation().overlay(new TextLayer().fontFamily("Arial").fontSize(45).fontWeight("bold").text("Hello%20World")).gravity("north_west").x(20).y(20)).generate("face_center.jpg");
iOS:
Copy to clipboard
imageView.cldSetImage(cloudinary.createUrl().setTransformation(CLDTransformation().setOverlay("text:Arial_45_bold:Hello%20World").setGravity("north_west").setX(20).setY(20)).generate("face_center.jpg")!, cloudinary: cloudinary)
gravity

Text overlay with face recognition

To position the same image on an automatically detected face there, rotate it and fit the text size to 50 percent of the detected face. Code the URL this way:

Ruby:
Copy to clipboard
cl_image_tag("face_center.jpg", :overlay=>{:font_family=>"Arial", :font_size=>45, :font_weight=>"bold", :text=>"Hello%20World"}, :gravity=>"face", :angle=>19, :flags=>"region_relative", :width=>0.5)
PHP v1:
Copy to clipboard
cl_image_tag("face_center.jpg", array("overlay"=>array("font_family"=>"Arial", "font_size"=>45, "font_weight"=>"bold", "text"=>"Hello%20World"), "gravity"=>"face", "angle"=>19, "flags"=>"region_relative", "width"=>"0.5"))
PHP v2:
Copy to clipboard
(new ImageTag('face_center.jpg'))
  ->overlay(
      Overlay::source(
          Source::text('Hello World', (new TextStyle('Arial', 45))
            ->fontWeight(FontWeight::bold()))
          ->transformation((new ImageTransformation())
            ->rotate(Rotate::byAngle(19))
            ->resize(Resize::scale()->width(0.5)->regionRelative())))
        ->position((new Position())
          ->gravity(Gravity::focusOn(FocusOn::face()))
      
      ));
Python:
Copy to clipboard
CloudinaryImage("face_center.jpg").image(overlay={'font_family': "Arial", 'font_size': 45, 'font_weight': "bold", 'text': "Hello%20World"}, gravity="face", angle=19, flags="region_relative", width="0.5")
Node.js:
Copy to clipboard
cloudinary.image("face_center.jpg", {overlay: {font_family: "Arial", font_size: 45, font_weight: "bold", text: "Hello%20World"}, gravity: "face", angle: 19, flags: "region_relative", width: "0.5"})
Java:
Copy to clipboard
cloudinary.url().transformation(new Transformation().overlay(new TextLayer().fontFamily("Arial").fontSize(45).fontWeight("bold").text("Hello%20World")).gravity("face").angle(19).flags("region_relative").width(0.5)).imageTag("face_center.jpg");
JS:
Copy to clipboard
cloudinary.imageTag('face_center.jpg', {overlay: new cloudinary.TextLayer().fontFamily("Arial").fontSize(45).fontWeight("bold").text("Hello%20World"), gravity: "face", angle: 19, flags: "region_relative", width: "0.5"}).toHtml();
jQuery:
Copy to clipboard
$.cloudinary.image("face_center.jpg", {overlay: new cloudinary.TextLayer().fontFamily("Arial").fontSize(45).fontWeight("bold").text("Hello%20World"), gravity: "face", angle: 19, flags: "region_relative", width: "0.5"})
React:
Copy to clipboard
<Image publicId="face_center.jpg" >
  <Transformation overlay={{fontFamily: "Arial", fontSize: 45, fontWeight: "bold", text: "Hello%20World"}} gravity="face" angle="19" flags="region_relative" width="0.5" />
</Image>
Vue.js:
Copy to clipboard
<cld-image publicId="face_center.jpg" >
  <cld-transformation :overlay="{fontFamily: 'Arial', fontSize: 45, fontWeight: 'bold', text: 'Hello%20World'}" gravity="face" angle="19" flags="region_relative" width="0.5" />
</cld-image>
Angular:
Copy to clipboard
<cl-image public-id="face_center.jpg" >
  <cl-transformation overlay="text:Arial_45_bold:Hello%20World" gravity="face" angle="19" flags="region_relative" width="0.5">
  </cl-transformation>
</cl-image>
.NET:
Copy to clipboard
cloudinary.Api.UrlImgUp.Transform(new Transformation().Overlay(new TextLayer().FontFamily("Arial").FontSize(45).FontWeight("bold").Text("Hello%20World")).Gravity("face").Angle(19).Flags("region_relative").Width(0.5)).BuildImageTag("face_center.jpg")
Android:
Copy to clipboard
MediaManager.get().url().transformation(new Transformation().overlay(new TextLayer().fontFamily("Arial").fontSize(45).fontWeight("bold").text("Hello%20World")).gravity("face").angle(19).flags("region_relative").width(0.5)).generate("face_center.jpg");
iOS:
Copy to clipboard
imageView.cldSetImage(cloudinary.createUrl().setTransformation(CLDTransformation().setOverlay("text:Arial_45_bold:Hello%20World").setGravity("face").setAngle(19).setFlags("region_relative").setWidth(0.5)).generate("face_center.jpg")!, cloudinary: cloudinary)
facial recognition

Text overlay with responsiveness

To overlay text on an image with a nice transparent background and ensure that the bar is relative to the image width, code the URL this way:

Ruby:
Copy to clipboard
cl_image_tag("lupine.jpg", :transformation=>[
  {:overlay=>"black_bar", :width=>1.0, :height=>0.1, :flags=>"relative", :opacity=>60},
  {:overlay=>{:font_family=>"Arial", :font_size=>150, :font_weight=>"bold", :text=>"Cloudinary"}, :color=>"white"}
  ])
PHP v1:
Copy to clipboard
cl_image_tag("lupine.jpg", array("transformation"=>array(
  array("overlay"=>"black_bar", "width"=>"1.0", "height"=>"0.1", "flags"=>"relative", "opacity"=>60),
  array("overlay"=>array("font_family"=>"Arial", "font_size"=>150, "font_weight"=>"bold", "text"=>"Cloudinary"), "color"=>"white")
  )))
PHP v2:
Copy to clipboard
(new ImageTag('lupine.jpg'))
  ->overlay(
      Overlay::source(Source::image('black_bar')
        ->transformation((new ImageTransformation())
          ->resize(Resize::scale()->width(1.0)->height(0.1)->relative())
          ->adjust(Adjust::opacity(60)))))
    ->overlay(
        Overlay::source(
            Source::text('Cloudinary', (new TextStyle('Arial', 150))
              ->fontWeight(FontWeight::bold()))
            ->textColor(Color::WHITE)
          
        
        ));
Python:
Copy to clipboard
CloudinaryImage("lupine.jpg").image(transformation=[
  {'overlay': "black_bar", 'width': "1.0", 'height': "0.1", 'flags': "relative", 'opacity': 60},
  {'overlay': {'font_family': "Arial", 'font_size': 150, 'font_weight': "bold", 'text': "Cloudinary"}, 'color': "white"}
  ])
Node.js:
Copy to clipboard
cloudinary.image("lupine.jpg", {transformation: [
  {overlay: "black_bar", width: "1.0", height: "0.1", flags: "relative", opacity: 60},
  {overlay: {font_family: "Arial", font_size: 150, font_weight: "bold", text: "Cloudinary"}, color: "white"}
  ]})
Java:
Copy to clipboard
cloudinary.url().transformation(new Transformation()
  .overlay(new Layer().publicId("black_bar")).width(1.0).height(0.1).flags("relative").opacity(60).chain()
  .overlay(new TextLayer().fontFamily("Arial").fontSize(150).fontWeight("bold").text("Cloudinary")).color("white")).imageTag("lupine.jpg");
JS:
Copy to clipboard
cloudinary.imageTag('lupine.jpg', {transformation: [
  {overlay: new cloudinary.Layer().publicId("black_bar"), width: "1.0", height: "0.1", flags: "relative", opacity: 60},
  {overlay: new cloudinary.TextLayer().fontFamily("Arial").fontSize(150).fontWeight("bold").text("Cloudinary"), color: "white"}
  ]}).toHtml();
jQuery:
Copy to clipboard
$.cloudinary.image("lupine.jpg", {transformation: [
  {overlay: new cloudinary.Layer().publicId("black_bar"), width: "1.0", height: "0.1", flags: "relative", opacity: 60},
  {overlay: new cloudinary.TextLayer().fontFamily("Arial").fontSize(150).fontWeight("bold").text("Cloudinary"), color: "white"}
  ]})
React:
Copy to clipboard
<Image publicId="lupine.jpg" >
  <Transformation overlay="black_bar" width="1.0" height="0.1" flags="relative" opacity="60" />
  <Transformation overlay={{fontFamily: "Arial", fontSize: 150, fontWeight: "bold", text: "Cloudinary"}} color="white" />
</Image>
Vue.js:
Copy to clipboard
<cld-image publicId="lupine.jpg" >
  <cld-transformation :overlay="black_bar" width="1.0" height="0.1" flags="relative" opacity="60" />
  <cld-transformation :overlay="{fontFamily: 'Arial', fontSize: 150, fontWeight: 'bold', text: 'Cloudinary'}" color="white" />
</cld-image>
Angular:
Copy to clipboard
<cl-image public-id="lupine.jpg" >
  <cl-transformation overlay="black_bar" width="1.0" height="0.1" flags="relative" opacity="60">
  </cl-transformation>
  <cl-transformation overlay="text:Arial_150_bold:Cloudinary" color="white">
  </cl-transformation>
</cl-image>
.NET:
Copy to clipboard
cloudinary.Api.UrlImgUp.Transform(new Transformation()
  .Overlay(new Layer().PublicId("black_bar")).Width(1.0).Height(0.1).Flags("relative").Opacity(60).Chain()
  .Overlay(new TextLayer().FontFamily("Arial").FontSize(150).FontWeight("bold").Text("Cloudinary")).Color("white")).BuildImageTag("lupine.jpg")
Android:
Copy to clipboard
MediaManager.get().url().transformation(new Transformation()
  .overlay(new Layer().publicId("black_bar")).width(1.0).height(0.1).flags("relative").opacity(60).chain()
  .overlay(new TextLayer().fontFamily("Arial").fontSize(150).fontWeight("bold").text("Cloudinary")).color("white")).generate("lupine.jpg");
iOS:
Copy to clipboard
imageView.cldSetImage(cloudinary.createUrl().setTransformation(CLDTransformation()
  .setOverlay("black_bar").setWidth(1.0).setHeight(0.1).setFlags("relative").setOpacity(60).chain()
  .setOverlay("text:Arial_150_bold:Cloudinary").setColor("white")).generate("lupine.jpg")!, cloudinary: cloudinary)
responsive overlay

Stacked image overlays

To add an image overlay with opacity (e.g., one called sample_watermark) to another one (e.g., one called brown_sheep) with Cloudinary's overlay command (1), code the URL this way:

Ruby:
Copy to clipboard
cl_image_tag("brown_sheep.jpg", :overlay=>"cloudinary_icon", :opacity=>50, :width=>300, :effect=>"brightness:200")
PHP v1:
Copy to clipboard
cl_image_tag("brown_sheep.jpg", array("overlay"=>"cloudinary_icon", "opacity"=>50, "width"=>300, "effect"=>"brightness:200"))
PHP v2:
Copy to clipboard
(new ImageTag('brown_sheep.jpg'))
  ->overlay(
      Overlay::source(Source::image('cloudinary_icon')
        ->transformation((new ImageTransformation())
          ->resize(Resize::scale()->width(300))
          ->adjust(Adjust::opacity(50))
          ->adjust(Adjust::brightness()->level(200))
  )));
Python:
Copy to clipboard
CloudinaryImage("brown_sheep.jpg").image(overlay="cloudinary_icon", opacity=50, width=300, effect="brightness:200")
Node.js:
Copy to clipboard
cloudinary.image("brown_sheep.jpg", {overlay: "cloudinary_icon", opacity: 50, width: 300, effect: "brightness:200"})
Java:
Copy to clipboard
cloudinary.url().transformation(new Transformation().overlay(new Layer().publicId("cloudinary_icon")).opacity(50).width(300).effect("brightness:200")).imageTag("brown_sheep.jpg");
JS:
Copy to clipboard
cloudinary.imageTag('brown_sheep.jpg', {overlay: new cloudinary.Layer().publicId("cloudinary_icon"), opacity: 50, width: 300, effect: "brightness:200"}).toHtml();
jQuery:
Copy to clipboard
$.cloudinary.image("brown_sheep.jpg", {overlay: new cloudinary.Layer().publicId("cloudinary_icon"), opacity: 50, width: 300, effect: "brightness:200"})
React:
Copy to clipboard
<Image publicId="brown_sheep.jpg" >
  <Transformation overlay="cloudinary_icon" opacity="50" width="300" effect="brightness:200" />
</Image>
Vue.js:
Copy to clipboard
<cld-image publicId="brown_sheep.jpg" >
  <cld-transformation :overlay="cloudinary_icon" opacity="50" width="300" effect="brightness:200" />
</cld-image>
Angular:
Copy to clipboard
<cl-image public-id="brown_sheep.jpg" >
  <cl-transformation overlay="cloudinary_icon" opacity="50" width="300" effect="brightness:200">
  </cl-transformation>
</cl-image>
.NET:
Copy to clipboard
cloudinary.Api.UrlImgUp.Transform(new Transformation().Overlay(new Layer().PublicId("cloudinary_icon")).Opacity(50).Width(300).Effect("brightness:200")).BuildImageTag("brown_sheep.jpg")
Android:
Copy to clipboard
MediaManager.get().url().transformation(new Transformation().overlay(new Layer().publicId("cloudinary_icon")).opacity(50).width(300).effect("brightness:200")).generate("brown_sheep.jpg");
iOS:
Copy to clipboard
imageView.cldSetImage(cloudinary.createUrl().setTransformation(CLDTransformation().setOverlay("cloudinary_icon").setOpacity(50).setWidth(300).setEffect("brightness:200")).generate("brown_sheep.jpg")!, cloudinary: cloudinary)
Stacked image overlay

Image overlay with automated positioning and face detection

To shrink a watermark and position it arbitrarily with the 'gravity', 'x', and 'y' transformation commands, see the example URL below, which adds an 80-pixel-wide watermark five pixels from the bottom-right corner of an image that is resized to fill a 300x200-pixel rectangle based on face detection:

Ruby:
Copy to clipboard
cl_image_tag("face_center.jpg", :transformation=>[
  {:width=>300, :height=>200, :gravity=>"face", :crop=>"fill"},
  {:width=>80, :gravity=>"south_east", :x=>5, :y=>5, :overlay=>"cloudinary_icon", :opacity=>50, :effect=>"brightness:200"}
  ])
PHP v1:
Copy to clipboard
cl_image_tag("face_center.jpg", array("transformation"=>array(
  array("width"=>300, "height"=>200, "gravity"=>"face", "crop"=>"fill"),
  array("width"=>80, "gravity"=>"south_east", "x"=>5, "y"=>5, "overlay"=>"cloudinary_icon", "opacity"=>50, "effect"=>"brightness:200")
  )))
PHP v2:
Copy to clipboard
(new ImageTag('face_center.jpg'))
  ->resize(Resize::fill()->width(300)->height(200)->gravity(Gravity::focusOn(FocusOn::face())))
  ->overlay(
      Overlay::source(Source::image('cloudinary_icon')
        ->transformation((new ImageTransformation())
          ->resize(Resize::scale()->width(80))
          ->adjust(Adjust::opacity(50))
          ->adjust(Adjust::brightness()->level(200))))
      ->position((new Position())
        ->gravity(Gravity::compass(Compass::southEast()))
        ->offsetX(5)->offsetY(5)
  ));
Python:
Copy to clipboard
CloudinaryImage("face_center.jpg").image(transformation=[
  {'width': 300, 'height': 200, 'gravity': "face", 'crop': "fill"},
  {'width': 80, 'gravity': "south_east", 'x': 5, 'y': 5, 'overlay': "cloudinary_icon", 'opacity': 50, 'effect': "brightness:200"}
  ])
Node.js:
Copy to clipboard
cloudinary.image("face_center.jpg", {transformation: [
  {width: 300, height: 200, gravity: "face", crop: "fill"},
  {width: 80, gravity: "south_east", x: 5, y: 5, overlay: "cloudinary_icon", opacity: 50, effect: "brightness:200"}
  ]})
Java:
Copy to clipboard
cloudinary.url().transformation(new Transformation()
  .width(300).height(200).gravity("face").crop("fill").chain()
  .width(80).gravity("south_east").x(5).y(5).overlay(new Layer().publicId("cloudinary_icon")).opacity(50).effect("brightness:200")).imageTag("face_center.jpg");
JS:
Copy to clipboard
cloudinary.imageTag('face_center.jpg', {transformation: [
  {width: 300, height: 200, gravity: "face", crop: "fill"},
  {width: 80, gravity: "south_east", x: 5, y: 5, overlay: new cloudinary.Layer().publicId("cloudinary_icon"), opacity: 50, effect: "brightness:200"}
  ]}).toHtml();
jQuery:
Copy to clipboard
$.cloudinary.image("face_center.jpg", {transformation: [
  {width: 300, height: 200, gravity: "face", crop: "fill"},
  {width: 80, gravity: "south_east", x: 5, y: 5, overlay: new cloudinary.Layer().publicId("cloudinary_icon"), opacity: 50, effect: "brightness:200"}
  ]})
React:
Copy to clipboard
<Image publicId="face_center.jpg" >
  <Transformation width="300" height="200" gravity="face" crop="fill" />
  <Transformation width="80" gravity="south_east" x="5" y="5" overlay="cloudinary_icon" opacity="50" effect="brightness:200" />
</Image>
Vue.js:
Copy to clipboard
<cld-image publicId="face_center.jpg" >
  <cld-transformation width="300" height="200" gravity="face" crop="fill" />
  <cld-transformation width="80" gravity="south_east" x="5" y="5" :overlay="cloudinary_icon" opacity="50" effect="brightness:200" />
</cld-image>
Angular:
Copy to clipboard
<cl-image public-id="face_center.jpg" >
  <cl-transformation width="300" height="200" gravity="face" crop="fill">
  </cl-transformation>
  <cl-transformation width="80" gravity="south_east" x="5" y="5" overlay="cloudinary_icon" opacity="50" effect="brightness:200">
  </cl-transformation>
</cl-image>
.NET:
Copy to clipboard
cloudinary.Api.UrlImgUp.Transform(new Transformation()
  .Width(300).Height(200).Gravity("face").Crop("fill").Chain()
  .Width(80).Gravity("south_east").X(5).Y(5).Overlay(new Layer().PublicId("cloudinary_icon")).Opacity(50).Effect("brightness:200")).BuildImageTag("face_center.jpg")
Android:
Copy to clipboard
MediaManager.get().url().transformation(new Transformation()
  .width(300).height(200).gravity("face").crop("fill").chain()
  .width(80).gravity("south_east").x(5).y(5).overlay(new Layer().publicId("cloudinary_icon")).opacity(50).effect("brightness:200")).generate("face_center.jpg");
iOS:
Copy to clipboard
imageView.cldSetImage(cloudinary.createUrl().setTransformation(CLDTransformation()
  .setWidth(300).setHeight(200).setGravity("face").setCrop("fill").chain()
  .setWidth(80).setGravity("south_east").setX(5).setY(5).setOverlay("cloudinary_icon").setOpacity(50).setEffect("brightness:200")).generate("face_center.jpg")!, cloudinary: cloudinary)
automated overlay

Custom fonts

You can upload your own custom fonts to Cloudinary for use as overlay text on images (see the procedures in the documentation). Afterwards, this code overlays text over an image with the uploaded font:

Ruby:
Copy to clipboard
cl_image_tag("fireworks.jpg", :overlay=>{:font_family=>"ttf", :font_size=>100, :text=>"Happy%20New%20Year%202021"}, :color=>"white", :gravity=>"north_west", :x=>30, :y=>30)
PHP v1:
Copy to clipboard
cl_image_tag("fireworks.jpg", array("overlay"=>array("font_family"=>"ttf", "font_size"=>100, "text"=>"Happy%20New%20Year%202021"), "color"=>"white", "gravity"=>"north_west", "x"=>30, "y"=>30))
PHP v2:
Copy to clipboard
(new ImageTag('fireworks.jpg'))
  ->overlay(
      Overlay::source(Source::text('Happy New Year 2021', (new TextStyle('AlexBrush-Regular.ttf', 100)))
        ->textColor(Color::WHITE))
      ->position((new Position())
        ->gravity(Gravity::compass(Compass::northWest()))
        ->offsetX(30)->offsetY(30)
  ));
Python:
Copy to clipboard
CloudinaryImage("fireworks.jpg").image(overlay={'font_family': "ttf", 'font_size': 100, 'text': "Happy%20New%20Year%202021"}, color="white", gravity="north_west", x=30, y=30)
Node.js:
Copy to clipboard
cloudinary.image("fireworks.jpg", {overlay: {font_family: "ttf", font_size: 100, text: "Happy%20New%20Year%202021"}, color: "white", gravity: "north_west", x: 30, y: 30})
Java:
Copy to clipboard
cloudinary.url().transformation(new Transformation().overlay(new TextLayer().fontFamily("ttf").fontSize(100).text("Happy%20New%20Year%202021")).color("white").gravity("north_west").x(30).y(30)).imageTag("fireworks.jpg");
JS:
Copy to clipboard
cloudinary.imageTag('fireworks.jpg', {overlay: new cloudinary.TextLayer().fontFamily("ttf").fontSize(100).text("Happy%20New%20Year%202021"), color: "white", gravity: "north_west", x: 30, y: 30}).toHtml();
jQuery:
Copy to clipboard
$.cloudinary.image("fireworks.jpg", {overlay: new cloudinary.TextLayer().fontFamily("ttf").fontSize(100).text("Happy%20New%20Year%202021"), color: "white", gravity: "north_west", x: 30, y: 30})
React:
Copy to clipboard
<Image publicId="fireworks.jpg" >
  <Transformation overlay={{fontFamily: "ttf", fontSize: 100, text: "Happy%20New%20Year%202021"}} color="white" gravity="north_west" x="30" y="30" />
</Image>
Vue.js:
Copy to clipboard
<cld-image publicId="fireworks.jpg" >
  <cld-transformation :overlay="{fontFamily: 'ttf', fontSize: 100, text: 'Happy%20New%20Year%202021'}" color="white" gravity="north_west" x="30" y="30" />
</cld-image>
Angular:
Copy to clipboard
<cl-image public-id="fireworks.jpg" >
  <cl-transformation overlay="text:AlexBrush-Regular.ttf_100:Happy%20New%20Year%202021" color="white" gravity="north_west" x="30" y="30">
  </cl-transformation>
</cl-image>
.NET:
Copy to clipboard
cloudinary.Api.UrlImgUp.Transform(new Transformation().Overlay(new TextLayer().FontFamily("ttf").FontSize(100).Text("Happy%20New%20Year%202021")).Color("white").Gravity("north_west").X(30).Y(30)).BuildImageTag("fireworks.jpg")
Android:
Copy to clipboard
MediaManager.get().url().transformation(new Transformation().overlay(new TextLayer().fontFamily("ttf").fontSize(100).text("Happy%20New%20Year%202021")).color("white").gravity("north_west").x(30).y(30)).generate("fireworks.jpg");
iOS:
Copy to clipboard
imageView.cldSetImage(cloudinary.createUrl().setTransformation(CLDTransformation().setOverlay("text:AlexBrush-Regular.ttf_100:Happy%20New%20Year%202021").setColor("white").setGravity("north_west").setX(30).setY(30)).generate("fireworks.jpg")!, cloudinary: cloudinary)
custom fonts

Overlays with multiple images and effects

You can stack multiple images, one after the other, on top of a base image. Cloudinary can apply eye-catching effects to each of the overlaid images.

The URL below sets the flag fl_layer_apply and performs three transformations:

  1. Display a base image of a coffee mug with the pictures of a handsome couple and a balloon on top of it.
  2. Smartly crop and resize the picture of the couple in addition to adding a blurred border.
  3. Resize the balloon to 30 pixels wide, rotate it, and change the hue level to pink.

Ruby:
Copy to clipboard
cl_image_tag("coffee_cup.jpg", :transformation=>[
  {:width=>400, :height=>250, :gravity=>"south", :crop=>"fill"},
  {:overlay=>"nice_couple", :width=>1.3, :height=>1.3, :gravity=>"faces", :flags=>"region_relative", :crop=>"crop"},
  {:effect=>"saturation:50"},
  {:effect=>"vignette"},
  {:flags=>"layer_apply", :width=>100, :radius=>"max", :gravity=>"center", :y=>20, :x=>-20, :crop=>"scale"},
  {:overlay=>"balloon", :width=>30},
  {:effect=>"hue:-20", :angle=>5},
  {:flags=>"layer_apply", :x=>30, :y=>5}
  ])
PHP v1:
Copy to clipboard
cl_image_tag("coffee_cup.jpg", array("transformation"=>array(
  array("width"=>400, "height"=>250, "gravity"=>"south", "crop"=>"fill"),
  array("overlay"=>"nice_couple", "width"=>"1.3", "height"=>"1.3", "gravity"=>"faces", "flags"=>"region_relative", "crop"=>"crop"),
  array("effect"=>"saturation:50"),
  array("effect"=>"vignette"),
  array("flags"=>"layer_apply", "width"=>100, "radius"=>"max", "gravity"=>"center", "y"=>20, "x"=>-20, "crop"=>"scale"),
  array("overlay"=>"balloon", "width"=>30),
  array("effect"=>"hue:-20", "angle"=>5),
  array("flags"=>"layer_apply", "x"=>30, "y"=>5)
  )))
PHP v2:
Copy to clipboard
(new ImageTag('coffee_cup.jpg'))
  ->resize(Resize::fill()->width(400)->height(250)->gravity(Gravity::compass(Compass::south())))
  ->overlay(
      Overlay::source(Source::image('nice_couple')
        ->transformation((new ImageTransformation())
          ->resize(Resize::crop()->width(1.3)->height(1.3)
            ->gravity(Gravity::focusOn(FocusOn::faces()))
            ->regionRelative())
          ->adjust(Adjust::saturation()->level(50))
          ->effect(Effect::vignette())
          ->resize(Resize::scale()->width(100))
          ->roundCorners(RoundCorners::max())))
      ->position((new Position())
        ->gravity(Gravity::compass(Compass::center()))
        ->offsetX(-20)->offsetY(20)))
    ->overlay(
        Overlay::source(Source::image('balloon')
          ->transformation((new ImageTransformation())
            ->resize(Resize::scale()->width(30))
            ->rotate(Rotate::byAngle(5))
            ->adjust(Adjust::hue()->level(-20))))
        ->position((new Position())
          ->offsetX(30)->offsetY(5)
      
    ));
Python:
Copy to clipboard
CloudinaryImage("coffee_cup.jpg").image(transformation=[
  {'width': 400, 'height': 250, 'gravity': "south", 'crop': "fill"},
  {'overlay': "nice_couple", 'width': "1.3", 'height': "1.3", 'gravity': "faces", 'flags': "region_relative", 'crop': "crop"},
  {'effect': "saturation:50"},
  {'effect': "vignette"},
  {'flags': "layer_apply", 'width': 100, 'radius': "max", 'gravity': "center", 'y': 20, 'x': -20, 'crop': "scale"},
  {'overlay': "balloon", 'width': 30},
  {'effect': "hue:-20", 'angle': 5},
  {'flags': "layer_apply", 'x': 30, 'y': 5}
  ])
Node.js:
Copy to clipboard
cloudinary.image("coffee_cup.jpg", {transformation: [
  {width: 400, height: 250, gravity: "south", crop: "fill"},
  {overlay: "nice_couple", width: "1.3", height: "1.3", gravity: "faces", flags: "region_relative", crop: "crop"},
  {effect: "saturation:50"},
  {effect: "vignette"},
  {flags: "layer_apply", width: 100, radius: "max", gravity: "center", y: 20, x: -20, crop: "scale"},
  {overlay: "balloon", width: 30},
  {effect: "hue:-20", angle: 5},
  {flags: "layer_apply", x: 30, y: 5}
  ]})
Java:
Copy to clipboard
cloudinary.url().transformation(new Transformation()
  .width(400).height(250).gravity("south").crop("fill").chain()
  .overlay(new Layer().publicId("nice_couple")).width(1.3).height(1.3).gravity("faces").flags("region_relative").crop("crop").chain()
  .effect("saturation:50").chain()
  .effect("vignette").chain()
  .flags("layer_apply").width(100).radius("max").gravity("center").y(20).x(-20).crop("scale").chain()
  .overlay(new Layer().publicId("balloon")).width(30).chain()
  .effect("hue:-20").angle(5).chain()
  .flags("layer_apply").x(30).y(5)).imageTag("coffee_cup.jpg");
JS:
Copy to clipboard
cloudinary.imageTag('coffee_cup.jpg', {transformation: [
  {width: 400, height: 250, gravity: "south", crop: "fill"},
  {overlay: new cloudinary.Layer().publicId("nice_couple"), width: "1.3", height: "1.3", gravity: "faces", flags: "region_relative", crop: "crop"},
  {effect: "saturation:50"},
  {effect: "vignette"},
  {flags: "layer_apply", width: 100, radius: "max", gravity: "center", y: 20, x: -20, crop: "scale"},
  {overlay: new cloudinary.Layer().publicId("balloon"), width: 30},
  {effect: "hue:-20", angle: 5},
  {flags: "layer_apply", x: 30, y: 5}
  ]}).toHtml();
jQuery:
Copy to clipboard
$.cloudinary.image("coffee_cup.jpg", {transformation: [
  {width: 400, height: 250, gravity: "south", crop: "fill"},
  {overlay: new cloudinary.Layer().publicId("nice_couple"), width: "1.3", height: "1.3", gravity: "faces", flags: "region_relative", crop: "crop"},
  {effect: "saturation:50"},
  {effect: "vignette"},
  {flags: "layer_apply", width: 100, radius: "max", gravity: "center", y: 20, x: -20, crop: "scale"},
  {overlay: new cloudinary.Layer().publicId("balloon"), width: 30},
  {effect: "hue:-20", angle: 5},
  {flags: "layer_apply", x: 30, y: 5}
  ]})
React:
Copy to clipboard
<Image publicId="coffee_cup.jpg" >
  <Transformation width="400" height="250" gravity="south" crop="fill" />
  <Transformation overlay="nice_couple" width="1.3" height="1.3" gravity="faces" flags="region_relative" crop="crop" />
  <Transformation effect="saturation:50" />
  <Transformation effect="vignette" />
  <Transformation flags="layer_apply" width="100" radius="max" gravity="center" y="20" x="-20" crop="scale" />
  <Transformation overlay="balloon" width="30" />
  <Transformation effect="hue:-20" angle="5" />
  <Transformation flags="layer_apply" x="30" y="5" />
</Image>
Vue.js:
Copy to clipboard
<cld-image publicId="coffee_cup.jpg" >
  <cld-transformation width="400" height="250" gravity="south" crop="fill" />
  <cld-transformation :overlay="nice_couple" width="1.3" height="1.3" gravity="faces" flags="region_relative" crop="crop" />
  <cld-transformation effect="saturation:50" />
  <cld-transformation effect="vignette" />
  <cld-transformation flags="layer_apply" width="100" radius="max" gravity="center" y="20" x="-20" crop="scale" />
  <cld-transformation :overlay="balloon" width="30" />
  <cld-transformation effect="hue:-20" angle="5" />
  <cld-transformation flags="layer_apply" x="30" y="5" />
</cld-image>
Angular:
Copy to clipboard
<cl-image public-id="coffee_cup.jpg" >
  <cl-transformation width="400" height="250" gravity="south" crop="fill">
  </cl-transformation>
  <cl-transformation overlay="nice_couple" width="1.3" height="1.3" gravity="faces" flags="region_relative" crop="crop">
  </cl-transformation>
  <cl-transformation effect="saturation:50">
  </cl-transformation>
  <cl-transformation effect="vignette">
  </cl-transformation>
  <cl-transformation flags="layer_apply" width="100" radius="max" gravity="center" y="20" x="-20" crop="scale">
  </cl-transformation>
  <cl-transformation overlay="balloon" width="30">
  </cl-transformation>
  <cl-transformation effect="hue:-20" angle="5">
  </cl-transformation>
  <cl-transformation flags="layer_apply" x="30" y="5">
  </cl-transformation>
</cl-image>
.NET:
Copy to clipboard
cloudinary.Api.UrlImgUp.Transform(new Transformation()
  .Width(400).Height(250).Gravity("south").Crop("fill").Chain()
  .Overlay(new Layer().PublicId("nice_couple")).Width(1.3).Height(1.3).Gravity("faces").Flags("region_relative").Crop("crop").Chain()
  .Effect("saturation:50").Chain()
  .Effect("vignette").Chain()
  .Flags("layer_apply").Width(100).Radius("max").Gravity("center").Y(20).X(-20).Crop("scale").Chain()
  .Overlay(new Layer().PublicId("balloon")).Width(30).Chain()
  .Effect("hue:-20").Angle(5).Chain()
  .Flags("layer_apply").X(30).Y(5)).BuildImageTag("coffee_cup.jpg")
Android:
Copy to clipboard
MediaManager.get().url().transformation(new Transformation()
  .width(400).height(250).gravity("south").crop("fill").chain()
  .overlay(new Layer().publicId("nice_couple")).width(1.3).height(1.3).gravity("faces").flags("region_relative").crop("crop").chain()
  .effect("saturation:50").chain()
  .effect("vignette").chain()
  .flags("layer_apply").width(100).radius("max").gravity("center").y(20).x(-20).crop("scale").chain()
  .overlay(new Layer().publicId("balloon")).width(30).chain()
  .effect("hue:-20").angle(5).chain()
  .flags("layer_apply").x(30).y(5)).generate("coffee_cup.jpg");
iOS:
Copy to clipboard
imageView.cldSetImage(cloudinary.createUrl().setTransformation(CLDTransformation()
  .setWidth(400).setHeight(250).setGravity("south").setCrop("fill").chain()
  .setOverlay("nice_couple").setWidth(1.3).setHeight(1.3).setGravity("faces").setFlags("region_relative").setCrop("crop").chain()
  .setEffect("saturation:50").chain()
  .setEffect("vignette").chain()
  .setFlags("layer_apply").setWidth(100).setRadius("max").setGravity("center").setY(20).setX(-20).setCrop("scale").chain()
  .setOverlay("balloon").setWidth(30).chain()
  .setEffect("hue:-20").setAngle(5).chain()
  .setFlags("layer_apply").setX(30).setY(5)).generate("coffee_cup.jpg")!, cloudinary: cloudinary)
Multiple overlays

Cloudinary: Much More than Image Overlays

Besides overlay capabilities for images and text, Cloudinary offers a multitude of robust tools for web developers, including the following:

  • Automated image uploads. You can upload images at scale anywhere from a browser, mobile app, or application back-end directly to the cloud.
  • Generous image storage. Cloudinary accords you up to 25 GB free managed, secure, and cloud-based storage space with multiregion backup, revision history, and disaster recovery.
  • Seamless asset management. You can efficiently manage your image library on Cloudinary by performing tasks like searching, organizing, and tagging files; controlling access; and monitoring usage and performance.
  • Effective image transformation. You can transform, enhance, transcode, crop, scale, and enhance images with a URL-based API or with SDKs that support all popular programming languages.
  • Automated image optimization. Cloudinary automatically selects the optimal quality and encoding settings for images, adapts the settings to any resolution or pixel density, and scales or crops images to focus on the important regions.
  • Responsive images. Cloudinary automatically scales images in an art-directed manner, cropping them to fit different resolutions and viewports.
  • Reliable and fast image delivery. Cloudinary delivers images through Content Delivery Networks (CDNs)—Akamai, Fastly, and CloudFront—with no integration or management on your part.

Do give Cloudinary a try. To start, sign up for a free account.

Check Out the Details of CSS Images

Want to learn more about CSS images? These articles are an excellent resource:

Recent Blog Posts

Our $2B Valuation

By
Blackstone Growth Invests in Cloudinary

When we started our journey in 2012, we were looking to improve our lives as developers by making it easier for us to handle the arduous tasks of handling images and videos in our code. That initial line of developer code has evolved into a full suite of media experience solutions driven by a mission that gradually revealed itself over the course of the past 10 years: help companies unleash the full potential of their media to create the most engaging visual experiences.

Read more
Direct-to-Consumer E-Commerce Requires Compelling Visual Experiences

When brands like you adopt a direct–to-consumer (DTC) e-commerce approach with no involvement of retailers or marketplaces, you gain direct and timely insight into evolving shopping behaviors. Accordingly, you can accommodate shoppers’ preferences by continually adjusting your product offering and interspersing the shopping journey with moments of excitement and intrigue. Opportunities abound for you to cultivate engaging customer relationships.

Read more
Automatically Translating Videos for an International Audience

No matter your business focus—public service, B2B integration, recruitment—multimedia, in particular video, is remarkably effective in communicating with the audience. Before, making video accessible to diverse viewers involved tasks galore, such as eliciting the service of production studios to manually dub, transcribe, and add subtitles. Those operations were costly and slow, especially for globally destined content.

Read more
Cloudinary Helps Minted Manage Its Image-Generation Pipeline at Scale

Shoppers return time and again to Minted’s global online community of independent artists and designers because they know they can count on unique, statement-making products of the highest quality there. Concurrently, the visual imagery on Minted.com must do justice to the designs into which the creators have poured their hearts and souls. For Minted’s VP of Engineering David Lien, “Because we are a premium brand, we need to ensure that every single one of our product images matches the selected configuration exactly. For example, if you pick an 18x24 art print on blue canvas, we will show that exact combination on the hero images in the PDF.”

Read more
Highlights on ImageCon 2021 and a Preview of ImageCon 2022

New year, same trend! Visual media will continue to play a monumental role in driving online conversions. To keep up with visual-experience trends and best practices, Cloudinary holds an annual conference called ImageCon, a one-of-a-kind event that helps attendees create the most engaging visual experiences possible.

Read more