Even though Node is fun, easy and cheap to work with, we spend a lot of time writing boilerplate codes because structure and organization is missing.
In part 1, we discussed the basics of Adonis, including how to setup Adonis projects, and create migrations, models, a few routes, and a controller to test the creation of new posts.
Now, let’s extend what we already know to reading posts, updating existing posts, deleting posts, and adding an image upload feature.
Reading existing posts
With the create feature implemented, we must have created posts in our store. These posts will be read from our store and displayed on the browser.
We need to update the index route to point to a controller, rather than sending a view directly as it already does:
// ./app/Http/routes.js
...
// What we had:
// Route.on('/').render('welcome');
// Update to:
Route.get('/', 'PostController.index');
...
Next, we add an action method to our controller named index. This method will be responsible for fetching the data from our model and sending the data to our view:
// ./app/Http/Controllers/PostController.js
...
* index(request, response) {
    const posts = yield Post.all();
    yield response.sendView('post/index', {posts: posts.toJSON()});
}
...
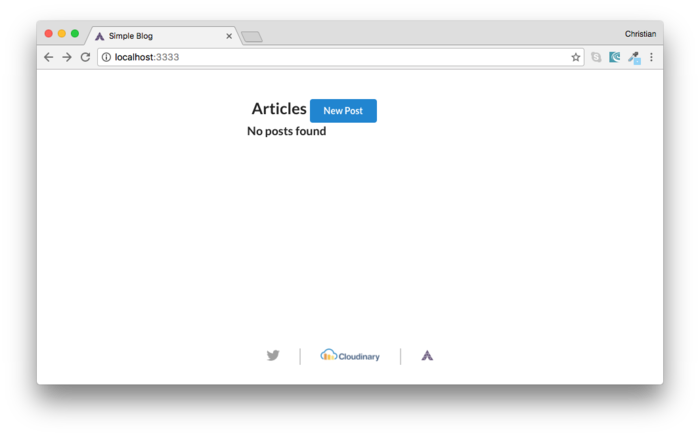
The route points to an existing method, which sends a view with our retrieved data. Let’s create this view:
<h2>Articles <a href="/new" class="ui blue button">New Post</a></h2>
<div class="ards">
  {% for post in posts %}
  <div class="card">
    <div class="content">
        <a class="header">{{post.title}}</a>
        <div class="meta">
            <span class="date">{{post.created_at}}</span>
        </div>
        <div class="description">
        {{post.body.substring(0, 50)}}...
        </div>
    </div>
  </div>
  % else %}
  <h3> No posts found </h3>
  {% endfor %}
</div>

Reading a single post
One other form of showing posts is reading and displaying a single post, which gives us more room for the details about the post. To do this, you need a route and a controller. Here is the route:
The :id part of the URL is a placeholder for the route parameter. The parameter will be a unique value that points to a given post.
// ./app/Http/Controllers/PostController.js
* read(request, response) {
     // Receive parameter from request
     const id = request.param('id');
     // Find id with request parameter
     const post = yield Post.find(id);
     yield response.sendView('post/read', {post: post});
 }
The controller’s read action method receives the id parameter from the request object. We then use the model’s find method to find a post based on the value passed in.
The view sent is named read in the post folder and we are passing the post data down to the view as well:

You can update the link for each post on the home page to point to the read URL:
Updating posts
What happens when we realize that our post requires an update? We can create a form just like we did for the new post form, but this time we will send the existing post to the form. First, we need to specify some routes, as usual:
// ./app/Http/routes.js
// Edit form
Route.get('/edit/:id', 'PostController.edit');
Route.post('/update', 'PostController.update');
With respect to the routes above, the following action methods will serve as handlers for both routes:
* edit(request, response) {
    const id = request.param('id');
    const post = yield Post.find(id);
    yield response.sendView('post/edit', {post: post});
}
* update(request, response) {
    var postData = request.only('id', 'title', 'body');
    const id = postData.id;
    const post = yield Post.find(id);
    // Update and save post
    post.fill(postData);
    yield post.save();
    // Go home
    response.redirect('/');
}
The edit action method sends a view. This view will hold our form template for editing the selected post:
  <h2>{{post.title}}</h2>
  {{ form.open({action: 'PostController.update'}) }}

    {{ csrfField }}

    <div class="ui form">
        <div class="field">
            {{ form.label('Title') }}
            {{ form.text('title', post.title) }}
        </div>

        <div class="field">
            {{ form.label('Body') }}
            {{ form.textarea('body', post.body) }}
        </div>

        {{form.hidden('id', post.id)}}

        {{ form.submit('Create', 'create', { class: 'ui blue button' }) }}
    </div>

  {{ form.close() }}
The default values are set using the existing values in our store. The post’s id is also available on the form via a hidden input.
For each post listed on the home page, we'll also add an edit button that points to the relevant edit URL:
Deleting posts
The route for deleting post is very similar to the read and edit routes. It takes a parameter for searching the post to be removed:
Note: Best practices suggest that you do not use GET to update state as we are doing right now. For the sake of this demo’s simplicity, we can overlook that practice.
The action method on the controller is delete and it finds the post based on the id parameter and then deletes the found post:
* delete(request, response) {
    var post = yield Post.find(request.param('id'));
    yield post.delete();
    response.redirect('/');
}
We can add a link to the post list to point to the delete URL:
Featured image uploads
Contents are always accompanied with images. In the case of a CMS, these images could be embedded right inside the content or serve as a banner to a given content. The banner is usually known as a featured image.
Cloudinary is the image management back-end for web and mobile developers. With Cloudinary, we can add images to our content with ease, thereby saving as the hassle of managing storage, as well as image uploads, downloads, manipulation, delivery and administration.
With the Cloudinary free account, we can begin using these features in our projects. Let’s see how by adding a featured image to our posts.
After you set up a Cloudinary account, you can create an upload preset. Upload presets enable you to centrally define a set of image upload options instead of specifying them in each upload call. We will use the preset when making an upload request.
Cloudinary provides JavaScript plugins that make image upload to the Cloudinary server very easy. Here’s how we include these scripts:
<script src='https://cdn.jsdelivr.net/jquery.cloudinary/1.0.18/jquery.cloudinary.js' type='text/javascript'></script>
<script src="//widget.cloudinary.com/global/all.js" type="text/javascript"></script>
<script src="/script.js"></script>
The plugin depends on jQuery, so we also added our defined script.js file to the setup.
In the script.js file, we can start implementing the upload logic:
$(function() {
    // Configure Cloudinary
    // with credentials available on
    // your Cloudinary account dashboard
    $.cloudinary.config({ cloud_name: 'YOUR_CLOUD_NAME', api_key: 'YOUR_API_KEY'});

    // Upload button
    var uploadButton = $('#upload-button');
    var canvas = $('#canvas');
    var imageInput = $('#image-input');
    // Upload button event
    uploadButton.on('click', function(e){
        // Initiate upload
        cloudinary.openUploadWidget({ cloud_name: 'christekh', upload_preset: 'idcidr0h', tags: ['cgal']},
        function(error, result) {
            if(error) console.log(error);
            // If NO error, log image data to console
            var id = result[0].public_id;
            canvas.html(procesImage(id));
            imageInput.val($.cloudinary.url(id, {}));
        });
    });
})

function procesImage(id) {
    var options = {
        client_hints: true,
    };
    return '<img src="'+ $.cloudinary.url(id, options) +'" style="width: 100%; height: auto"/>';
}
The above listens to a click event on a button in our view. When the button is clicked, the upload process starts. After an image is uploaded and returned, the image is displayed above the form. The URL is also embedded in a hidden input so it can be sent to the server and stored for future use, as well.
Going back to the posts/new view we already created, we can extend it to handle the logic we have prepared:
<h2>New Post</h2>
    <div class="paint_container" id="canvas">
        <!-- Canvas to drop image after processing -->
    </div>
  {{ form.open({action: 'PostController.create'}) }}

    {{ csrfField }}

    <div class="ui form">
        <div class="field">
            {{ form.label('Title') }}
            {{ form.text('title', null) }}
        </div>

        <div class="field">
            {{ form.label('Body') }}
            {{ form.textarea('body', null) }}
        </div>

        <input type="hidden" id="image-input" name="image">

        <button id="upload-button" class="ui purple button" type="button">Upload Featured Image</button>

        {{ form.submit('Create', 'create', { class: 'ui blue button' }) }}
    </div>

  {{ form.close() }}
The image also gets stored in our database, so we can also display it on the home page where we list the posts:
...
<div class="card">
    <div class="image">
        <img src="{{post.image}}" syyle="width: 100%; heigth: auto;">
    </div>
   ...
Have a look at the complete demo project.
Conclusion
Adonis is an awesome framework that is great to work with because of its simplicity. Media management can cause you sleepless nights, not just with Adonis, but any server-side framework. Cloudinary eliminates the stress and shortens the time you spend on media management, enabling you to focus on building out the other aspects of your application.
 |
Christian Nwamba is a code beast, with a passion for instructing computers and understanding it's language. In his next life, Chris hopes to remain a computer programmer. |


