How you present the content of your website can be just as important as the content itself. The images you display need to conform to the graphic design of your site, and every image needs to fit within a predefined size. Although that may be simple enough to achieve when you are dealing with your own images, the task can be more challenging when displaying images uploaded by your users.
Your users could potentially upload their images in a variety of resolutions and sizes. This means you need to adjust the images on-the-fly to fit within the available space defined by your graphic design. However, for images that are uploaded with a different aspect ratio than the area reserved to display it, a simple scaled resize will result in extra space either above and below the image or on the left and right. It also could affect the spacing of other elements on your page. To make sure you end up with an image that is the right size to fill all of the available space, you will generally need to add padding to the image as well, either using CSS or by transforming the original image.
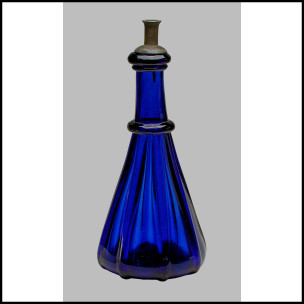
Now the question becomes, how do you add the extra padding to the image so that the end result fits properly and looks professional? We could simply decide that the extra padding added to all the images needs to conform to a specific color, for example: white. You could use CSS for this purpose, but Cloudinary makes this process much easier to accomplish. Cloudinary offers a comprehensive end-to-end solution for all elements of image and media management, enabling web and app developers to invest their full focus on the main purpose of their own site, or app. To add padding in a specific color with Cloudinary, you use one of the padding crop modes together with the background parameter set to the color you want. For example, padding the bottle image with white so that it fits within a height and width of 300 pixels, along with with a black border:
Ruby:
cl_image_tag("bottle.jpg", :transformation=>[
  {:width=>300, :height=>300, :background=>"white", :crop=>"pad"},
  {:border=>"2px_solid_black"}
  ])
PHP v1:
cl_image_tag("bottle.jpg", array("transformation"=>array(
  array("width"=>300, "height"=>300, "background"=>"white", "crop"=>"pad"),
  array("border"=>"2px_solid_black")
  )))
PHP v2:
(new ImageTag('bottle.jpg'))
  ->resize(Resize::pad()->width(300)->height(300)->background(Background::color(Color::WHITE)))
  ->border(Border::solid(2, Color::BLACK));
Python:
CloudinaryImage("bottle.jpg").image(transformation=[
  {'width': 300, 'height': 300, 'background': "white", 'crop': "pad"},
  {'border': "2px_solid_black"}
  ])
Node.js:
cloudinary.image("bottle.jpg", {transformation: [
  {width: 300, height: 300, background: "white", crop: "pad"},
  {border: "2px_solid_black"}
  ]})
Java:
cloudinary.url().transformation(new Transformation()
  .width(300).height(300).background("white").crop("pad").chain()
  .border("2px_solid_black")).imageTag("bottle.jpg");
JS:
cloudinary.imageTag('bottle.jpg', {transformation: [
  {width: 300, height: 300, background: "white", crop: "pad"},
  {border: "2px_solid_black"}
  ]}).toHtml();
jQuery:
$.cloudinary.image("bottle.jpg", {transformation: [
  {width: 300, height: 300, background: "white", crop: "pad"},
  {border: "2px_solid_black"}
  ]})
React:
<Image publicId="bottle.jpg" >
  <Transformation width="300" height="300" background="white" crop="pad" />
  <Transformation border="2px_solid_black" />
</Image>
Vue.js:
<cld-image publicId="bottle.jpg" >
  <cld-transformation width="300" height="300" background="white" crop="pad" />
  <cld-transformation border="2px_solid_black" />
</cld-image>
Angular:
<cl-image public-id="bottle.jpg" >
  <cl-transformation width="300" height="300" background="white" crop="pad">
  </cl-transformation>
  <cl-transformation border="2px_solid_black">
  </cl-transformation>
</cl-image>
.NET:
cloudinary.Api.UrlImgUp.Transform(new Transformation()
  .Width(300).Height(300).Background("white").Crop("pad").Chain()
  .Border("2px_solid_black")).BuildImageTag("bottle.jpg")
Android:
MediaManager.get().url().transformation(new Transformation()
  .width(300).height(300).background("white").crop("pad").chain()
  .border("2px_solid_black")).generate("bottle.jpg");
iOS:
imageView.cldSetImage(cloudinary.createUrl().setTransformation(CLDTransformation()
  .setWidth(300).setHeight(300).setBackground("white").setCrop("pad").chain()
  .setBorder("2px_solid_black")).generate("bottle.jpg")!, cloudinary: cloudinary)

Setting a uniform color for all padding might be a good solution for some of your images, but what if you could automatically set the padding color based on the color of the border pixels in the image? Any padding added would then have the effect of extending the image canvas, and make it appear as if the padded region is actually part of the image itself. Guess what? Cloudinary makes this simple too. All you have to do is set the background parameter to auto (b_auto in URLs). For example, here's the same bottle image as above, but now with automatic color padding:
Ruby:
cl_image_tag("bottle.jpg", :transformation=>[
  {:width=>300, :height=>300, :background=>"auto", :crop=>"pad"},
  {:border=>"2px_solid_black"}
  ])
PHP v1:
cl_image_tag("bottle.jpg", array("transformation"=>array(
  array("width"=>300, "height"=>300, "background"=>"auto", "crop"=>"pad"),
  array("border"=>"2px_solid_black")
  )))
PHP v2:
(new ImageTag('bottle.jpg'))
  ->resize(Resize::pad()->width(300)->height(300)->background(Background::auto()))
  ->border(Border::solid(2, Color::BLACK));
Python:
CloudinaryImage("bottle.jpg").image(transformation=[
  {'width': 300, 'height': 300, 'background': "auto", 'crop': "pad"},
  {'border': "2px_solid_black"}
  ])
Node.js:
cloudinary.image("bottle.jpg", {transformation: [
  {width: 300, height: 300, background: "auto", crop: "pad"},
  {border: "2px_solid_black"}
  ]})
Java:
cloudinary.url().transformation(new Transformation()
  .width(300).height(300).background("auto").crop("pad").chain()
  .border("2px_solid_black")).imageTag("bottle.jpg");
JS:
cloudinary.imageTag('bottle.jpg', {transformation: [
  {width: 300, height: 300, background: "auto", crop: "pad"},
  {border: "2px_solid_black"}
  ]}).toHtml();
jQuery:
$.cloudinary.image("bottle.jpg", {transformation: [
  {width: 300, height: 300, background: "auto", crop: "pad"},
  {border: "2px_solid_black"}
  ]})
React:
<Image publicId="bottle.jpg" >
  <Transformation width="300" height="300" background="auto" crop="pad" />
  <Transformation border="2px_solid_black" />
</Image>
Vue.js:
<cld-image publicId="bottle.jpg" >
  <cld-transformation width="300" height="300" background="auto" crop="pad" />
  <cld-transformation border="2px_solid_black" />
</cld-image>
Angular:
<cl-image public-id="bottle.jpg" >
  <cl-transformation width="300" height="300" background="auto" crop="pad">
  </cl-transformation>
  <cl-transformation border="2px_solid_black">
  </cl-transformation>
</cl-image>
.NET:
cloudinary.Api.UrlImgUp.Transform(new Transformation()
  .Width(300).Height(300).Background("auto").Crop("pad").Chain()
  .Border("2px_solid_black")).BuildImageTag("bottle.jpg")
Android:
MediaManager.get().url().transformation(new Transformation()
  .width(300).height(300).background("auto").crop("pad").chain()
  .border("2px_solid_black")).generate("bottle.jpg");
iOS:
imageView.cldSetImage(cloudinary.createUrl().setTransformation(CLDTransformation()
  .setWidth(300).setHeight(300).setBackground("auto").setCrop("pad").chain()
  .setBorder("2px_solid_black")).generate("bottle.jpg")!, cloudinary: cloudinary)

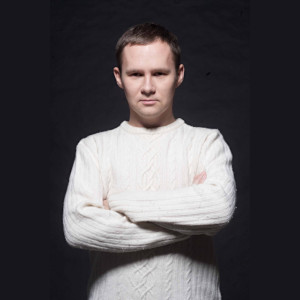
Here's another example that highlights the difference between using a value of black for padding in the left image and auto color padding on the right:


Ruby:
cl_image_tag("white_sweater.jpg", :width=>300, :height=>300, :background=>"auto", :crop=>"pad")
PHP v1:
cl_image_tag("white_sweater.jpg", array("width"=>300, "height"=>300, "background"=>"auto", "crop"=>"pad"))
PHP v2:
(new ImageTag('white_sweater.jpg'))
  ->resize(Resize::pad()->width(300)->height(300)
    ->background(Background::auto()));
Python:
CloudinaryImage("white_sweater.jpg").image(width=300, height=300, background="auto", crop="pad")
Node.js:
cloudinary.image("white_sweater.jpg", {width: 300, height: 300, background: "auto", crop: "pad"})
Java:
cloudinary.url().transformation(new Transformation().width(300).height(300).background("auto").crop("pad")).imageTag("white_sweater.jpg");
JS:
cloudinary.imageTag('white_sweater.jpg', {width: 300, height: 300, background: "auto", crop: "pad"}).toHtml();
jQuery:
$.cloudinary.image("white_sweater.jpg", {width: 300, height: 300, background: "auto", crop: "pad"})
React:
<Image publicId="white_sweater.jpg" >
  <Transformation width="300" height="300" background="auto" crop="pad" />
</Image>
Vue.js:
<cld-image publicId="white_sweater.jpg" >
  <cld-transformation width="300" height="300" background="auto" crop="pad" />
</cld-image>
Angular:
<cl-image public-id="white_sweater.jpg" >
  <cl-transformation width="300" height="300" background="auto" crop="pad">
  </cl-transformation>
</cl-image>
.NET:
cloudinary.Api.UrlImgUp.Transform(new Transformation().Width(300).Height(300).Background("auto").Crop("pad")).BuildImageTag("white_sweater.jpg")
Android:
MediaManager.get().url().transformation(new Transformation().width(300).height(300).background("auto").crop("pad")).generate("white_sweater.jpg");
iOS:
imageView.cldSetImage(cloudinary.createUrl().setTransformation(CLDTransformation().setWidth(300).setHeight(300).setBackground("auto").setCrop("pad")).generate("white_sweater.jpg")!, cloudinary: cloudinary)
Automatically selecting the padding color is a great solution for images with a solid background color, but it also gives good results on images without a solid background color. For example, take a look at this dog image with automatic color padding:
Ruby:
cl_image_tag("dog.jpg", :width=>300, :height=>300, :background=>"auto", :crop=>"pad")
PHP v1:
cl_image_tag("dog.jpg", array("width"=>300, "height"=>300, "background"=>"auto", "crop"=>"pad"))
PHP v2:
(new ImageTag('dog.jpg'))
  ->resize(Resize::pad()->width(300)->height(300)
    ->background(Background::auto()));
Python:
CloudinaryImage("dog.jpg").image(width=300, height=300, background="auto", crop="pad")
Node.js:
cloudinary.image("dog.jpg", {width: 300, height: 300, background: "auto", crop: "pad"})
Java:
cloudinary.url().transformation(new Transformation().width(300).height(300).background("auto").crop("pad")).imageTag("dog.jpg");
JS:
cloudinary.imageTag('dog.jpg', {width: 300, height: 300, background: "auto", crop: "pad"}).toHtml();
jQuery:
$.cloudinary.image("dog.jpg", {width: 300, height: 300, background: "auto", crop: "pad"})
React:
<Image publicId="dog.jpg" >
  <Transformation width="300" height="300" background="auto" crop="pad" />
</Image>
Vue.js:
<cld-image publicId="dog.jpg" >
  <cld-transformation width="300" height="300" background="auto" crop="pad" />
</cld-image>
Angular:
<cl-image public-id="dog.jpg" >
  <cl-transformation width="300" height="300" background="auto" crop="pad">
  </cl-transformation>
</cl-image>
.NET:
cloudinary.Api.UrlImgUp.Transform(new Transformation().Width(300).Height(300).Background("auto").Crop("pad")).BuildImageTag("dog.jpg")
Android:
MediaManager.get().url().transformation(new Transformation().width(300).height(300).background("auto").crop("pad")).generate("dog.jpg");
iOS:
imageView.cldSetImage(cloudinary.createUrl().setTransformation(CLDTransformation().setWidth(300).setHeight(300).setBackground("auto").setCrop("pad")).generate("dog.jpg")!, cloudinary: cloudinary)

We can see in the example above that the predominant color has been calculated to be a particular shade of green, resulting in a visually pleasing padded image. The jump between the image and the border may feel somewhat stark, but we can fade the picture into the padding by applying the gradient_fade effect with a value of symmetric_pad (e_gradient_fade:symmetric_pad in URLs). For example, the same dog image as above, but now with the image faded into the padding:
Ruby:
cl_image_tag("dog.jpg", :width=>300, :height=>300, :background=>"auto", :effect=>"gradient_fade:symmetric_pad", :crop=>"pad")
PHP v1:
cl_image_tag("dog.jpg", array("width"=>300, "height"=>300, "background"=>"auto", "effect"=>"gradient_fade:symmetric_pad", "crop"=>"pad"))
PHP v2:
(new ImageTag('dog.jpg'))
  ->resize(Resize::pad()->width(300)->height(300)->background(Background::auto()))
  ->effect(Effect::gradientFade()
    ->type(GradientFade::symmetricPad()));
Python:
CloudinaryImage("dog.jpg").image(width=300, height=300, background="auto", effect="gradient_fade:symmetric_pad", crop="pad")
Node.js:
cloudinary.image("dog.jpg", {width: 300, height: 300, background: "auto", effect: "gradient_fade:symmetric_pad", crop: "pad"})
Java:
cloudinary.url().transformation(new Transformation().width(300).height(300).background("auto").effect("gradient_fade:symmetric_pad").crop("pad")).imageTag("dog.jpg");
JS:
cloudinary.imageTag('dog.jpg', {width: 300, height: 300, background: "auto", effect: "gradient_fade:symmetric_pad", crop: "pad"}).toHtml();
jQuery:
$.cloudinary.image("dog.jpg", {width: 300, height: 300, background: "auto", effect: "gradient_fade:symmetric_pad", crop: "pad"})
React:
<Image publicId="dog.jpg" >
  <Transformation width="300" height="300" background="auto" effect="gradient_fade:symmetric_pad" crop="pad" />
</Image>
Vue.js:
<cld-image publicId="dog.jpg" >
  <cld-transformation width="300" height="300" background="auto" effect="gradient_fade:symmetric_pad" crop="pad" />
</cld-image>
Angular:
<cl-image public-id="dog.jpg" >
  <cl-transformation width="300" height="300" background="auto" effect="gradient_fade:symmetric_pad" crop="pad">
  </cl-transformation>
</cl-image>
.NET:
cloudinary.Api.UrlImgUp.Transform(new Transformation().Width(300).Height(300).Background("auto").Effect("gradient_fade:symmetric_pad").Crop("pad")).BuildImageTag("dog.jpg")
Android:
MediaManager.get().url().transformation(new Transformation().width(300).height(300).background("auto").effect("gradient_fade:symmetric_pad").crop("pad")).generate("dog.jpg");
iOS:
imageView.cldSetImage(cloudinary.createUrl().setTransformation(CLDTransformation().setWidth(300).setHeight(300).setBackground("auto").setEffect("gradient_fade:symmetric_pad").setCrop("pad")).generate("dog.jpg")!, cloudinary: cloudinary)

You can also control how much of the image to include in the fading effect by adding the x parameter with a value that indicates the width of the fading region in pixels. For example, the same dog image as above, but now with only a 50 pixel wide gradient fade into the padding:
Ruby:
cl_image_tag("dog.jpg", :width=>300, :height=>300, :background=>"auto", :effect=>"gradient_fade:symmetric_pad", :x=>50, :crop=>"pad")
PHP v1:
cl_image_tag("dog.jpg", array("width"=>300, "height"=>300, "background"=>"auto", "effect"=>"gradient_fade:symmetric_pad", "x"=>50, "crop"=>"pad"))
PHP v2:
(new ImageTag('dog.jpg'))
  ->resize(Resize::pad()->width(300)->height(300)->offsetX(50)->background(Background::auto()))
  ->effect(Effect::gradientFade()
    ->type(GradientFade::symmetricPad()));
Python:
CloudinaryImage("dog.jpg").image(width=300, height=300, background="auto", effect="gradient_fade:symmetric_pad", x=50, crop="pad")
Node.js:
cloudinary.image("dog.jpg", {width: 300, height: 300, background: "auto", effect: "gradient_fade:symmetric_pad", x: 50, crop: "pad"})
Java:
cloudinary.url().transformation(new Transformation().width(300).height(300).background("auto").effect("gradient_fade:symmetric_pad").x(50).crop("pad")).imageTag("dog.jpg");
JS:
cloudinary.imageTag('dog.jpg', {width: 300, height: 300, background: "auto", effect: "gradient_fade:symmetric_pad", x: 50, crop: "pad"}).toHtml();
jQuery:
$.cloudinary.image("dog.jpg", {width: 300, height: 300, background: "auto", effect: "gradient_fade:symmetric_pad", x: 50, crop: "pad"})
React:
<Image publicId="dog.jpg" >
  <Transformation width="300" height="300" background="auto" effect="gradient_fade:symmetric_pad" x="50" crop="pad" />
</Image>
Vue.js:
<cld-image publicId="dog.jpg" >
  <cld-transformation width="300" height="300" background="auto" effect="gradient_fade:symmetric_pad" x="50" crop="pad" />
</cld-image>
Angular:
<cl-image public-id="dog.jpg" >
  <cl-transformation width="300" height="300" background="auto" effect="gradient_fade:symmetric_pad" x="50" crop="pad">
  </cl-transformation>
</cl-image>
.NET:
cloudinary.Api.UrlImgUp.Transform(new Transformation().Width(300).Height(300).Background("auto").Effect("gradient_fade:symmetric_pad").X(50).Crop("pad")).BuildImageTag("dog.jpg")
Android:
MediaManager.get().url().transformation(new Transformation().width(300).height(300).background("auto").effect("gradient_fade:symmetric_pad").x(50).crop("pad")).generate("dog.jpg");
iOS:
imageView.cldSetImage(cloudinary.createUrl().setTransformation(CLDTransformation().setWidth(300).setHeight(300).setBackground("auto").setEffect("gradient_fade:symmetric_pad").setX(50).setCrop("pad")).generate("dog.jpg")!, cloudinary: cloudinary)

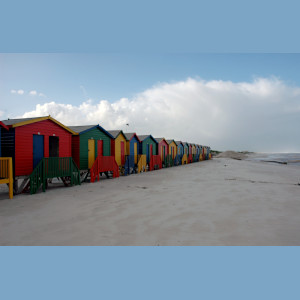
The examples in this article are some of the most frequent uses of padding options, but you can fine tune the way padding is added in a number of other ways. The following examples give a taste of what can be accomplished by tweaking the value of the b_auto parameter:
- Select the predominant color of the entire image or only the border pixels:
 b_auto:border
 b_auto:predominant
Ruby:
cl_image_tag("beach_huts.jpg", :height=>200, :width=>200, :background=>"auto:predominant", :crop=>"pad")
PHP v1:
cl_image_tag("beach_huts.jpg", array("height"=>200, "width"=>200, "background"=>"auto:predominant", "crop"=>"pad"))
PHP v2:
(new ImageTag('beach_huts.jpg'))
  ->resize(Resize::pad()->width(200)->height(200)
    ->background(Background::predominant()));
Python:
CloudinaryImage("beach_huts.jpg").image(height=200, width=200, background="auto:predominant", crop="pad")
Node.js:
cloudinary.image("beach_huts.jpg", {height: 200, width: 200, background: "auto:predominant", crop: "pad"})
Java:
cloudinary.url().transformation(new Transformation().height(200).width(200).background("auto:predominant").crop("pad")).imageTag("beach_huts.jpg");
JS:
cloudinary.imageTag('beach_huts.jpg', {height: 200, width: 200, background: "auto:predominant", crop: "pad"}).toHtml();
jQuery:
$.cloudinary.image("beach_huts.jpg", {height: 200, width: 200, background: "auto:predominant", crop: "pad"})
React:
<Image publicId="beach_huts.jpg" >
  <Transformation height="200" width="200" background="auto:predominant" crop="pad" />
</Image>
Vue.js:
<cld-image publicId="beach_huts.jpg" >
  <cld-transformation height="200" width="200" background="auto:predominant" crop="pad" />
</cld-image>
Angular:
<cl-image public-id="beach_huts.jpg" >
  <cl-transformation height="200" width="200" background="auto:predominant" crop="pad">
  </cl-transformation>
</cl-image>
.NET:
cloudinary.Api.UrlImgUp.Transform(new Transformation().Height(200).Width(200).Background("auto:predominant").Crop("pad")).BuildImageTag("beach_huts.jpg")
Android:
MediaManager.get().url().transformation(new Transformation().height(200).width(200).background("auto:predominant").crop("pad")).generate("beach_huts.jpg");
iOS:
imageView.cldSetImage(cloudinary.createUrl().setTransformation(CLDTransformation().setHeight(200).setWidth(200).setBackground("auto:predominant").setCrop("pad")).generate("beach_huts.jpg")!, cloudinary: cloudinary)
- Pad with the strongest contrasting color to the predominant color:
 b_auto:predominant
 b_auto:predominant_contrast
Ruby:
cl_image_tag("painter_scene.jpg", :height=>300, :width=>300, :background=>"auto:predominant_contrast", :crop=>"pad")
PHP v1:
cl_image_tag("painter_scene.jpg", array("height"=>300, "width"=>300, "background"=>"auto:predominant_contrast", "crop"=>"pad"))
PHP v2:
(new ImageTag('painter_scene.jpg'))
  ->resize(Resize::pad()->width(300)->height(300)
    ->background(Background::predominant()->contrast()));
Python:
CloudinaryImage("painter_scene.jpg").image(height=300, width=300, background="auto:predominant_contrast", crop="pad")
Node.js:
cloudinary.image("painter_scene.jpg", {height: 300, width: 300, background: "auto:predominant_contrast", crop: "pad"})
Java:
cloudinary.url().transformation(new Transformation().height(300).width(300).background("auto:predominant_contrast").crop("pad")).imageTag("painter_scene.jpg");
JS:
cloudinary.imageTag('painter_scene.jpg', {height: 300, width: 300, background: "auto:predominant_contrast", crop: "pad"}).toHtml();
jQuery:
$.cloudinary.image("painter_scene.jpg", {height: 300, width: 300, background: "auto:predominant_contrast", crop: "pad"})
React:
<Image publicId="painter_scene.jpg" >
  <Transformation height="300" width="300" background="auto:predominant_contrast" crop="pad" />
</Image>
Vue.js:
<cld-image publicId="painter_scene.jpg" >
  <cld-transformation height="300" width="300" background="auto:predominant_contrast" crop="pad" />
</cld-image>
Angular:
<cl-image public-id="painter_scene.jpg" >
  <cl-transformation height="300" width="300" background="auto:predominant_contrast" crop="pad">
  </cl-transformation>
</cl-image>
.NET:
cloudinary.Api.UrlImgUp.Transform(new Transformation().Height(300).Width(300).Background("auto:predominant_contrast").Crop("pad")).BuildImageTag("painter_scene.jpg")
Android:
MediaManager.get().url().transformation(new Transformation().height(300).width(300).background("auto:predominant_contrast").crop("pad")).generate("painter_scene.jpg");
iOS:
imageView.cldSetImage(cloudinary.createUrl().setTransformation(CLDTransformation().setHeight(300).setWidth(300).setBackground("auto:predominant_contrast").setCrop("pad")).generate("painter_scene.jpg")!, cloudinary: cloudinary)
- Select multiple predominant colors and use a gradient effect to blend them together:
 b_auto:predominant_gradient:2
 b_auto:predominant_gradient:4
Ruby:
cl_image_tag("phone_wood.jpg", :height=>300, :width=>300, :background=>"auto:predominant_gradient:2", :crop=>"pad")
PHP v1:
cl_image_tag("phone_wood.jpg", array("height"=>300, "width"=>300, "background"=>"auto:predominant_gradient:2", "crop"=>"pad"))
PHP v2:
(new ImageTag('phone_wood.jpg'))
  ->resize(Resize::pad()->width(300)->height(300)
    ->background(Background::predominantGradient()
      ->gradientColors(2)));
Python:
CloudinaryImage("phone_wood.jpg").image(height=300, width=300, background="auto:predominant_gradient:2", crop="pad")
Node.js:
cloudinary.image("phone_wood.jpg", {height: 300, width: 300, background: "auto:predominant_gradient:2", crop: "pad"})
Java:
cloudinary.url().transformation(new Transformation().height(300).width(300).background("auto:predominant_gradient:2").crop("pad")).imageTag("phone_wood.jpg");
JS:
cloudinary.imageTag('phone_wood.jpg', {height: 300, width: 300, background: "auto:predominant_gradient:2", crop: "pad"}).toHtml();
jQuery:
$.cloudinary.image("phone_wood.jpg", {height: 300, width: 300, background: "auto:predominant_gradient:2", crop: "pad"})
React:
<Image publicId="phone_wood.jpg" >
  <Transformation height="300" width="300" background="auto:predominant_gradient:2" crop="pad" />
</Image>
Vue.js:
<cld-image publicId="phone_wood.jpg" >
  <cld-transformation height="300" width="300" background="auto:predominant_gradient:2" crop="pad" />
</cld-image>
Angular:
<cl-image public-id="phone_wood.jpg" >
  <cl-transformation height="300" width="300" background="auto:predominant_gradient:2" crop="pad">
  </cl-transformation>
</cl-image>
.NET:
cloudinary.Api.UrlImgUp.Transform(new Transformation().Height(300).Width(300).Background("auto:predominant_gradient:2").Crop("pad")).BuildImageTag("phone_wood.jpg")
Android:
MediaManager.get().url().transformation(new Transformation().height(300).width(300).background("auto:predominant_gradient:2").crop("pad")).generate("phone_wood.jpg");
iOS:
imageView.cldSetImage(cloudinary.createUrl().setTransformation(CLDTransformation().setHeight(300).setWidth(300).setBackground("auto:predominant_gradient:2").setCrop("pad")).generate("phone_wood.jpg")!, cloudinary: cloudinary)
- Limit the selected gradient colors to specific values (i.e. provide your own palette). The predominant color is then selected from the closest match in the provided palette:
Ruby:
cl_image_tag("string.jpg", :height=>300, :width=>300, :background=>"auto:predominant_gradient:4:palette_red_orange_brown", :crop=>"pad")
PHP v1:
cl_image_tag("string.jpg", array("height"=>300, "width"=>300, "background"=>"auto:predominant_gradient:4:palette_red_orange_brown", "crop"=>"pad"))
PHP v2:
(new ImageTag('string.jpg'))
  ->resize(Resize::pad()->width(300)->height(300)
    ->background(Background::predominantGradient()->gradientColors(4)
      ->palette(Color::RED, Color::ORANGE, Color::BROWN)));
Python:
CloudinaryImage("string.jpg").image(height=300, width=300, background="auto:predominant_gradient:4:palette_red_orange_brown", crop="pad")
Node.js:
cloudinary.image("string.jpg", {height: 300, width: 300, background: "auto:predominant_gradient:4:palette_red_orange_brown", crop: "pad"})
Java:
cloudinary.url().transformation(new Transformation().height(300).width(300).background("auto:predominant_gradient:4:palette_red_orange_brown").crop("pad")).imageTag("string.jpg");
JS:
cloudinary.imageTag('string.jpg', {height: 300, width: 300, background: "auto:predominant_gradient:4:palette_red_orange_brown", crop: "pad"}).toHtml();
jQuery:
$.cloudinary.image("string.jpg", {height: 300, width: 300, background: "auto:predominant_gradient:4:palette_red_orange_brown", crop: "pad"})
React:
<Image publicId="string.jpg" >
  <Transformation height="300" width="300" background="auto:predominant_gradient:4:palette_red_orange_brown" crop="pad" />
</Image>
Vue.js:
<cld-image publicId="string.jpg" >
  <cld-transformation height="300" width="300" background="auto:predominant_gradient:4:palette_red_orange_brown" crop="pad" />
</cld-image>
Angular:
<cl-image public-id="string.jpg" >
  <cl-transformation height="300" width="300" background="auto:predominant_gradient:4:palette_red_orange_brown" crop="pad">
  </cl-transformation>
</cl-image>
.NET:
cloudinary.Api.UrlImgUp.Transform(new Transformation().Height(300).Width(300).Background("auto:predominant_gradient:4:palette_red_orange_brown").Crop("pad")).BuildImageTag("string.jpg")
Android:
MediaManager.get().url().transformation(new Transformation().height(300).width(300).background("auto:predominant_gradient:4:palette_red_orange_brown").crop("pad")).generate("string.jpg");
iOS:
imageView.cldSetImage(cloudinary.createUrl().setTransformation(CLDTransformation().setHeight(300).setWidth(300).setBackground("auto:predominant_gradient:4:palette_red_orange_brown").setCrop("pad")).generate("string.jpg")!, cloudinary: cloudinary)

See the documentation for more information on these values and more details on the various padding options.
There are many cool things you can do with image padding, and as you've seen, Cloudinary enables you to easily do these enhancements in the cloud using simple, dynamic transformation parameters and delivery URLs. Context-aware padding is especially useful for making sure your images take up the exact space allocated for the image while looking good.
The context-aware features are available for use with all Cloudinary accounts, including free accounts.


