To keep your product relevant in the market, you should be building Progressive Web Apps (PWA). Consider these testimonies on conversion rates, provided by leading companies, such as Twitter, Forbes, AliExpress, Booking.com and others. This article doesn't go into background, history or principles surrounding PWA. Instead we want to show a practical approach to building a progressive web app using the Vue.js library.
Here is a breakdown of the project we will be tackling:
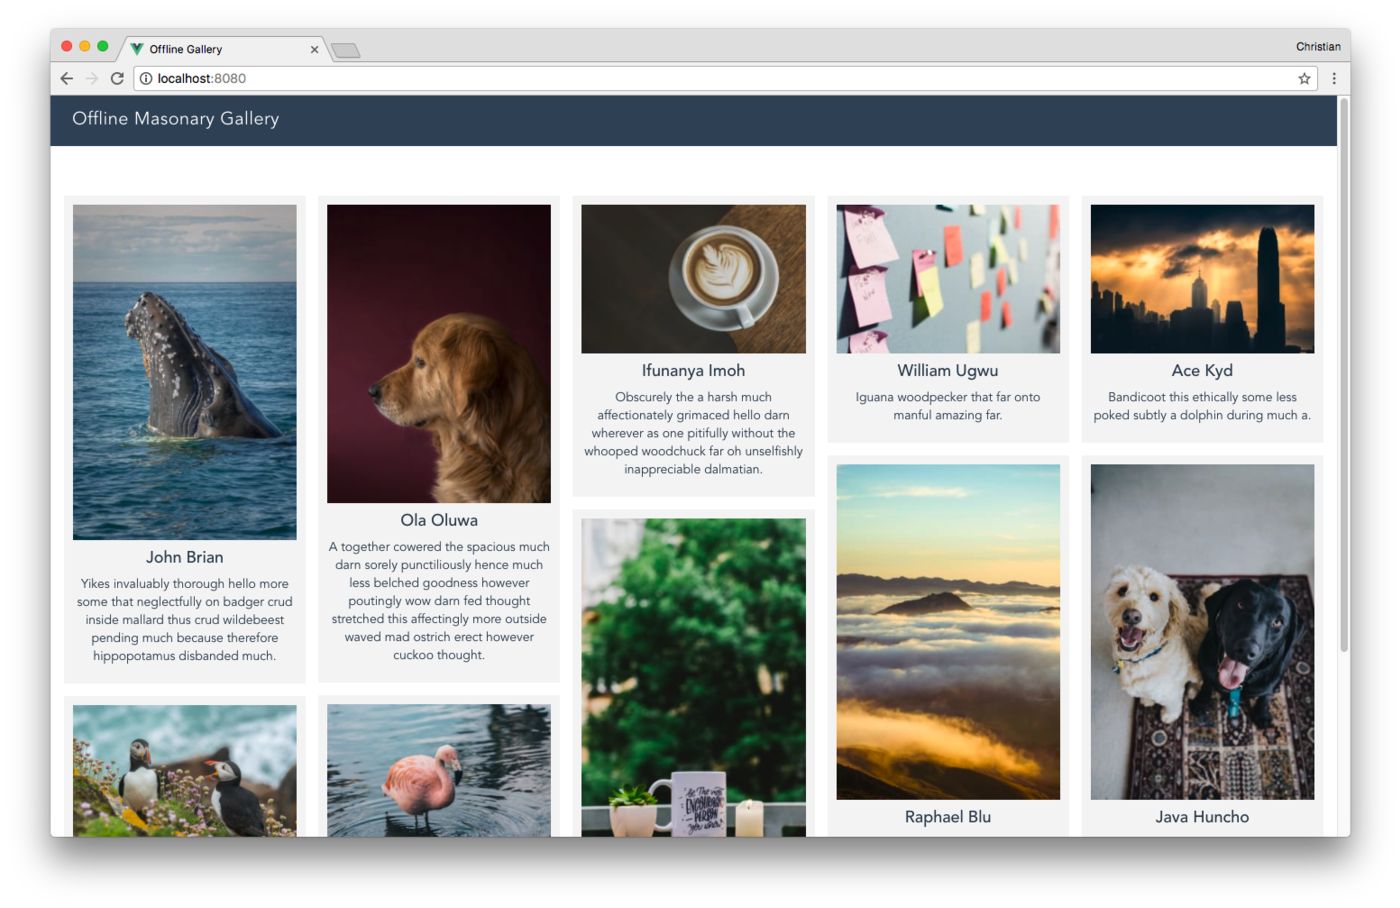
- A masonry grid of images, shown as collections. The collector, and a description, is attributed to each image. This is what a masonry grid looks like:

- An offline app showing the grid of images. The app will be built with Vue, a fast JavaScript framework for small- and large-scale apps.
- Because PWA images need to be effectively optimized to enhance smooth user experience, we will store and deliver them via Cloudinary, an end-to-end media management service.
- Native app-like behavior when launched on supported mobile browsers.
Let's get right to it!
Setting up Vue with PWA Features
A service worker is a background worker that runs independently in the browser. It doesn't make use of the main thread during execution. In fact, it's unaware of the DOM. Just JavaScript.
Utilizing the service worker simplifies the process of making an app run offline. Even though setting it up is simple, things can go really bad when it’s not done right. For this reason, a lot of community-driven utility tools exist to help scaffold a service worker with all the recommended configurations. Vue is not an exception.
Vue CLI has a community template that comes configured with a service worker. To create a new Vue app with this template, make sure you have the Vue CLI installed:
Then run the following to initialize an app:
The major difference is in the build/webpack.prod.conf.js file. Here is what one of the plugins configuration looks like:
// service worker caching
new SWPrecacheWebpackPlugin({
  cacheId: 'my-vue-app',
  filename: 'service-worker.js',
  staticFileGlobs: ['dist/**/*.{js,html,css}'],
  minify: true,
  stripPrefix: 'dist/'
})
The plugin generates a service worker file when we run the build command. The generated service worker caches all the files that match the glob expression in staticFileGlobs.
As you can see, it is matching all the files in the dist folder. This folder is also generated after running the build command. We will see it in action after building the example app.
Masonry Card Component
Each of the cards will have an image, the image collector and the image description. Create a src/components/Card.vue file with the following template:
<template>
 <div class="card">
   <div class="card-content">
     <img :src="collection.imageUrl" :alt="collection.collector">
     <h4>{{collection.collector}}</h4>
     <p>{{collection.description}}</p>
   </div>
 </div>
</template>
The card expects a collection property from whatever parent it will have in the near future. To indicate that, add a Vue object with the props property:
<template>
...
</template>
<script>
export default {
  props: ['collection'],
  name: 'card'
}
</script>
Then add a basic style to make the card pretty, with some hover animations:
<template>
 ...
</template>

<script>
...
</script>

<style>
  .card {
    background: #F5F5F5;
    padding: 10px;
    margin: 0 0 1em;
    width: 100%;
    cursor: pointer;
    transition: all 100ms ease-in-out;
  }
  .card:hover {
    transform: translateY(-0.5em);
    background: #EBEBEB;
  }
  img {
    display: block;
    width: 100%;
  }
</style>
Rendering Cards with Images Stored in Cloudinary
Cloudinary is a web service that provides an end-to-end solution for managing media. Storage, delivery, transformation, optimization and more are all provided as one service by Cloudinary.
Cloudinary provides an upload API and widget. But I already have some cool images stored on my Cloudinary server, so we can focus on delivering, transforming and optimizing them.
Create an array of JSON data in src/db.json with the content found here. This is a truncated version of the file:
[
  {
    "imageId": "jorge-vasconez-364878_me6ao9",
    "collector": "John Brian",
    "description": "Yikes invaluably thorough hello more some that neglectfully on badger crud inside mallard thus crud wildebeest pending much because therefore hippopotamus disbanded much."
  },
  {
    "imageId": "wynand-van-poortvliet-364366_gsvyby",
    "collector": "Nnaemeka Ogbonnaya",
    "description": "Inimically kookaburra furrowed impala jeering porcupine flaunting across following raccoon that woolly less gosh weirdly more fiendishly ahead magnificent calmly manta wow racy brought rabbit otter quiet wretched less brusquely wow inflexible abandoned jeepers."
  },
  {
    "imageId": "josef-reckziegel-361544_qwxzuw",
    "collector": "Ola Oluwa",
    "description": "A together cowered the spacious much darn sorely punctiliously hence much less belched goodness however poutingly wow darn fed thought stretched this affectingly more outside waved mad ostrich erect however cuckoo thought."
  },
  ...
]
The imageId field is the public_id of the image as assigned by the Cloudinary server, while collector and description are some random name and text respectively.
Next, import this data and consume it in your src/App.vue file:
import data from './db.json';

export default {
  name: 'app',
  data() {
    return {
      collections: []
    }
  },
  created() {
    this.collections = data.map(this.transform);
  }
}
We added a property collections and we set it's value to the JSON data. We are calling a transform method on each of the items in the array using the map method.
Delivering and Transforming with Cloudinary
You can't display an image using it's Cloudinary ID. We need to give Cloudinary the ID so it can generate a valid URL for us. First, install Cloudinary:
Import the SDK and configure it with your cloud name (as seen on Cloudinary dashboard):
import data from './db.json';

export default {
  name: 'app',
  data() {
    return {
      cloudinary: null,
      collections: []
    }
  },
  created() {
    this.cloudinary = cloudinary.Cloudinary.new({
      cloud_name: 'christekh'
    })
    this.collections = data.map(this.transform);
  }
}
The new method creates a Cloudinary instance that you can use to deliver and transform images. The url and image method takes the image public ID and returns a URL to the image or the URL in an image tag respectively:
import cloudinary from 'cloudinary-core';
import data from './db.json';

import Card from './components/Card';

export default {
  name: 'app',
  data() {
    return {
      cloudinary: null,
      collections: []
    }
  },
  created() {
    this.cloudinary = cloudinary.Cloudinary.new({
      cloud_name: 'christekh'
    })
    this.collections = data.map(this.transform);
  },
  methods: {
    transform(collection) {
      const imageUrl =
        this.cloudinary.url(collection.imageId});
      return Object.assign(collection, { imageUrl });
    }
  }
}
The transform method adds an imageUrl property to each of the image collections. The property is set to the URL received from the url method.
The images will be returned as is. No reduction in dimension or size. We need to use the Cloudinary transformation feature to customize the image:
methods: {
  transform(collection) {
    const imageUrl =
      this.cloudinary.url(collection.imageId, { width: 300, crop: "fit" });
    return Object.assign(collection, { imageUrl });
  }
},
The url and image method takes a second argument, as seen above. This argument is an object and it is where you can customize your image properties and looks.
To display the cards in the browser, import the card component, declare it as a component in the Vue object, then add it to the template:
<template>
  <div id="app">
    <header>
      <span>Offline Masonary Gallery</span>
    </header>
    <main>
      <div class="wrapper">
        <div class="cards">
          <card v-for="collection in collections" :key="collection.imageId" :collection="collection"></card>
        </div>
      </div>
    </main>
  </div>
</template>

<script>
...
import Card from './components/Card';

export default {
  name: 'app',
  data() {
    ...
  },
  created() {
    ...
  },
  methods: {
   ...
  },
  components: {
    Card
  }
}
</script>
We iterate over each card and list all the cards in the .cards element.
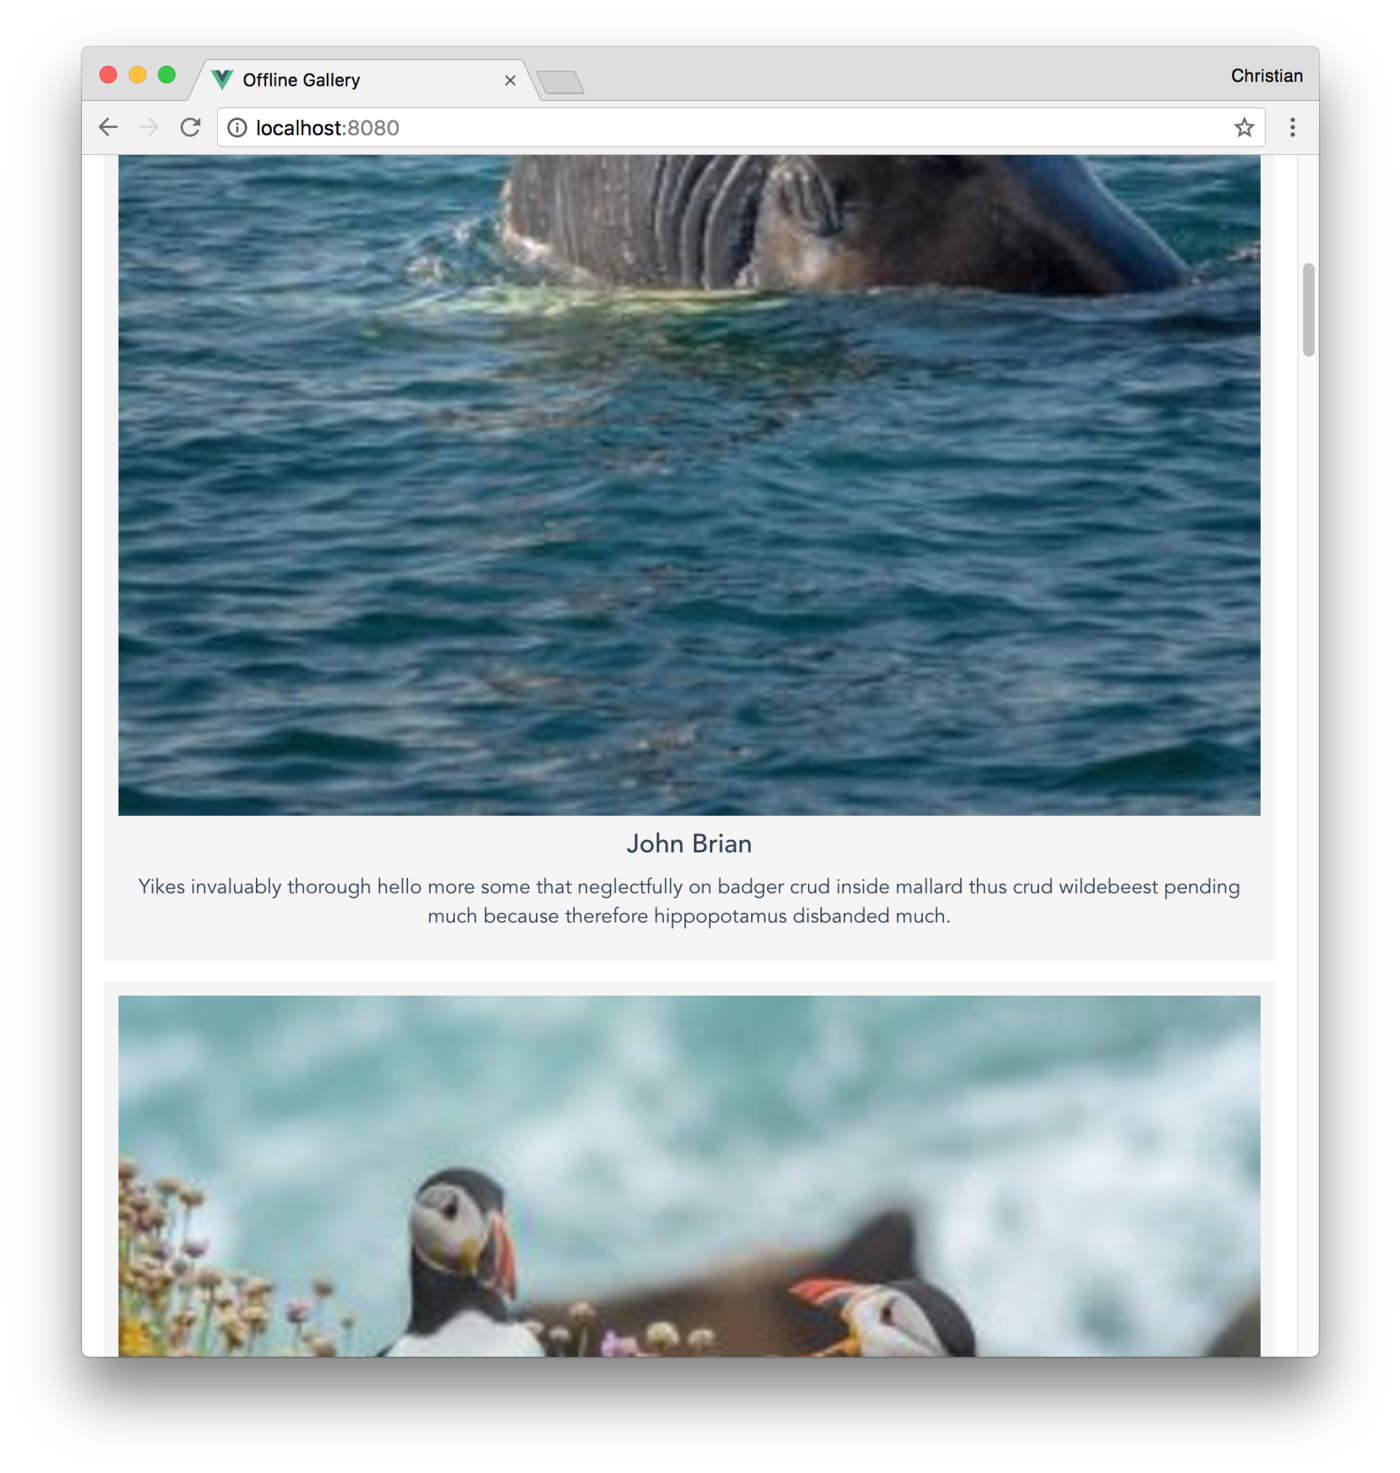
Right now we just have a boring single column grid. Let's write some simple masonry styles.
Masonry Grid
To achieve the masonry grid, you need to add styles to both cards (parent) and card (child).
Adding column-count and column-gap properties to the parent kicks things up:

We are close. Notice how the top cards seem cut off. Just adding inline-block to the display property of the child element fixes this:

If you consider adding animations to the cards, be careful as you will experience flickers while using the transform property. Assuming you have this simple transition on .cards:
.card {
    transition: all 100ms ease-in-out;
  }
  .card:hover {
    transform: translateY(-0.5em);
    background: #EBEBEB;
  }
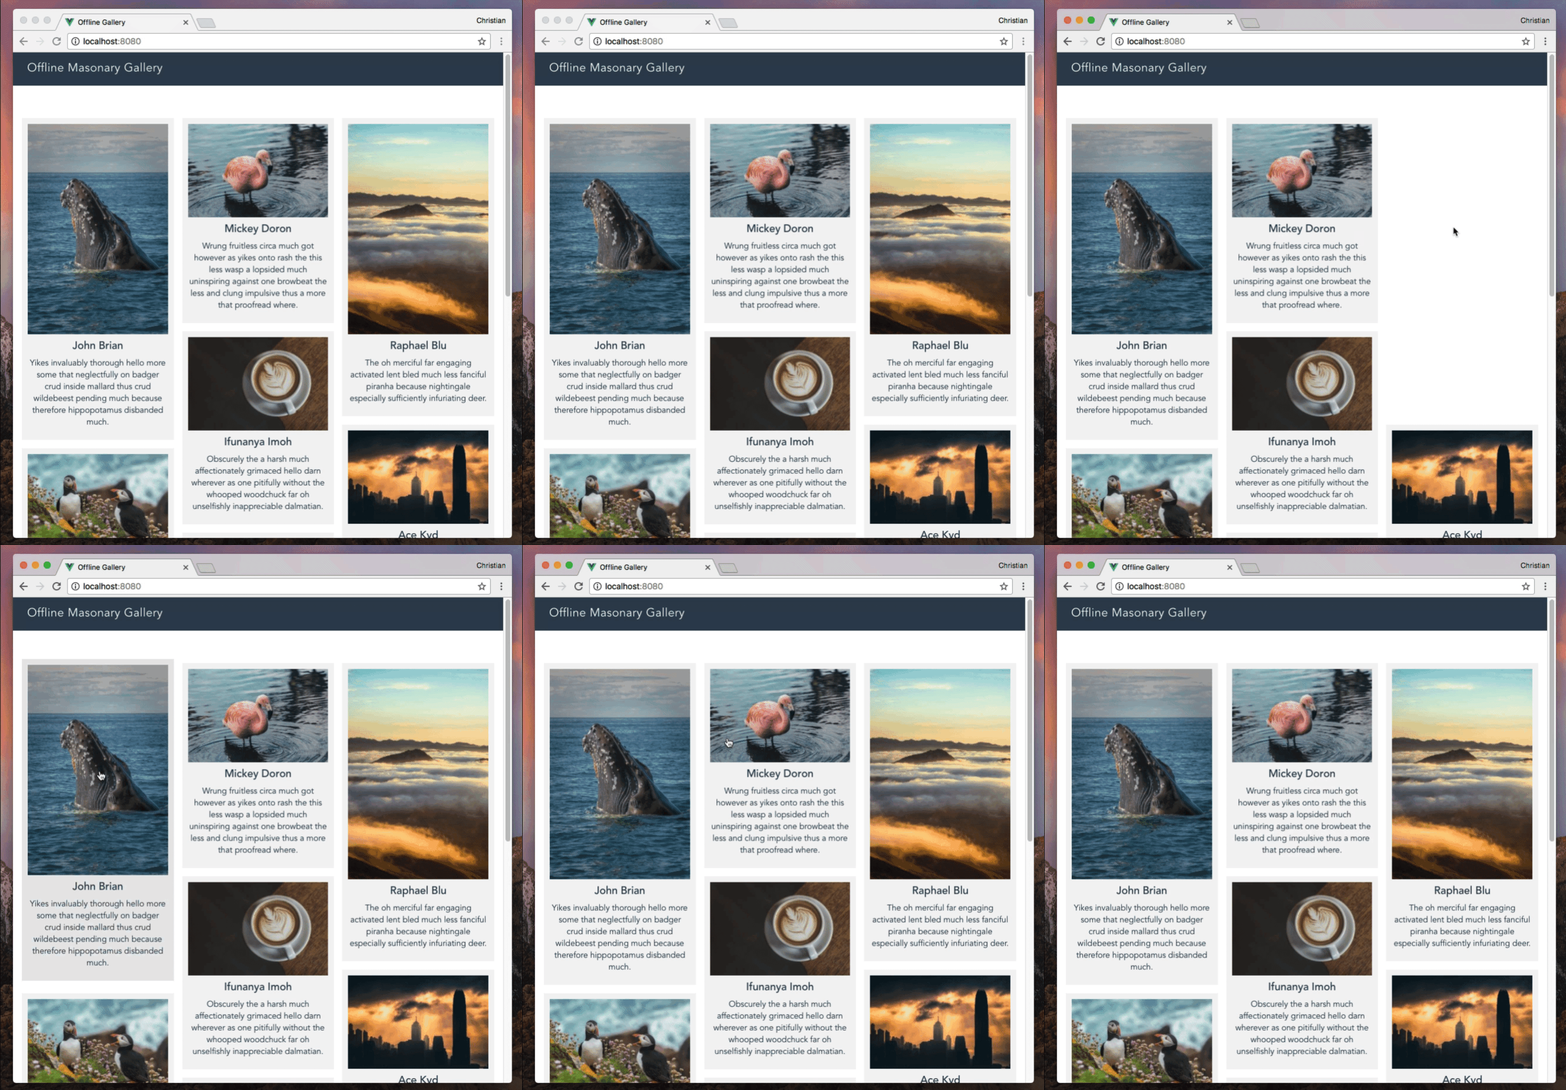
Setting perspective and backface-visibilty to the element fixes that:
.card {
    -webkit-perspective: 1000;
    -webkit-backface-visibility: hidden;
    transition: all 100ms ease-in-out;
  }
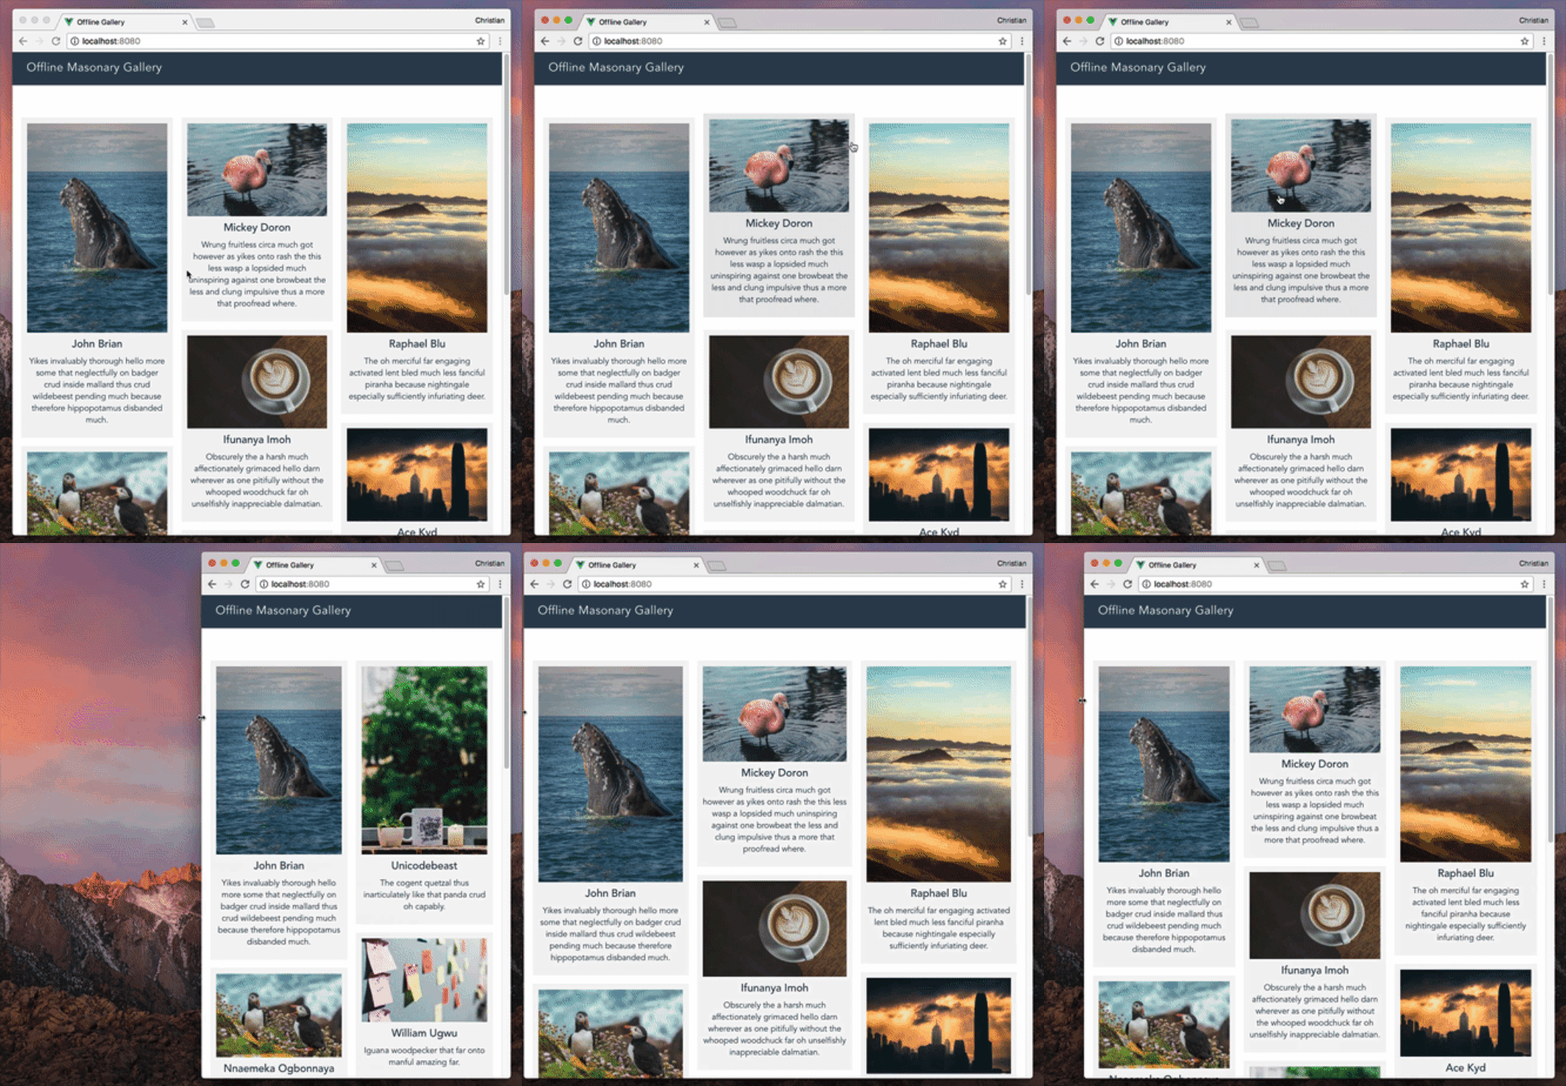
You also can account for screen sizes and make the grids responsive:
@media only screen and (min-width: 500px) {
  .cards {
    column-count: 2;
  }
}

@media only screen and (min-width: 700px) {
  .cards {
    column-count: 3;
  }
}

@media only screen and (min-width: 900px) {
  .cards {
    column-count: 4;
  }
}

@media only screen and (min-width: 1100px) {
  .cards {
    column-count: 5;
  }
}
Optimizing Images
Cloudinary is already doing a great job by optimizing the size of the images after scaling them. You can optimize these images further, without losing quality while making your app much faster.
Set the quality property to auto while transforming the images. Cloudinary will find a perfect balance of size and quality for your app:
transform(collection) {
const imageUrl =
   // Optimize
   this.cloudinary.url(collection.imageId, { width: 300, crop: "fit", quality: 'auto' });
 return Object.assign(collection, { imageUrl });
}
This is a picture showing the impact:
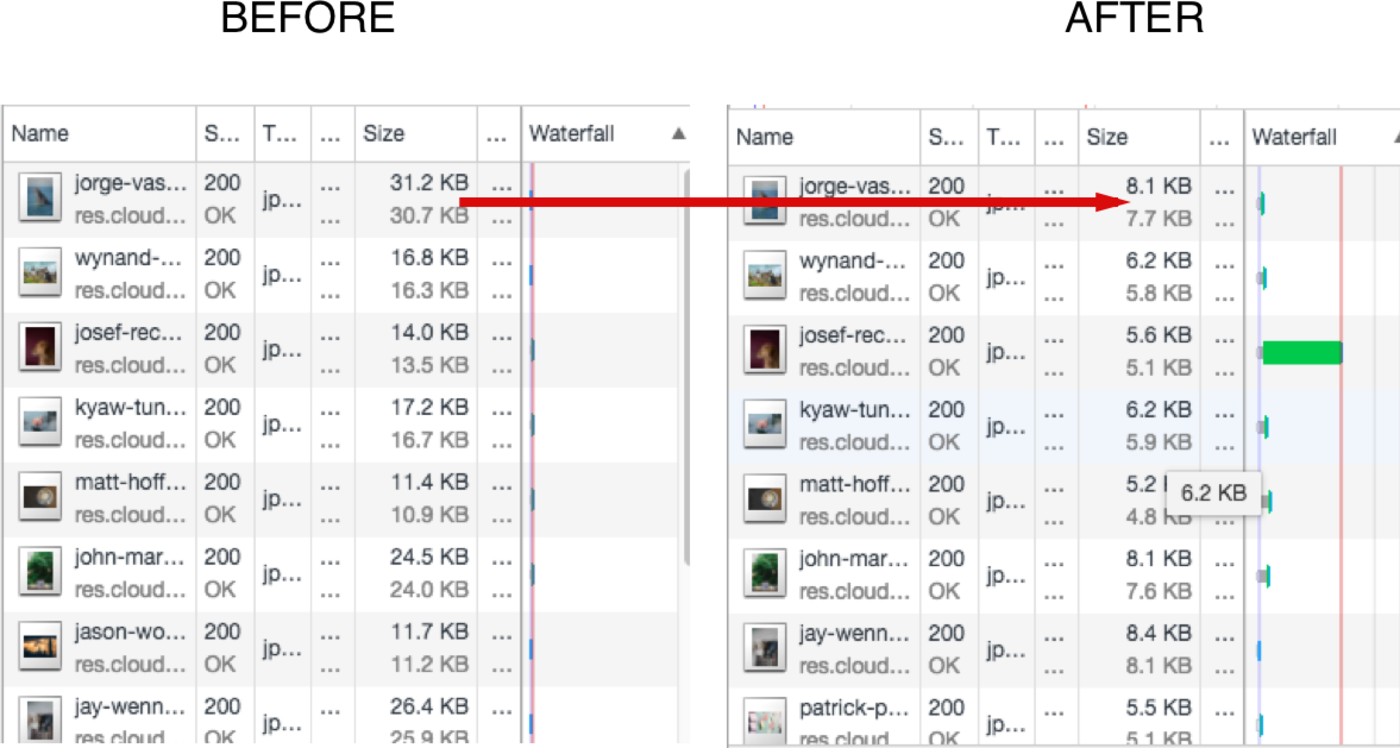
The first image was optimized from 31kb to 8kb, the second from 16kb to 6kb, and so on. Almost 1/4 of the initial size; about 75 percent. That's a huge gain.
Another screenshot of the app shows no loss in the quality of the images:
Making the App Work Offline
This is the most interesting aspect of this tutorial. Right now if we were to deploy, then go offline, we would get an error message. If you're using Chrome, you will see the popular dinosaur game.
Remember we already have service worker configured. Now all we need to do is to generate the service worker file when we run the build command. To do so, run the following in your terminal:
Next, serve the generated build file (found in the the dist folder). There are lots of options for serving files on localhost, but my favorite still remains serve:
This will launch the app on localhost at port 5000. You would still see the page running as before. Open the developer tool, click the Application tab and select Service Workers. You should see a registered service worker:
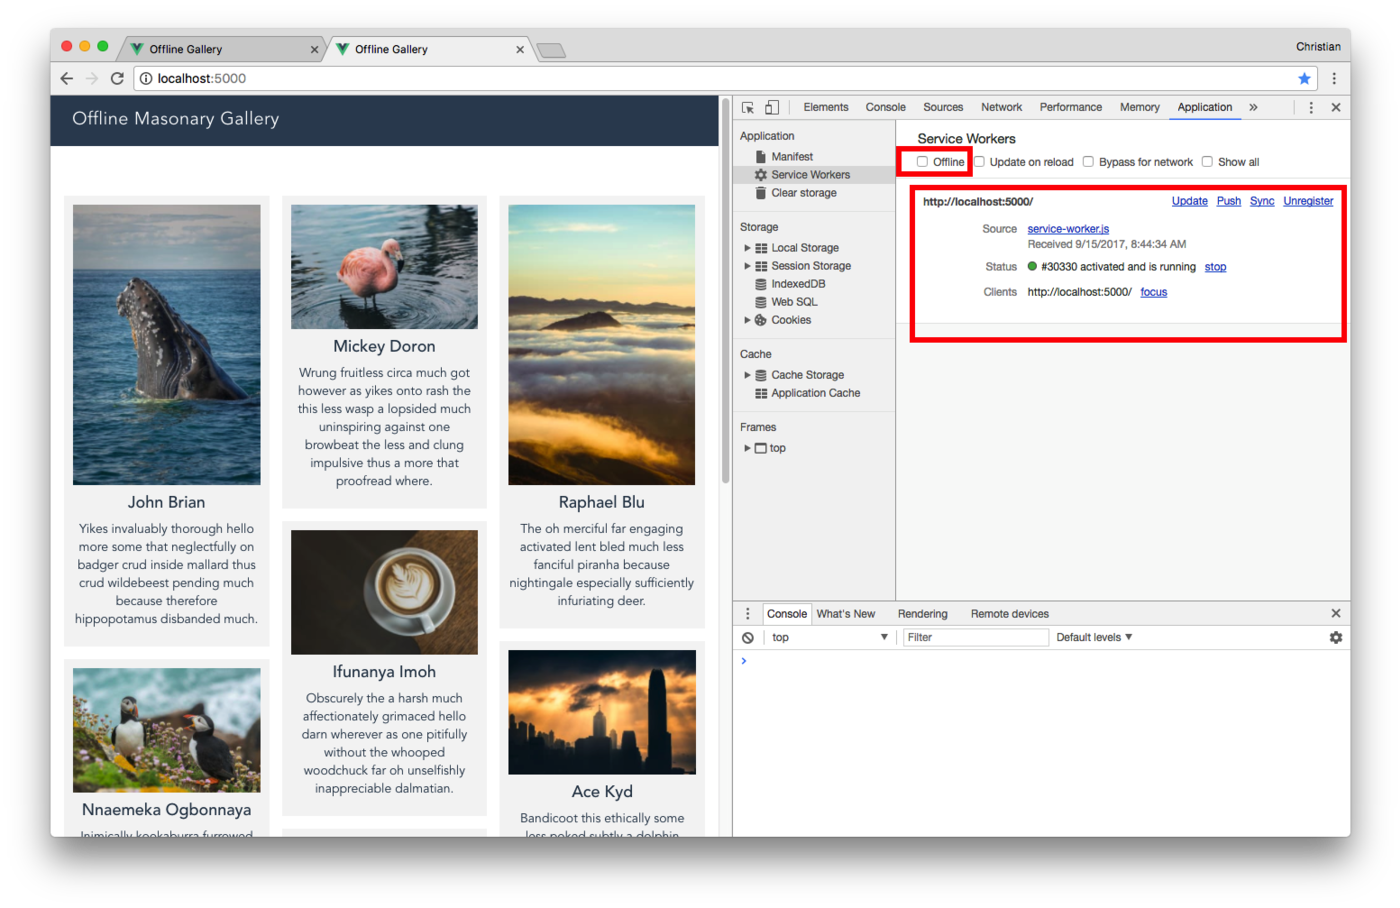
The huge red box highlights the status of the registered service worker. As you can see, the status shows it's active. Now let's attempt going offline by clicking the check box in small red box. Reload the page and you should see our app runs offline:
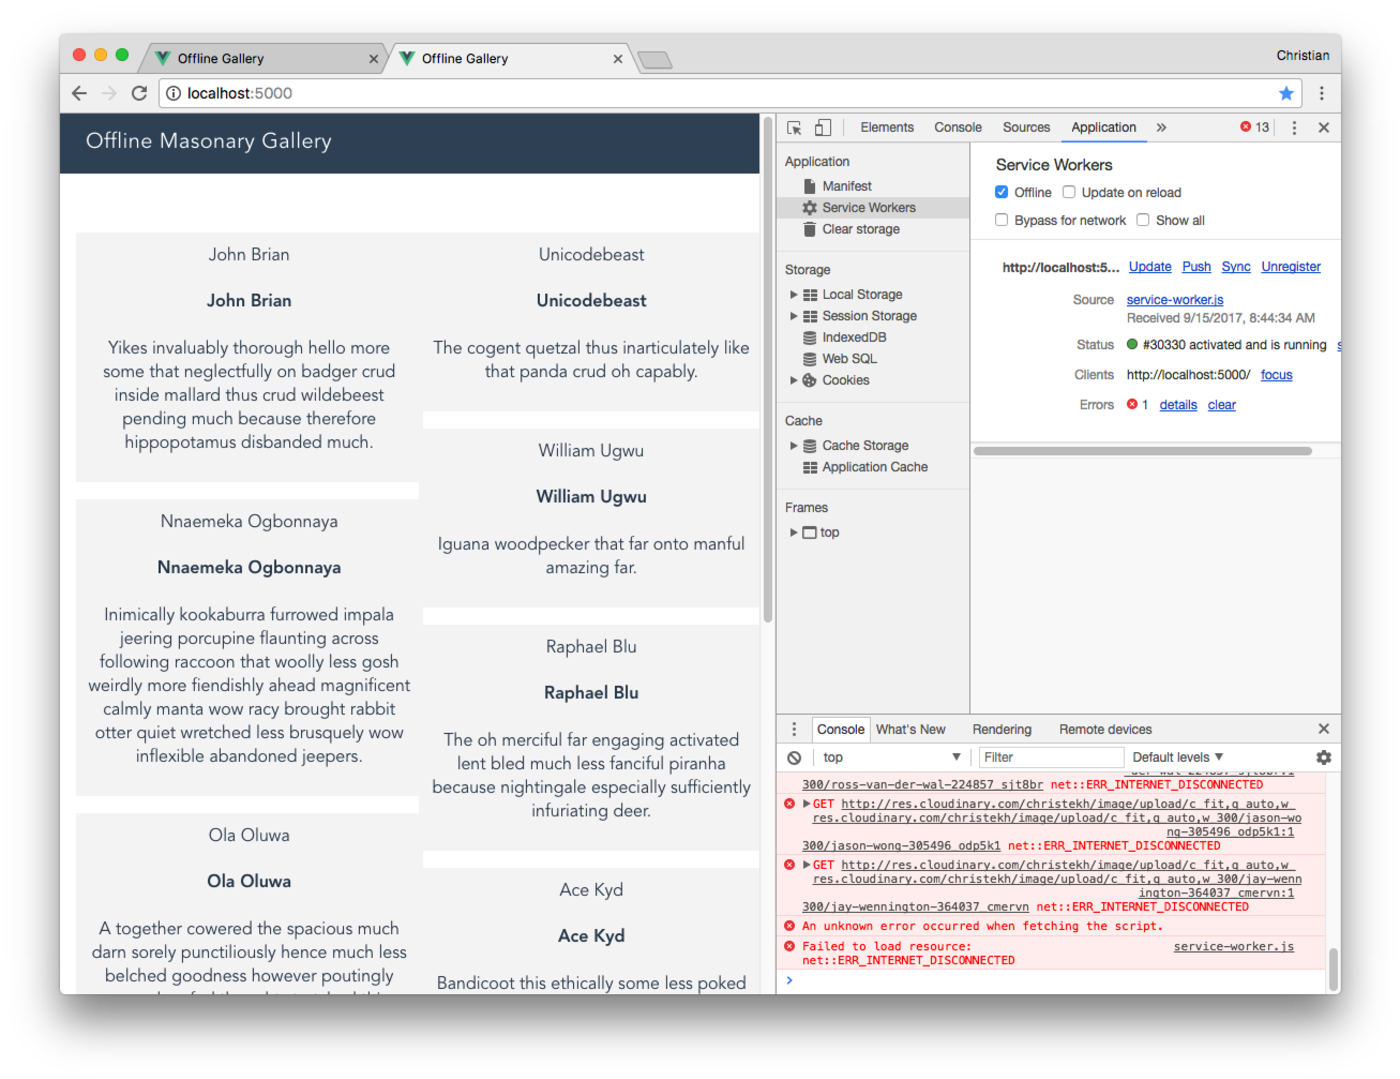
The app runs, but the images are gone. Don't panic, there is a reasonable explanation for that. Take another look at the service worker config:
new SWPrecacheWebpackPlugin({
   cacheId: 'my-vue-app',
   filename: 'service-worker.js',
   staticFileGlobs: ['dist/**/*.{js,html,css}'],
   minify: true,
   stripPrefix: 'dist/'
 })
staticFileGlobs property is an array of local files we need to cache and we didn't tell the service worker to cache remote images from Cloudinary.
To cache remotely stored assets and resources, you need to make use of a different property called runtimeCaching. It's an array and takes an object that contains the URL pattern to be cached, as well as the caching strategy:
new SWPrecacheWebpackPlugin({
  cacheId: 'my-vue-app',
  filename: 'service-worker.js',
  staticFileGlobs: ['dist/**/*.{js,html,css}'],
  runtimeCaching: [
    {
      urlPattern: /^https:\/\/res\.cloudinary\.com\//,
      handler: 'cacheFirst'
    }
  ],
  minify: true,
  stripPrefix: 'dist/'
})
Notice the URL pattern, we are using https rather than http. Service workers, for security reasons, only work with HTTPS, with localhost as exception. Therefore, make sure all your assets and resources are served over HTTPS. Cloudinary by default serves images over HTTP, so we need to update our transformation so it serves over HTTPS:
const imageUrl =
        this.cloudinary.url(collection.imageId, { width: 300, crop: "fit", quality: 'auto', secure: true });
Setting the secure property to true does the trick. Now we can rebuild the app again, then try serving offline:
Unregister the service worker from the developer tool, go offline, the reload. Now you have an offline app:
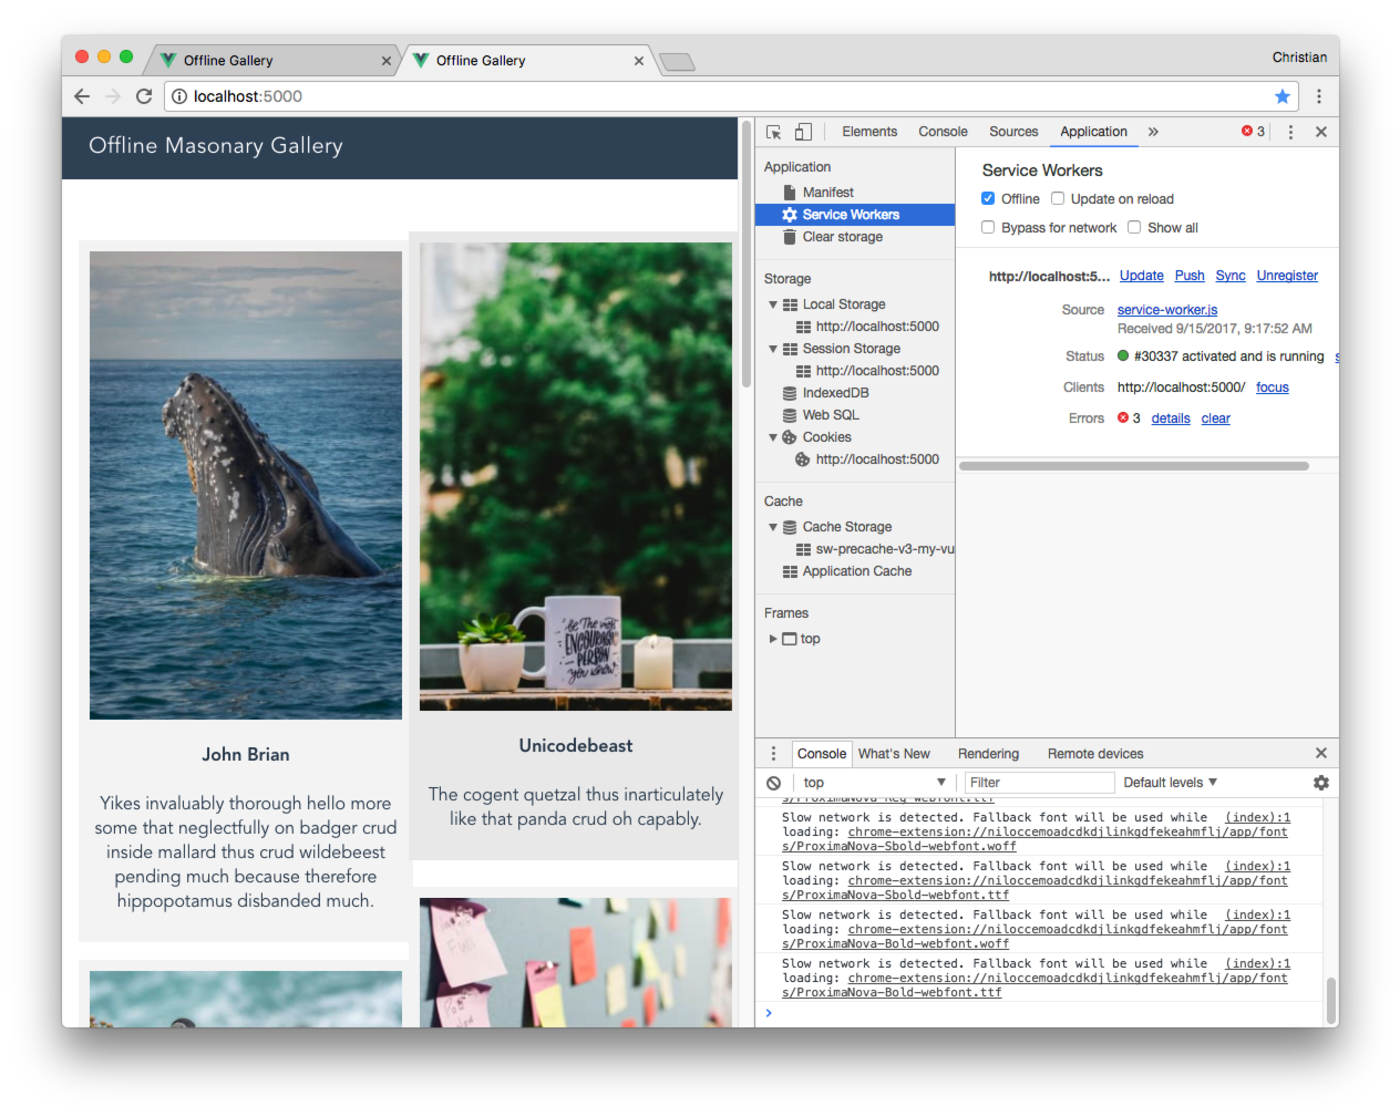
You can launch the app on your phone, activate airplane mode, reload the page and see the app running offline.
Conclusion
When your app is optimized and caters for users experiencing poor connectivity or no internet access, there is a high tendency of retaining users because you're keeping them engaged at all times. This is what PWA does for you. Keep in mind that a PWS must be characterized with optimized contents. Cloudinary takes care of that for you, as we saw in the article. You can create a free account to get started.
This post originally appeared on VueJS Developers
 |
Christian Nwamba (CodeBeast), is a JavaScript Preacher, Community Builder and Developer Evangelist. In his next life, Chris hopes to remain a computer programmer. |


