It doesn't take a genius (or a statistician) to know that video represents a significant proportion of web and mobile content these days. But did you realize that in 2017, video will account for about 75% of all internet traffic and that 55% of people watch videos online every day? In fact, 52% of marketing professionals worldwide believe that video is the content type with the best ROI, with people spending up to 2.6x more time on pages with video than on those without.
So there's a fair chance that your web site or app already includes proprietary or user-generated video, or will in the near future. But video is extremely heavy content, so you better make sure that you deliver your super-valuable video content in the most optimized way and present it in a video player that maximizes user experience regardless of the device your viewers use.
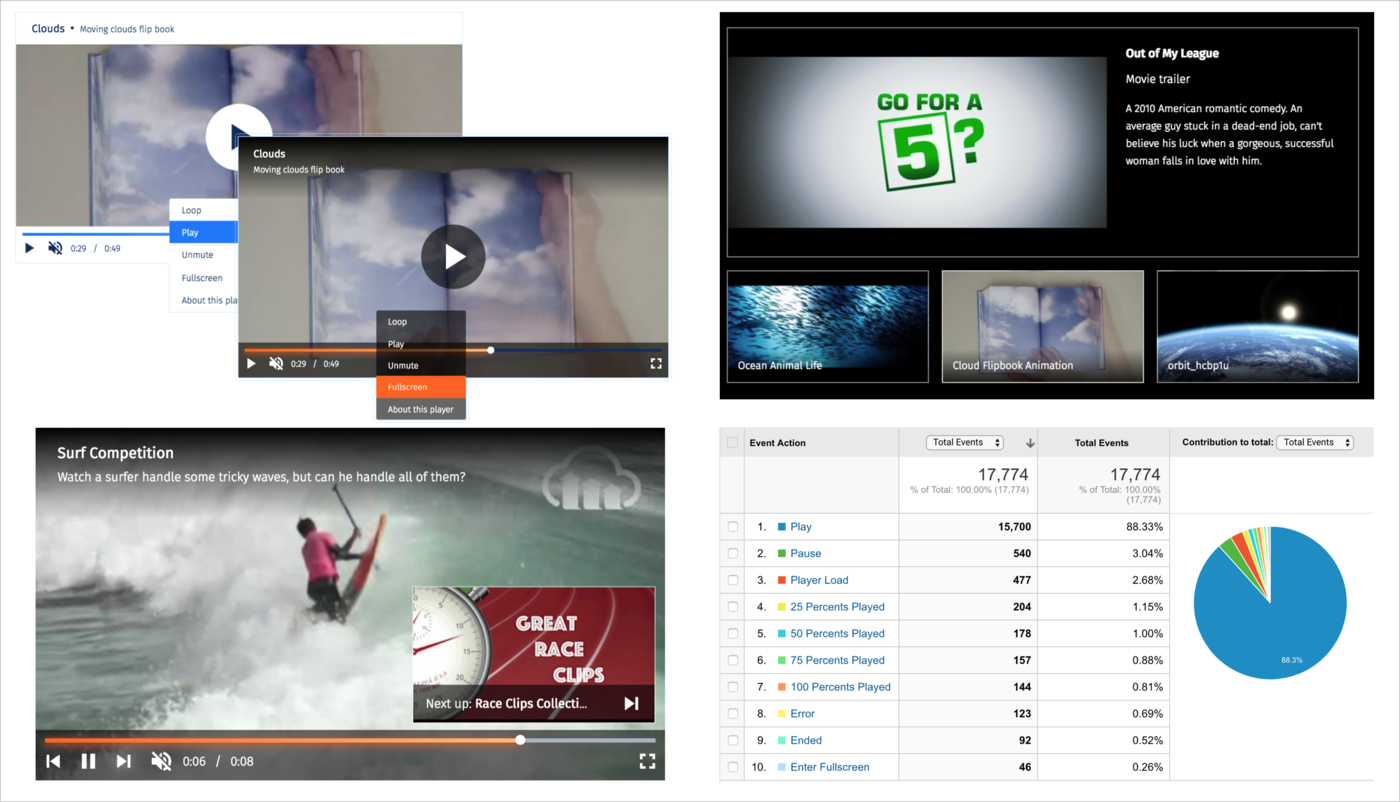
We're happy to announce that Cloudinary has just released a comprehensive, JavaScript video player that provides just that — all of the video player capabilities you need, fully integrated with Cloudinary's video upload, storage, transcoding, and delivery solution. As promised in the title, a video player that literally delivers! You can have your cake and eat it too!

What should I consider when embedding a video player in my site?
Some web sites default to the simple solution of uploading to YouTube or Vimeo and embedding the YouTube player on their page. This is a quick, free solution that avoids the complications of video hosting. But as with most quick and easy solutions, it comes with many disadvantages and is generally not the best long term solution.
With embedded YouTube or Vimeo:
- You give up full ownership. Your video can be deleted by YouTube moderators or downloaded and redistributed by others.
- You don't have control over whether (or which) ads are played with your video. Likewise for additional video recommendations displayed at the end, which may send your users elsewhere.
- You can’t control the player behavior. For example, autoplay is not supported.
- You miss out on valuable viewer input from Google Analytics or other analytics trackers.
- You can't customize the player to match your branding or for other UX considerations.
- Limited monetization options.
There are a variety of paid and open source video players that you can use as an alternative. Depending on your requirements and choices, you might even require components from more than one supplier.
When choosing your video player solution, you should check whether:
- It supports adaptive bitrate streaming formats, so that your users can enjoy an optimal streaming experience regardless of their device or connection speeds.
- You can control and customize playlists and recommendations.
- You can capture in-depth analytical data about your video audience and their consumption of your videos.
- It supports standard ad protocols like VAST and VPAID (if you want to enable sponsors to append ads to your videos either now or in the future).
- You can implement a lightly-customized player without a huge coding investment, but that there are options for significant flexibility if you need it.
In addition to selecting a video player, you need to decide:
- Where will you host your video?
- How can you best optimize the output for all required delivery formats?
- Which CDN will you use to ensure speedy video delivery?
These hosting and delivery issues can be big headaches, but as you may already know, you can use a service like Cloudinary to automatically handle all of that for you. Cloudinary also enables you to perform a variety of cool video manipulations before or after the video is uploaded. And now you can also use Cloudinary to address all the important video player requirements listed above and more, in a single, simple-to-implement package!
Video player power on a silver platter
The Cloudinary video player packages all the power of the well known VideoJS open-source framework along with several valuable plug-ins and plenty of special Cloudinary functionality on top. Together, this gives you built-in adaptive bitrate streaming (HLS and MPEG-DASH), automatic transcoding and delivery of all popular video formats, video recommendations, simple creation of playlists including 'Next Up' thumbnails, event-based analytics, cool video manipulations applied to all videos in your player or to individual videos, and more.
All this is handed to you in a simple Javascript-based library that enables you to get your player working and your video playing inside it, within minutes.

The Nitty Gritty
After installing (or including) the cloudinary-video-player package, it only takes a few basic steps to get your video player up and running with your best videos.
Below we break down the steps to add a video player to your page that….
Prerequisites
Set up a Cloudinary account
If you don't already have a Cloudinary account, set one up for free, and make sure to select an appropriate cloud name for your site or organization.
Upload videos to your account The quickest way if you are a new user is to just drag them into to your Media Library. In the future, you can also use the Cloudinary Upload API. And try the Upload Widget for letting users upload their own video content directly to your site.
1. Add the video player instance and video tag
Instantiate a Cloudinary instance and the video player
While instantiating the video player, you can also add video player configurations. Here we set the width of this video player instance to 600 pixels.
var cld = cloudinary.Cloudinary.new({ cloud_name: "my-cloud", secure: true});
var demoplayer = cld.videoPlayer('blog-player').width(600)
Add the video tag element
Inside the tag, include the Cloudinary video player class, preferred player skin, and your video player instance ID, as well as any desired HTML5 video tag configuration:
We chose to display this video player with default
controlsand thedarkskin theme. We want the player to resize responsively, so we've added thecld-fluidclass as well.The Cloudinary video player offers a smart
autoplay, so when you include thedata-cld-autoplay-mode='on-scroll'attribute, the player begins playing only when at least 50% of the video player is visible. We'll use that, but since it's going to start on it's own, we'll also make sure it starts withmutedvolume so you don't get any nasty looks from your co-workers or the strangers next to you on the train.We've also added
widthandcroptransformations that will automatically be applied to any video that plays here, so that the videos are delivered in the size that best fits our video player.
<video id="blog-player" controls muted
  class="cld-video-player cld-video-player-skin-dark cld-fluid"
  data-cld-autoplay-mode='on-scroll'>
</video>
2. Create the playlist
Our player is going to play all the videos in our account that have the tag: video_race.
Our Media Asset Manager (that's me for today :-) ) has already gone into our Media Library and made sure that all the videos with that tag have good
titleandsubtitlemetadata values, so that those will show up in the titlebar of the player whenever the viewer mouses over the player.Now, all we need to do is tell our
demoplayerinstance to create a playlist from that tag. We'll ask it to advance from one video to the next automatically, with no pause between videos (autoAdvance:0), and to restart at the beginning of the playlist after that last video plays (repeat:true). * We'd also like a preview of the next video in the playlist to pop-up 3 seconds before the end of each playing video (presentUpcoming:3).To help brand our playlist, we've decided to add an overlay transformation using our Cloudinary logo to every video in the playlist. We take advantage of effects like opacity and brightness, plus placement parameters to get the logo to look just the way we want.
demoplayer.playlistByTag('video_race', {
      sourceParams: { overlay: "cloudinary_icon", opacity: 80,
          effect: "brightness:200", width: 100, gravity: "north_east",
          x: 20, y: 10 }, autoAdvance: 0,
      repeat: true,
      presentUpcoming: 4
})
Add a sorter function
Our playlist is being generated automatically, but we want to have some control over the order. We can do that by writing a simple CompareFunction-style sorter. In this case, we're sorting alphabetically by the publicID value:
var abcSorter = function(a, b) {
      if (a.publicId < b.publicId) return -1;
      if (a.publicId > b.publicId) return 1;
      return 0;
};
Now we just need to add the sorter function as one of our playlist options:
3. Grab the popcorn!
As you can see, it was pretty simple to embed a video player with an automatically generated playlist, custom transformation settings, a cool logo overlay, nice title/sub-title bar, and modern 'up next' thumbnails.
Now enjoy the show:
Stop agonizing and start streaming!
All it takes is a (free) Cloudinary account to start working with Cloudinary's open source video player.
And as you've seen, it only takes a few minutes to add the code that will help you be a part of all those crazy statistics we mentioned at the beginning of this post: increase your conversions, keep people on your site longer, and maximize the experience for everyone who views your video content, to name a few!
Get the all the video player details from the video player guide and API reference and start fiddling with the examples on the Cloudinary Video Player Demo and Code Pen.
And then start creating your own! We can't wait to see what you decide to do with all the treasures in this package. Let us know!
https://demo.cloudinary.com/video-player/


