Cloudinary Blog

Cloudinary’s most popular image processing add-ons

By Orly Bogler
Our most popular add-ons and how to utilize them

Perhaps some of you readers that have been around for a while remember our add-ons launch 2 years back, when we introduced a number of third party image processing products, fully integrated into the Cloudinary image management pipeline. Since then our add-ons marketplace has grown, both in our offerings and in usage. We now have 11 add-ons offering various capabilities and improvements.

I decided to take a peek and see which of our add-ons are most frequently used and popular amongst our customers.

Advanced Facial Attribute Detection

Firstly, we have our Advanced Facial Attribute Detection add-on. The ‘Face API' of Microsoft's Cognitive Services allows you to accurately and automatically detect eyes, nose and other facial attributes in your photos. An in depth blog post describing this powerful add-on is coming up in the next couple of weeks, so stay tuned :)

For example:

Ruby:
Copy to clipboard
cl_image_tag("cloudinary_team.jpg", :transformation=>[
  {:overlay=>"santa_hat", :effect=>"trim"},
  {:gravity=>"north_east", :width=>1.0, :height=>2.3, :crop=>"lpad"},
  {:gravity=>"adv_eyes", :flags=>["region_relative", "layer_apply"], :width=>2.6, :crop=>"scale"},
  {:width=>500, :crop=>"scale"}
  ])
PHP v1:
Copy to clipboard
cl_image_tag("cloudinary_team.jpg", array("transformation"=>array(
  array("overlay"=>"santa_hat", "effect"=>"trim"),
  array("gravity"=>"north_east", "width"=>"1.0", "height"=>"2.3", "crop"=>"lpad"),
  array("gravity"=>"adv_eyes", "flags"=>array("region_relative", "layer_apply"), "width"=>"2.6", "crop"=>"scale"),
  array("width"=>500, "crop"=>"scale")
  )))
PHP v2:
Copy to clipboard
(new ImageTag('cloudinary_team.jpg'))
  ->overlay(
      Overlay::source(Source::image('santa_hat')
        ->transformation((new ImageTransformation())
          ->reshape(Reshape::trim())
          ->resize(Resize::limitPad()->width(1.0)->height(2.3)->gravity(Gravity::compass(Compass::northEast())))
          ->resize(Resize::scale()->width(Expression::expression(2.6))
            ->regionRelative())))
      ->position((new Position())
        ->gravity(Gravity::focusOn(FocusOn::advancedEyes()))))
    ->resize(Resize::scale()->width(500));
Python:
Copy to clipboard
CloudinaryImage("cloudinary_team.jpg").image(transformation=[
  {'overlay': "santa_hat", 'effect': "trim"},
  {'gravity': "north_east", 'width': "1.0", 'height': "2.3", 'crop': "lpad"},
  {'gravity': "adv_eyes", 'flags': ["region_relative", "layer_apply"], 'width': "2.6", 'crop': "scale"},
  {'width': 500, 'crop': "scale"}
  ])
Node.js:
Copy to clipboard
cloudinary.image("cloudinary_team.jpg", {transformation: [
  {overlay: "santa_hat", effect: "trim"},
  {gravity: "north_east", width: "1.0", height: "2.3", crop: "lpad"},
  {gravity: "adv_eyes", flags: ["region_relative", "layer_apply"], width: "2.6", crop: "scale"},
  {width: 500, crop: "scale"}
  ]})
Java:
Copy to clipboard
cloudinary.url().transformation(new Transformation()
  .overlay(new Layer().publicId("santa_hat")).effect("trim").chain()
  .gravity("north_east").width(1.0).height(2.3).crop("lpad").chain()
  .gravity("adv_eyes").flags("region_relative", "layer_apply").width(2.6).crop("scale").chain()
  .width(500).crop("scale")).imageTag("cloudinary_team.jpg");
JS:
Copy to clipboard
cloudinary.imageTag('cloudinary_team.jpg', {transformation: [
  {overlay: new cloudinary.Layer().publicId("santa_hat"), effect: "trim"},
  {gravity: "north_east", width: "1.0", height: "2.3", crop: "lpad"},
  {gravity: "adv_eyes", flags: ["region_relative", "layer_apply"], width: "2.6", crop: "scale"},
  {width: 500, crop: "scale"}
  ]}).toHtml();
jQuery:
Copy to clipboard
$.cloudinary.image("cloudinary_team.jpg", {transformation: [
  {overlay: new cloudinary.Layer().publicId("santa_hat"), effect: "trim"},
  {gravity: "north_east", width: "1.0", height: "2.3", crop: "lpad"},
  {gravity: "adv_eyes", flags: ["region_relative", "layer_apply"], width: "2.6", crop: "scale"},
  {width: 500, crop: "scale"}
  ]})
React:
Copy to clipboard
<Image publicId="cloudinary_team.jpg" >
  <Transformation overlay="santa_hat" effect="trim" />
  <Transformation gravity="north_east" width="1.0" height="2.3" crop="lpad" />
  <Transformation gravity="adv_eyes" flags={["region_relative", "layer_apply"]} width="2.6" crop="scale" />
  <Transformation width="500" crop="scale" />
</Image>
Vue.js:
Copy to clipboard
<cld-image publicId="cloudinary_team.jpg" >
  <cld-transformation :overlay="santa_hat" effect="trim" />
  <cld-transformation gravity="north_east" width="1.0" height="2.3" crop="lpad" />
  <cld-transformation gravity="adv_eyes" flags={["region_relative", "layer_apply"]} width="2.6" crop="scale" />
  <cld-transformation width="500" crop="scale" />
</cld-image>
Angular:
Copy to clipboard
<cl-image public-id="cloudinary_team.jpg" >
  <cl-transformation overlay="santa_hat" effect="trim">
  </cl-transformation>
  <cl-transformation gravity="north_east" width="1.0" height="2.3" crop="lpad">
  </cl-transformation>
  <cl-transformation gravity="adv_eyes" flags={{["region_relative", "layer_apply"]}} width="2.6" crop="scale">
  </cl-transformation>
  <cl-transformation width="500" crop="scale">
  </cl-transformation>
</cl-image>
.NET:
Copy to clipboard
cloudinary.Api.UrlImgUp.Transform(new Transformation()
  .Overlay(new Layer().PublicId("santa_hat")).Effect("trim").Chain()
  .Gravity("north_east").Width(1.0).Height(2.3).Crop("lpad").Chain()
  .Gravity("adv_eyes").Flags("region_relative", "layer_apply").Width(2.6).Crop("scale").Chain()
  .Width(500).Crop("scale")).BuildImageTag("cloudinary_team.jpg")
Android:
Copy to clipboard
MediaManager.get().url().transformation(new Transformation()
  .overlay(new Layer().publicId("santa_hat")).effect("trim").chain()
  .gravity("north_east").width(1.0).height(2.3).crop("lpad").chain()
  .gravity("adv_eyes").flags("region_relative", "layer_apply").width(2.6).crop("scale").chain()
  .width(500).crop("scale")).generate("cloudinary_team.jpg");
iOS:
Copy to clipboard
imageView.cldSetImage(cloudinary.createUrl().setTransformation(CLDTransformation()
  .setOverlay("santa_hat").setEffect("trim").chain()
  .setGravity("north_east").setWidth(1.0).setHeight(2.3).setCrop("lpad").chain()
  .setGravity("adv_eyes").setFlags("region_relative", "layer_apply").setWidth(2.6).setCrop("scale").chain()
  .setWidth(500).setCrop("scale")).generate("cloudinary_team.jpg")!, cloudinary: cloudinary)

Image with hat overlay automatically placed above all faces detected

JPEGmini

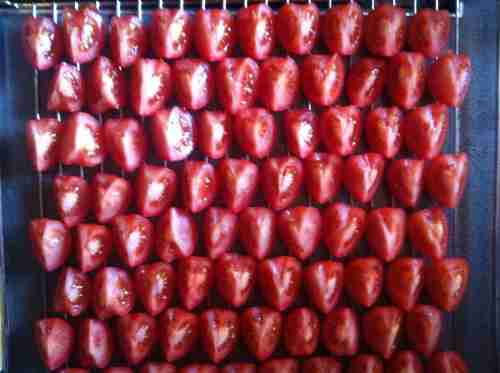
Our second most popular add-on, the JPEGmini image optimization add-on, is an add-on that helps reduce the file size of your photos by up to 5x, while keeping their original quality and JPEG format. Any Cloudinary image transformation can be chained as well of course. When using the JPEGmini add-on, your images will be automatically optimized using advanced visual algorithms achieving maximum file size reduction while maintaining a very high visual quality. This seems like a no-brainer to me - who wouldn’t want their images automatically optimized in such a manner?? You can also read more about this add-on in this blog post.

For example:
Ruby:
Copy to clipboard
cl_image_tag("tomatoes_cooking.jpg", :quality=>"jpegmini:2", :width=>500, :crop=>"scale")
PHP v1:
Copy to clipboard
cl_image_tag("tomatoes_cooking.jpg", array("quality"=>"jpegmini:2", "width"=>500, "crop"=>"scale"))
PHP v2:
Copy to clipboard
(new ImageTag('tomatoes_cooking.jpg'))
  ->resize(Resize::scale()->width(500))
  ->delivery(Delivery::quality(Quality::jpegminiMedium()));
Python:
Copy to clipboard
CloudinaryImage("tomatoes_cooking.jpg").image(quality="jpegmini:2", width=500, crop="scale")
Node.js:
Copy to clipboard
cloudinary.image("tomatoes_cooking.jpg", {quality: "jpegmini:2", width: 500, crop: "scale"})
Java:
Copy to clipboard
cloudinary.url().transformation(new Transformation().quality("jpegmini:2").width(500).crop("scale")).imageTag("tomatoes_cooking.jpg");
JS:
Copy to clipboard
cloudinary.imageTag('tomatoes_cooking.jpg', {quality: "jpegmini:2", width: 500, crop: "scale"}).toHtml();
jQuery:
Copy to clipboard
$.cloudinary.image("tomatoes_cooking.jpg", {quality: "jpegmini:2", width: 500, crop: "scale"})
React:
Copy to clipboard
<Image publicId="tomatoes_cooking.jpg" >
  <Transformation quality="jpegmini:2" width="500" crop="scale" />
</Image>
Vue.js:
Copy to clipboard
<cld-image publicId="tomatoes_cooking.jpg" >
  <cld-transformation quality="jpegmini:2" width="500" crop="scale" />
</cld-image>
Angular:
Copy to clipboard
<cl-image public-id="tomatoes_cooking.jpg" >
  <cl-transformation quality="jpegmini:2" width="500" crop="scale">
  </cl-transformation>
</cl-image>
.NET:
Copy to clipboard
cloudinary.Api.UrlImgUp.Transform(new Transformation().Quality("jpegmini:2").Width(500).Crop("scale")).BuildImageTag("tomatoes_cooking.jpg")
Android:
Copy to clipboard
MediaManager.get().url().transformation(new Transformation().quality("jpegmini:2").width(500).crop("scale")).generate("tomatoes_cooking.jpg");
iOS:
Copy to clipboard
imageView.cldSetImage(cloudinary.createUrl().setTransformation(CLDTransformation().setQuality("jpegmini:2").setWidth(500).setCrop("scale")).generate("tomatoes_cooking.jpg")!, cloudinary: cloudinary)
Image automatically optimized with JPEGmini add-on

Imagga crop & scale

Imagga's crop & scale smart cropping technology automatically chooses the most visually appealing parts of your images and crops them accordingly, extending Cloudinary's powerful cropping capabilities with automatic cropping that is not only based on detected faces. When using the Imagga add-on, your images will be scaled and cropped based on automatically calculated areas of interest within each specific photo. This add-on was also described in this blog post.

For example:

  • Original image: Original image
  • Imagga scaled:
    Ruby:
    Copy to clipboard
    cl_image_tag("/dog_field.jpg", :height=>200, :width=>400, :crop=>"imagga_scale")
    PHP v1:
    Copy to clipboard
    cl_image_tag("/dog_field.jpg", array("height"=>200, "width"=>400, "crop"=>"imagga_scale"))
    PHP v2:
    Copy to clipboard
    (new ImageTag('/dog_field.jpg'))
      ->resize(Resize::imaggaScale()->width(400)->height(200));
    Python:
    Copy to clipboard
    CloudinaryImage("/dog_field.jpg").image(height=200, width=400, crop="imagga_scale")
    Node.js:
    Copy to clipboard
    cloudinary.image("/dog_field.jpg", {height: 200, width: 400, crop: "imagga_scale"})
    Java:
    Copy to clipboard
    cloudinary.url().transformation(new Transformation().height(200).width(400).crop("imagga_scale")).imageTag("/dog_field.jpg");
    JS:
    Copy to clipboard
    cloudinary.imageTag('/dog_field.jpg', {height: 200, width: 400, crop: "imagga_scale"}).toHtml();
    jQuery:
    Copy to clipboard
    $.cloudinary.image("/dog_field.jpg", {height: 200, width: 400, crop: "imagga_scale"})
    React:
    Copy to clipboard
    <Image publicId="/dog_field.jpg" >
      <Transformation height="200" width="400" crop="imagga_scale" />
    </Image>
    Vue.js:
    Copy to clipboard
    <cld-image publicId="/dog_field.jpg" >
      <cld-transformation height="200" width="400" crop="imagga_scale" />
    </cld-image>
    Angular:
    Copy to clipboard
    <cl-image public-id="/dog_field.jpg" >
      <cl-transformation height="200" width="400" crop="imagga_scale">
      </cl-transformation>
    </cl-image>
    .NET:
    Copy to clipboard
    cloudinary.Api.UrlImgUp.Transform(new Transformation().Height(200).Width(400).Crop("imagga_scale")).BuildImageTag("/dog_field.jpg")
    Android:
    Copy to clipboard
    MediaManager.get().url().transformation(new Transformation().height(200).width(400).crop("imagga_scale")).generate("/dog_field.jpg");
    iOS:
    Copy to clipboard
    imageView.cldSetImage(cloudinary.createUrl().setTransformation(CLDTransformation().setHeight(200).setWidth(400).setCrop("imagga_scale")).generate("/dog_field.jpg")!, cloudinary: cloudinary)
    Image automatically scaled with Imagga add-on

Imagga auto tagging

The Imagga auto tagging add-on automatically categorizes and tags images, according to the categories detected in each image. The Imagga add-on can automatically tell you what's in a photo by returning a list of detected categories and the confidence score for each of them. User uploaded images can now be fully categorized automatically! You can read more about it in this great blog post.

Other cool add-ons

Although the add-ons described above are statistically of the highest usage amongst our customers, there are a few more that are so useful and cool, I had to highlight them as well:

VIESUS image enhancement

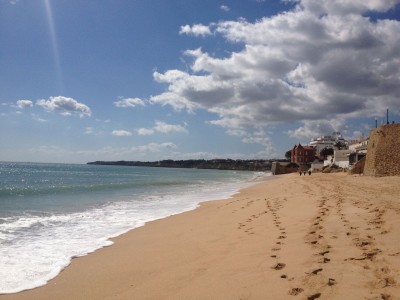
The VIESUS image enhancement add-on does just that, enhancing the visual quality of your photos, automatically adjusting brightness and color, restoring sharpness, removing noise and correcting for overexposure or underexposure. We speak in length about it here.

For example:

  • Original image: Original image
  • VIESUS enhanced:
    Ruby:
    Copy to clipboard
    cl_image_tag("beach_day.jpg", :effect=>"viesus_correct", :width=>400, :crop=>"scale")
    PHP v1:
    Copy to clipboard
    cl_image_tag("beach_day.jpg", array("effect"=>"viesus_correct", "width"=>400, "crop"=>"scale"))
    PHP v2:
    Copy to clipboard
    (new ImageTag('beach_day.jpg'))
      ->resize(Resize::scale()->width(400))
      ->adjust(Adjust::viesusCorrect());
    Python:
    Copy to clipboard
    CloudinaryImage("beach_day.jpg").image(effect="viesus_correct", width=400, crop="scale")
    Node.js:
    Copy to clipboard
    cloudinary.image("beach_day.jpg", {effect: "viesus_correct", width: 400, crop: "scale"})
    Java:
    Copy to clipboard
    cloudinary.url().transformation(new Transformation().effect("viesus_correct").width(400).crop("scale")).imageTag("beach_day.jpg");
    JS:
    Copy to clipboard
    cloudinary.imageTag('beach_day.jpg', {effect: "viesus_correct", width: 400, crop: "scale"}).toHtml();
    jQuery:
    Copy to clipboard
    $.cloudinary.image("beach_day.jpg", {effect: "viesus_correct", width: 400, crop: "scale"})
    React:
    Copy to clipboard
    <Image publicId="beach_day.jpg" >
      <Transformation effect="viesus_correct" width="400" crop="scale" />
    </Image>
    Vue.js:
    Copy to clipboard
    <cld-image publicId="beach_day.jpg" >
      <cld-transformation effect="viesus_correct" width="400" crop="scale" />
    </cld-image>
    Angular:
    Copy to clipboard
    <cl-image public-id="beach_day.jpg" >
      <cl-transformation effect="viesus_correct" width="400" crop="scale">
      </cl-transformation>
    </cl-image>
    .NET:
    Copy to clipboard
    cloudinary.Api.UrlImgUp.Transform(new Transformation().Effect("viesus_correct").Width(400).Crop("scale")).BuildImageTag("beach_day.jpg")
    Android:
    Copy to clipboard
    MediaManager.get().url().transformation(new Transformation().effect("viesus_correct").width(400).crop("scale")).generate("beach_day.jpg");
    iOS:
    Copy to clipboard
    imageView.cldSetImage(cloudinary.createUrl().setTransformation(CLDTransformation().setEffect("viesus_correct").setWidth(400).setCrop("scale")).generate("beach_day.jpg")!, cloudinary: cloudinary)
    Image automatically enhanced with VIESUS add-on

WebPurify

WebPurify image moderation comes in handy in various user generated content sites, by automatically moderating all photos uploaded to your application, thus preventing adult-oriented and inappropriate images from creeping into your websites or mobile applications. Custom moderation profiles can also be defined with our assistance, making sure that whatever images you don’t want appearing on your website - will be automatically screened out. You can read more about this add-on here.

Remove The Background

Remove The Background editing add-on automatically removes any background from your photos, resulting in a transparent-background image focusing only on the main object within your photo. This is especially common in e-commerce, media, and news sites in order to place the main element of the image on either white or color backgrounds. The final result better integrates an image into a site or specific page’s graphic design. This blog post describes this add-on in detail.

Which add-ons are your favorite? Are there any additional add-ons you wish we had? We would love to get your feedback and thoughts!

Recent Blog Posts

Our $2B Valuation

By
Blackstone Growth Invests in Cloudinary

When we started our journey in 2012, we were looking to improve our lives as developers by making it easier for us to handle the arduous tasks of handling images and videos in our code. That initial line of developer code has evolved into a full suite of media experience solutions driven by a mission that gradually revealed itself over the course of the past 10 years: help companies unleash the full potential of their media to create the most engaging visual experiences.

Read more
Direct-to-Consumer E-Commerce Requires Compelling Visual Experiences

When brands like you adopt a direct–to-consumer (DTC) e-commerce approach with no involvement of retailers or marketplaces, you gain direct and timely insight into evolving shopping behaviors. Accordingly, you can accommodate shoppers’ preferences by continually adjusting your product offering and interspersing the shopping journey with moments of excitement and intrigue. Opportunities abound for you to cultivate engaging customer relationships.

Read more
Automatically Translating Videos for an International Audience

No matter your business focus—public service, B2B integration, recruitment—multimedia, in particular video, is remarkably effective in communicating with the audience. Before, making video accessible to diverse viewers involved tasks galore, such as eliciting the service of production studios to manually dub, transcribe, and add subtitles. Those operations were costly and slow, especially for globally destined content.

Read more
Cloudinary Helps Minted Manage Its Image-Generation Pipeline at Scale

Shoppers return time and again to Minted’s global online community of independent artists and designers because they know they can count on unique, statement-making products of the highest quality there. Concurrently, the visual imagery on Minted.com must do justice to the designs into which the creators have poured their hearts and souls. For Minted’s VP of Engineering David Lien, “Because we are a premium brand, we need to ensure that every single one of our product images matches the selected configuration exactly. For example, if you pick an 18x24 art print on blue canvas, we will show that exact combination on the hero images in the PDF.”

Read more
Highlights on ImageCon 2021 and a Preview of ImageCon 2022

New year, same trend! Visual media will continue to play a monumental role in driving online conversions. To keep up with visual-experience trends and best practices, Cloudinary holds an annual conference called ImageCon, a one-of-a-kind event that helps attendees create the most engaging visual experiences possible.

Read more