With video becoming increasingly popular, especially across social media, it’s as important as ever to ensure that your videos aren’t one of the hundreds that people just scroll on past. Toward that end, successful techniques have emerged over the last couple of years, e.g.:
- Overlaying a progress indicator so viewers can see the video length if no controls are displayed.
- Adding branded overlays to grab attention and spotlight your company.
- Showing subtitles to enhance the understanding of muted videos.
Cloudinary can help you as developers automate and build on those tasks so that you can deliver engaging video experiences to viewers at scale. In addition to simple ways for adding impressive overlays and slick subtitles, we’ve now added the final piece of the jigsaw with our new progressbar effect. Given that you’re building videos on Cloudinary’s Dynamic Video platform, why not also make use of the advanced AI functionalities, such as automatic content-aware cropping, so that you can push out videos to social networks in the right aspect ratio while keeping all the best content intact?
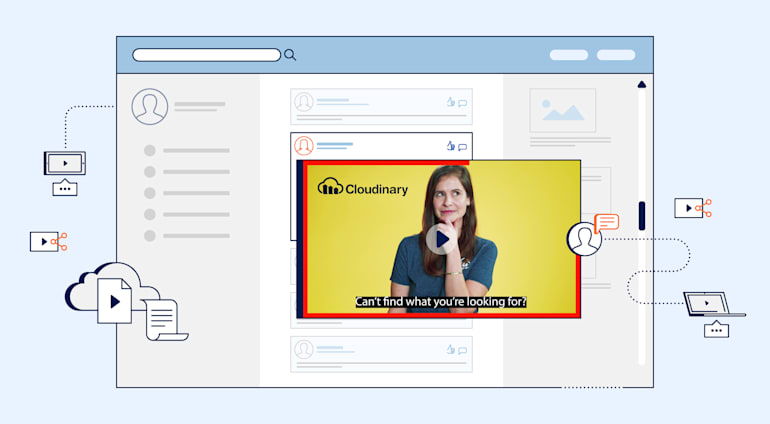
Below is an example video with four user-friendly features:
- A progress indicator frame
- Automatically generated subtitles
- A branded overlay
- AI-based resizing to a different aspect ratio through content-aware cropping
This post shows you how to automate the creation of videos—just like the one above—with the Node.js SDK as an example. You can then easily produce your own engaging experiences for viewers and get those who scroll nonstop to stop at your videos.

Step 1: Make Progress
Over the past few years, the video experience at social networks has evolved in such a way that we’re all used to videos auto-playing when scrolled into view, often without displaying any controls until we interact with them. Even though such an approach increases the number of views, if viewers have no clues of a video’s length, they might just keep scrolling.
To alert viewers how much precious time a no-controls video takes out of their day, content creators have overlaid a progress indicator—either along the bottom or around the frame of the video. If viewers can see that the video is reasonably short, they might very well watch till the end.
Cloudinary offers a simple way in which to overlay a progress indicator with no calculations required: Just add the progressbar effect (e_progressbar in URLs), and Cloudinary does all the heavy lifting. By default, that configuration adds a 10-px.-wide red progress bar, as shown in this example:
You can customize the progress bar to fit your requirements. Three parameters are available:
typecontrols the type of progress indicator, which can bebarorframe.colorcontrols the color of the indicator.widthcontrols the width (in pixels) of the indicator.
See this example of a slightly thinner orange-frame effect:
For details on how to take that effect to videos, check out the documentation on progressbar.
Step 2: Turn Off Sound and Turn On Subtitles
According to research by Verizon and Publicis, 93% of mobile users watch videos with the sound off, and 80% would watch an entire video if subtitles were available. Such statistics show how important it is for silent videos to be compelling for viewers. However, creating subtitles can be laborious and time consuming, especially in the case of a huge volume of videos. Gratifyingly, with one of Cloudinary’s Video Transcription add-ons, (Google Speech, or Azure), you can automate that task and combine it with Cloudinary’s other features.
After enabling one of the Video Transcription add-ons, you can generate subtitles automatically on upload by setting the raw_convert parameter to either google\_speech or azure\_video\_indexer, which adds, by default, a RAW transcript file with the same name as your video to your account. You can also generate a Video Text Tracks (VTT) file with that option, as shown in the upload code below, assuming that you have installed the Node.js SDK and created a Cloudinary instance:
cloudinary.v2.uploader.upload("my-video.mp4",
   {
       resource_type: "video",
       type: "upload",
       raw_convert: "azure_video_indexer:vtt",// Auto-generate subtitles and save vtt file
       use_filename: true,
       notification_url: "my-webhook"
   })
Once upload is complete, you’ll see the transcript and VTT files in your Media Library. Because text tracks do not work on social networks, you must overlay the transcript files as subtitles, as in this example:
Nice, simple, and all automated. Now you can share your videos with the sound off and subtitles on.
Step 3: Keep It on Brand
Given the importance of delivering an optimal video experience for the viewers who scroll nonstop, how do you ensure that they remember your brand after only a quick glance? One simple technique is to overlay bold imagery for your brand.
To do that, just pick your brand assets and then resize, and position them with Cloudinary's tried-and-tested overlay transformation technique.
This example shows an overlay of the Cloudinary fashion-demo logo in the top right corner of the video and the Cloudinary logo in the bottom left. Both logos are conspicuous and impossible to miss.
cloudinary.video("digital-asset-management-with-cloudinary", {transformation: [
  {color: "#db8226", effect: "colorize", gravity: "north_east", overlay: "cld_fashion", width: "0.5", x: "0.01", y: "0.01", crop: "scale"},
  {color: "#0e2f5a", effect: "colorize", gravity: "south_west", overlay: "cld_logo_white", width: "0.5", x: "0.01", y: "0.01", crop: "scale"}
  ]})
Step 4: Generate the Final Video
Now combine the effects and overlays to create the final video. In this case, you deliver two videos: one in a square (1:1) aspect ratio and the other in a vertical (9:16) aspect ratio. Do that with Cloudinary’s AI-based automatic content-aware cropping. That feature automatically identifies the most relevant content from each frame of the video and crops accordingly, ensuring that the content stays intact when you add it to various social networks in different aspect ratios.
Automatic content-aware cropping starts with the generation of a heatmap from the video. Since that process can take a while to complete, trigger it as an eager transformation when uploading the video. The example below shows a width setting of 500 px., an aspect ratio of 1:1, a fill crop mode, and auto gravity, which sparks the creation of a heatmap. Once the process is complete, you can generate other video sizes on the fly.
cloudinary.v2.uploader.upload("my-video.mp4",
   {
       resource_type: "video",
       type: "upload",
       use_filename: true,
       eager: [// Eagerly trigger automatic content-aware cropping.
           {
               width: "500",
               crop: "fill",
               aspect_ratio: "1:1",
               gravity: "auto"
           }
       ],
       eager_notification_url: "my-eager-webhook",
       notification_url: "my-webhook"
   })
Now combine the above code and add all the previous transformations to generate the final URL. Below is a complete code example for generating the final video output:
cloudinary.v2.uploader.upload("my-video.mp4",
    {
        resource_type: "video",
        type: "upload",
        raw_convert: "google_speech:vtt",// Auto-generate subtitles and save vtt file
        use_filename: true,
        eager: [// Eagerly trigger automatic content-aware cropping.
            {
                width: "500",
                crop: "fill",
                aspect_ratio: "1:1",
                gravity: "auto"
            }
        ]
    }).then((result) => {
        var publicId = result.public_id;// Save public ID of video we just uploaded.
        generateFinalVideo(publicId)

    }).catch((error) => {
        console.log(error);
    })

var generateFinalVideo = async function (publicId) {
    await new Promise(resolve => setTimeout(resolve, 90000));// Wait for 90 seconds for subtitle generation to complete. In production a webhook should be used.
    let finalVideo = cloudinary.url(publicId + '.mp4', {// Build URL for final video.
        resource_type: "video",
        transformation: [
            {// Crop video to the right size using automatic content-aware cropping.
                width: "500",
                aspect_ratio: "1:1",
                crop: "fill",
                gravity: "auto"
            },
            {// Add brand overlays, using named transformation.
                transformation: ["cld_brand_blog_color"]
            },
            {// Add the automatically generated subtitles as an overlay.
                overlay: {
                    resource_type: "subtitles",
                    public_id: publicId + ".vtt"
                }
            },
            {// Add the progressbar frame around the video.
                effect: "progressbar:frame:DB8226:8"
            }
        ]
    });

    console.log(finalVideo)// Output the final video URL.

}
This is the final video URL that is output from the code above:
You can edit the URL, which includes the square crop, to generate a vertical 9:16 video. For example:
Summary
There you have it: a basic tutorial on how to combine various Cloudinary features to automate the generation of social videos, preventing content from being scrolled past. Give it a try yourself by starting with our new feature, i.e., overlay a progress indicator to your videos by adding the progressbar effect (e_progressbar in URLs).
For more ways to enhance video experience, check out our documentation on video transformations.


