These days, e-commerce websites are trending clean and sleek, almost always spotlighting high-quality product photos with a flat-white, solid-color, or transparent background. Many practical and well-validated reasons support this choice, making it clear that this is no passing fad. This graphic illustrates a few of them:

How do website or app developers deliver hundreds or thousands of solid- or transparent-background images, including user-generated content? Getting someone to manually edit them with an editing tool definitely doesn’t scale.
Cloudinary has the solution in its AI Background-Removal Add-On. The add-on's deep-learning and artificial-intelligence algorithms identify the primary subject in each photo's foreground and then accurately remove its background in mere seconds.
Moments after you upload your photos, . . .
|
These . . .
|
Become These!
|

|

|

|

|
Cloudinary is a robust media-management platform that leverages automation and deep-learning algorithms to simplify and accelerate workflows for website and app developers, from bulk uploads of raw photos to on-the-fly transformations for creating multiple media variants, optimizations, and responsive delivery to all devices.
To apply the AI Background Removal Add-On to images during or after uploading them to your Cloudinary account, add the background_removal parameter set to cloudinary_ai in your upload or update command. When triggered in the method call, the add-on analyzes the image and then replaces the originally uploaded image with a transparent PNG containing only the foreground image. Cloudinary backs up the original for later retrieval, if required.For example, to have Cloudinary replace the the baseball JPG image above with a transparent PNG, you could run the following upload command:
Ruby:
Cloudinary::Uploader.upload("baseball.jpg",
  :public_id => "baseball_no_bg",
  :background_removal => 'cloudinary_ai',
  :notification_url => "https://mysite.example.com/hooks")
PHP:
\Cloudinary\Uploader::upload("baseball.jpg",
  array(
    "public_id" => "baseball_no_bg",
    "background_removal" => "cloudinary_ai",
    "notification_url" => "https://mysite.example.com/hooks"));
Python:
cloudinary.uploader.upload("baseball.jpg",
  public_id = "baseball_no_bg",
  background_removal = "cloudinary_ai",
  notification_url = "https://mysite.example.com/hooks")
Node.js:
cloudinary.v2.uploader.upload("baseball.jpg",
  { public_id: "baseball_no_bg",
    background_removal: "cloudinary_ai",
    notification_url: "https://mysite.example.com/hooks" }),
  function(error, result){console.log(result);});
Java:
cloudinary.uploader().upload("baseball.jpg",
  ObjectUtils.asMap(
    "public_id", "baseball_no_bg",
    "background_removal", "cloudinary_ai",
    "notification_url", "https://mysite.example.com/hooks"));
.NET:
var uploadParams = new ImageUploadParams(){
  File = new FileDescription(@"baseball.jpg"),
  PublicId = "baseball_no_bg",
  BackgroundRemoval = "cloudinary_ai",
  NotificationUrl = "https://mysite.example.com/hooks"};
var uploadResult = cloudinary.Upload(uploadParams);
Even though background removal takes only a few seconds, if you plan to deliver the transparent image on your site or app immediately after upload, it's a good idea to include the notification_url parameter in your upload or upload command, which activates a webhook that receives the removal status. You can then check if removal is still in progress and, if so, you might want to display a placeholder image or an in-progress animation until the process is complete.
Segmenting objects from images is a fundamental and well-studied challenge in the computer industry. Nowadays, neural networks are the “secret sauce” behind many segmentation tasks that enable state-of-the-art functionality for various applications, such as autonomous driving, medical analysis, and industrial planning.
As shown above, erasing image backgrounds with Cloudinary’s add-on is simple for the developers who use it.. Behind the scenes, however, the Cloudinary engine must perform these three complex tasks::
Identify the salient objects in the image to determine which objects to classify as foreground according to the context and scene composition.
Segment the salient objects. Most neutral networks today produce only coarse maps through standard segmentation techniques. For images slated for production, the segmentation maps of foreground versus background pixels must be near-perfect to achieve seamless background removal, e.g., proper segmentation of fur and hair requires meticulous processing.
Currently, no large public dataset exists for accurate background removal, rendering it all the more difficult to acquire the quantity of media assets necessary for training neutral networks.
Separate the foreground as an alpha layer.
While addressing those challenges, we at Cloudinary also focused on finding ways to optimize our algorithm to deliver the high performance our customers expect; that means processing images of all sizes at scale.
When you prepare the delivery URLs for the resulting transparent PNGs, you might want to do one or both of the following:
Add a solid or neutral background to the images and then optimize the updated images using Cloudinary's auto‑format (f_auto) and auto-quality (q_auto) parameters to reduce file sizes with no loss in visual quality.
Eliminate unnecessary white space in the transparent images, which still retain the original dimensions, and then center them within the updated dimensions To do that, just add the auto-cropping parameter, which tells Cloudinary to identify the visible items in the images and then resize and crop them around these foreground objects to the size and aspect ratio you request.
For example, the Background Removal Add-On returns this cute stuffed sheep without the table and wall in the background but with a lot of redundant white space on the right. Also, this transparent PNG boasts a hefty weight of slightly over 1 MB.
How about transforming the image further in the following ways?
- Convert the image to a square JPG with a white background.
- Optimize the image with
f_auto and q_auto.
- Add the
g_auto:subject parameter to ensure that, no matter the aspect ratio, Cloudinary automatically selects the location for the cropping based on the main—in this case, the only—subject in the image.
- Add a thin gray border.
Ruby:
cl_image_tag("docs/rmv_bgd/stuffed.jpg", :transformation=>[
  {:quality=>"auto", :gravity=>"auto:subject", :height=>1280, :aspect_ratio=>"1", :background=>"white", :crop=>"thumb"},
  {:border=>"1px_solid_gray"}
  ])
PHP v1:
cl_image_tag("docs/rmv_bgd/stuffed.jpg", array("transformation"=>array(
  array("quality"=>"auto", "gravity"=>"auto:subject", "height"=>1280, "aspect_ratio"=>"1", "background"=>"white", "crop"=>"thumb"),
  array("border"=>"1px_solid_gray")
  )))
PHP v2:
(new ImageTag('docs/rmv_bgd/stuffed'))
  ->resize(Resize::thumbnail()->height(1280)->aspectRatio(1)
    ->gravity(Gravity::autoGravity()->autoFocus(AutoFocus::focusOn(FocusOn::subject()))))
  ->backgroundColor(Color::WHITE)
  ->delivery(Delivery::format(Format::auto()))
  ->delivery(Delivery::quality(Quality::auto()))
  ->border(Border::solid(1, Color::GRAY));
Python:
CloudinaryImage("docs/rmv_bgd/stuffed.jpg").image(transformation=[
  {'quality': "auto", 'gravity': "auto:subject", 'height': 1280, 'aspect_ratio': "1", 'background': "white", 'crop': "thumb"},
  {'border': "1px_solid_gray"}
  ])
Node.js:
cloudinary.image("docs/rmv_bgd/stuffed.jpg", {transformation: [
  {quality: "auto", gravity: "auto:subject", height: 1280, aspect_ratio: "1", background: "white", crop: "thumb"},
  {border: "1px_solid_gray"}
  ]})
Java:
cloudinary.url().transformation(new Transformation()
  .quality("auto").gravity("auto:subject").height(1280).aspectRatio("1").background("white").crop("thumb").chain()
  .border("1px_solid_gray")).imageTag("docs/rmv_bgd/stuffed.jpg");
JS:
cloudinary.imageTag('docs/rmv_bgd/stuffed.jpg', {transformation: [
  {quality: "auto", gravity: "auto:subject", height: 1280, aspectRatio: "1", background: "white", crop: "thumb"},
  {border: "1px_solid_gray"}
  ]}).toHtml();
jQuery:
$.cloudinary.image("docs/rmv_bgd/stuffed.jpg", {transformation: [
  {quality: "auto", gravity: "auto:subject", height: 1280, aspect_ratio: "1", background: "white", crop: "thumb"},
  {border: "1px_solid_gray"}
  ]})
React:
<Image publicId="docs/rmv_bgd/stuffed.jpg" >
  <Transformation quality="auto" gravity="auto:subject" height="1280" aspectRatio="1" background="white" crop="thumb" />
  <Transformation border="1px_solid_gray" />
</Image>
Vue.js:
<cld-image publicId="docs/rmv_bgd/stuffed.jpg" >
  <cld-transformation quality="auto" gravity="auto:subject" height="1280" aspectRatio="1" background="white" crop="thumb" />
  <cld-transformation border="1px_solid_gray" />
</cld-image>
Angular:
<cl-image public-id="docs/rmv_bgd/stuffed.jpg" >
  <cl-transformation quality="auto" gravity="auto:subject" height="1280" aspect-ratio="1" background="white" crop="thumb">
  </cl-transformation>
  <cl-transformation border="1px_solid_gray">
  </cl-transformation>
</cl-image>
.NET:
cloudinary.Api.UrlImgUp.Transform(new Transformation()
  .Quality("auto").Gravity("auto:subject").Height(1280).AspectRatio("1").Background("white").Crop("thumb").Chain()
  .Border("1px_solid_gray")).BuildImageTag("docs/rmv_bgd/stuffed.jpg")
Android:
MediaManager.get().url().transformation(new Transformation()
  .quality("auto").gravity("auto:subject").height(1280).aspectRatio("1").background("white").crop("thumb").chain()
  .border("1px_solid_gray")).generate("docs/rmv_bgd/stuffed.jpg");
iOS:
imageView.cldSetImage(cloudinary.createUrl().setTransformation(CLDTransformation()
  .setQuality("auto").setGravity("auto:subject").setHeight(1280).setAspectRatio("1").setBackground("white").setCrop("thumb").chain()
  .setBorder("1px_solid_gray")).generate("docs/rmv_bgd/stuffed.jpg")!, cloudinary: cloudinary)
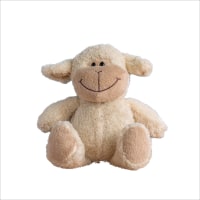
That way, even if you retain the image’s original height of 1,280 pixels, the delivered version would still weigh only 92 KB.
Another excellent way to eliminate excessive whitespace from images is to apply Cloudinary's trimming effect (trim), like this:
Ruby:
cl_image_tag("docs/rmv_bgd/stuffed.jpg", :transformation=>[
  {:quality=>"auto", :effect=>"trim", :background=>"white"},
  {:border=>"1px_solid_gray"}
  ])
PHP v1:
cl_image_tag("docs/rmv_bgd/stuffed.jpg", array("transformation"=>array(
  array("quality"=>"auto", "effect"=>"trim", "background"=>"white"),
  array("border"=>"1px_solid_gray")
  )))
PHP v2:
(new ImageTag('docs/rmv_bgd/stuffed'))
  ->reshape(Reshape::trim())
  ->backgroundColor(Color::WHITE)
  ->delivery(Delivery::format(Format::auto()))
  ->delivery(Delivery::quality(Quality::auto()))
  ->border(Border::solid(1, Color::GRAY));
Python:
CloudinaryImage("docs/rmv_bgd/stuffed.jpg").image(transformation=[
  {'quality': "auto", 'effect': "trim", 'background': "white"},
  {'border': "1px_solid_gray"}
  ])
Node.js:
cloudinary.image("docs/rmv_bgd/stuffed.jpg", {transformation: [
  {quality: "auto", effect: "trim", background: "white"},
  {border: "1px_solid_gray"}
  ]})
Java:
cloudinary.url().transformation(new Transformation()
  .quality("auto").effect("trim").background("white").chain()
  .border("1px_solid_gray")).imageTag("docs/rmv_bgd/stuffed.jpg");
JS:
cloudinary.imageTag('docs/rmv_bgd/stuffed.jpg', {transformation: [
  {quality: "auto", effect: "trim", background: "white"},
  {border: "1px_solid_gray"}
  ]}).toHtml();
jQuery:
$.cloudinary.image("docs/rmv_bgd/stuffed.jpg", {transformation: [
  {quality: "auto", effect: "trim", background: "white"},
  {border: "1px_solid_gray"}
  ]})
React:
<Image publicId="docs/rmv_bgd/stuffed.jpg" >
  <Transformation quality="auto" effect="trim" background="white" />
  <Transformation border="1px_solid_gray" />
</Image>
Vue.js:
<cld-image publicId="docs/rmv_bgd/stuffed.jpg" >
  <cld-transformation quality="auto" effect="trim" background="white" />
  <cld-transformation border="1px_solid_gray" />
</cld-image>
Angular:
<cl-image public-id="docs/rmv_bgd/stuffed.jpg" >
  <cl-transformation quality="auto" effect="trim" background="white">
  </cl-transformation>
  <cl-transformation border="1px_solid_gray">
  </cl-transformation>
</cl-image>
.NET:
cloudinary.Api.UrlImgUp.Transform(new Transformation()
  .Quality("auto").Effect("trim").Background("white").Chain()
  .Border("1px_solid_gray")).BuildImageTag("docs/rmv_bgd/stuffed.jpg")
Android:
MediaManager.get().url().transformation(new Transformation()
  .quality("auto").effect("trim").background("white").chain()
  .border("1px_solid_gray")).generate("docs/rmv_bgd/stuffed.jpg");
iOS:
imageView.cldSetImage(cloudinary.createUrl().setTransformation(CLDTransformation()
  .setQuality("auto").setEffect("trim").setBackground("white").chain()
  .setBorder("1px_solid_gray")).generate("docs/rmv_bgd/stuffed.jpg")!, cloudinary: cloudinary)

Besides those steps performed by the Background Removal Add-On, optimizing images for delivery often involves other transformations, such as replacing the transparent background and converting the image to a non-PNG format. You might wonder why we don't just return a (smaller) JPG that already has a solid white background.
We're glad you asked.
.
In addition to offering the same advantages as those from a white background, a light, neutral-colored background breaks the monotony of an all-white page, sometimes even conveying a certain style or personality without distracting visitors from the main theme.. Walmart.com’s apparel landing-page is one example.

To have Cloudinary automatically change the background color, set the value of the background (b_) parameter in your URL to the desired color. For example, here’s the image of the sheep with a very light-blue background.
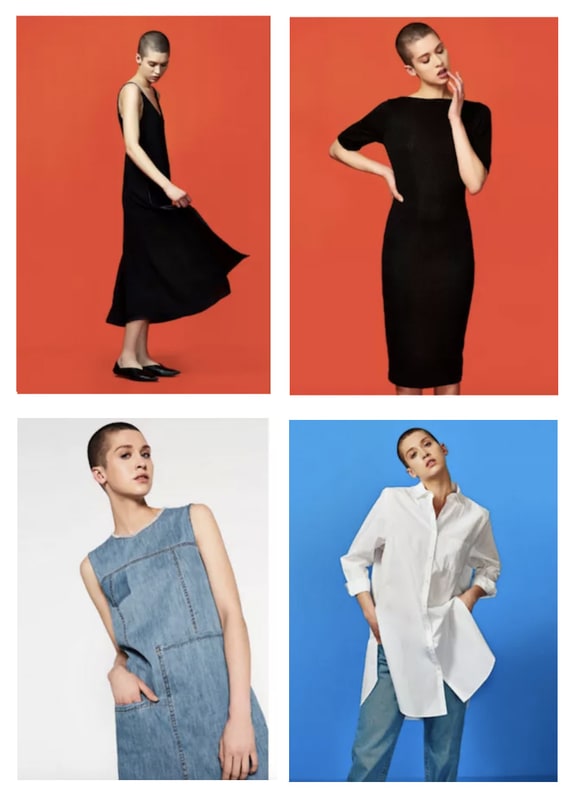
Conversely, some retailers, such as Zara.com, opt for brightly colored backgrounds for white or black products and neutral backgrounds for other merchandise.
A fully transparent background makes it easy to add shadows. Even if the object in the original photograph has a shadow, the Background Removal Add-On will remove that shadow, enabling you to add a consistent shadow location and size for all your product images.
For example:
 Remote Control (Original)
 Backgroundless Remote Control
 Backgroundless remote control with an added shadow
Below is the transformation used for the far right image shown above: :
Ruby:
cl_image_tag("docs/rmv_bgd/remote.png", :transformation=>[
  {:width=>200, :quality=>"auto", :crop=>"scale"},
  {:effect=>"shadow:50", :x=>6, :y=>6}
  ])
PHP v1:
cl_image_tag("docs/rmv_bgd/remote.png", array("transformation"=>array(
  array("width"=>200, "quality"=>"auto", "crop"=>"scale"),
  array("effect"=>"shadow:50", "x"=>6, "y"=>6)
  )))
PHP v2:
(new ImageTag('docs/rmv_bgd/remote.png'))
  ->resize(Resize::scale()->width(200))
  ->delivery(Delivery::quality(Quality::auto()))
  ->effect(Effect::shadow()->strength(50)->offsetX(6)->offsetY(6));
Python:
CloudinaryImage("docs/rmv_bgd/remote.png").image(transformation=[
  {'width': 200, 'quality': "auto", 'crop': "scale"},
  {'effect': "shadow:50", 'x': 6, 'y': 6}
  ])
Node.js:
cloudinary.image("docs/rmv_bgd/remote.png", {transformation: [
  {width: 200, quality: "auto", crop: "scale"},
  {effect: "shadow:50", x: 6, y: 6}
  ]})
Java:
cloudinary.url().transformation(new Transformation()
  .width(200).quality("auto").crop("scale").chain()
  .effect("shadow:50").x(6).y(6)).imageTag("docs/rmv_bgd/remote.png");
JS:
cloudinary.imageTag('docs/rmv_bgd/remote.png', {transformation: [
  {width: 200, quality: "auto", crop: "scale"},
  {effect: "shadow:50", x: 6, y: 6}
  ]}).toHtml();
jQuery:
$.cloudinary.image("docs/rmv_bgd/remote.png", {transformation: [
  {width: 200, quality: "auto", crop: "scale"},
  {effect: "shadow:50", x: 6, y: 6}
  ]})
React:
<Image publicId="docs/rmv_bgd/remote.png" >
  <Transformation width="200" quality="auto" crop="scale" />
  <Transformation effect="shadow:50" x="6" y="6" />
</Image>
Vue.js:
<cld-image publicId="docs/rmv_bgd/remote.png" >
  <cld-transformation width="200" quality="auto" crop="scale" />
  <cld-transformation effect="shadow:50" x="6" y="6" />
</cld-image>
Angular:
<cl-image public-id="docs/rmv_bgd/remote.png" >
  <cl-transformation width="200" quality="auto" crop="scale">
  </cl-transformation>
  <cl-transformation effect="shadow:50" x="6" y="6">
  </cl-transformation>
</cl-image>
.NET:
cloudinary.Api.UrlImgUp.Transform(new Transformation()
  .Width(200).Quality("auto").Crop("scale").Chain()
  .Effect("shadow:50").X(6).Y(6)).BuildImageTag("docs/rmv_bgd/remote.png")
Android:
MediaManager.get().url().transformation(new Transformation()
  .width(200).quality("auto").crop("scale").chain()
  .effect("shadow:50").x(6).y(6)).generate("docs/rmv_bgd/remote.png");
iOS:
imageView.cldSetImage(cloudinary.createUrl().setTransformation(CLDTransformation()
  .setWidth(200).setQuality("auto").setCrop("scale").chain()
  .setEffect("shadow:50").setX(6).setY(6)).generate("docs/rmv_bgd/remote.png")!, cloudinary: cloudinary)
For fun, add the underlay parameter set to an image’s public ID to add background scenery for a green-screen-like effect..
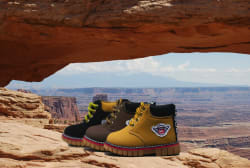
For example, with an instantaneous on-the-fly transformation, we can send our baseball player to outer space, get the dog off the couch, and place the hiking boots against natural scenery:
Below is the delivery code for the hiking boots image.
(Click the other transformed images in the right column above to see their delivery URLs in your browser.)
Ruby:
cl_image_tag("docs/rmv_bgd/shoes.png", :transformation=>[
  {:width=>800, :quality=>"auto", :crop=>"scale"},
  {:underlay=>"docs:canyon2", :gravity=>"south", :height=>1000}
  ])
PHP v1:
cl_image_tag("docs/rmv_bgd/shoes.png", array("transformation"=>array(
  array("width"=>800, "quality"=>"auto", "crop"=>"scale"),
  array("underlay"=>"docs:canyon2", "gravity"=>"south", "height"=>1000)
  )))
PHP v2:
(new ImageTag('docs/rmv_bgd/shoes.png'))
  ->resize(Resize::scale()->width(800))
  ->delivery(Delivery::format(Format::auto()))
  ->delivery(Delivery::quality(Quality::auto()))
  ->underlay(
      Underlay::source(Source::image('docs/canyon2')
        ->transformation((new ImageTransformation())
          ->resize(Resize::scale()->height(1000))))
      ->position((new Position())
        ->gravity(Gravity::compass(Compass::south()))
  ));
Python:
CloudinaryImage("docs/rmv_bgd/shoes.png").image(transformation=[
  {'width': 800, 'quality': "auto", 'crop': "scale"},
  {'underlay': "docs:canyon2", 'gravity': "south", 'height': 1000}
  ])
Node.js:
cloudinary.image("docs/rmv_bgd/shoes.png", {transformation: [
  {width: 800, quality: "auto", crop: "scale"},
  {underlay: "docs:canyon2", gravity: "south", height: 1000}
  ]})
Java:
cloudinary.url().transformation(new Transformation()
  .width(800).quality("auto").crop("scale").chain()
  .underlay(new Layer().publicId("docs:canyon2")).gravity("south").height(1000)).imageTag("docs/rmv_bgd/shoes.png");
JS:
cloudinary.imageTag('docs/rmv_bgd/shoes.png', {transformation: [
  {width: 800, quality: "auto", crop: "scale"},
  {underlay: new cloudinary.Layer().publicId("docs:canyon2"), gravity: "south", height: 1000}
  ]}).toHtml();
jQuery:
$.cloudinary.image("docs/rmv_bgd/shoes.png", {transformation: [
  {width: 800, quality: "auto", crop: "scale"},
  {underlay: new cloudinary.Layer().publicId("docs:canyon2"), gravity: "south", height: 1000}
  ]})
React:
<Image publicId="docs/rmv_bgd/shoes.png" >
  <Transformation width="800" quality="auto" crop="scale" />
  <Transformation underlay="docs:canyon2" gravity="south" height="1000" />
</Image>
Vue.js:
<cld-image publicId="docs/rmv_bgd/shoes.png" >
  <cld-transformation width="800" quality="auto" crop="scale" />
  <cld-transformation :underlay="docs:canyon2" gravity="south" height="1000" />
</cld-image>
Angular:
<cl-image public-id="docs/rmv_bgd/shoes.png" >
  <cl-transformation width="800" quality="auto" crop="scale">
  </cl-transformation>
  <cl-transformation underlay="docs:canyon2" gravity="south" height="1000">
  </cl-transformation>
</cl-image>
.NET:
cloudinary.Api.UrlImgUp.Transform(new Transformation()
  .Width(800).Quality("auto").Crop("scale").Chain()
  .Underlay(new Layer().PublicId("docs:canyon2")).Gravity("south").Height(1000)).BuildImageTag("docs/rmv_bgd/shoes.png")
Android:
MediaManager.get().url().transformation(new Transformation()
  .width(800).quality("auto").crop("scale").chain()
  .underlay(new Layer().publicId("docs:canyon2")).gravity("south").height(1000)).generate("docs/rmv_bgd/shoes.png");
iOS:
imageView.cldSetImage(cloudinary.createUrl().setTransformation(CLDTransformation()
  .setWidth(800).setQuality("auto").setCrop("scale").chain()
  .setUnderlay("docs:canyon2").setGravity("south").setHeight(1000)).generate("docs/rmv_bgd/shoes.png")!, cloudinary: cloudinary)
To display product photos on your own site or marketplaces, or to offer background-removal service for the photos uploaded by your users, you need an automated, efficient, and reliable solution that ultimately delivers images with a sharp and clear foreground image. Once the original background is “out of the picture,” you can freely deliver your product images with white backgrounds, neutral colors, bright colors, or in context of a realistic scene.
Do all of the above if you wish. One way is to place all your background-free images—along with other product images or videos—in a single carousel-controlled gallery, such as Cloudinary's Product Gallery. For details, see this blog post, this video tutorial, and the Product Gallery documentation.
To get started, sign up for a free Cloudinary account and register for the free tier of Cloudinary’s AI Background Removal Add-On. Also, check out the add-on’s documentation.
We'd love to see your transformed photos in the comments below.
Have a look at these articles:


 Remote Control (Original)
 Backgroundless Remote Control
 Backgroundless remote control with an added shadow


