Since its initial release in October 2016 by the Chopin brothers as a server-side framework that runs on top of Vue.js, Nuxt (aka Nuxt.js) has gained prominence in both intuitiveness and performance. The framework offers numerous built-in features based on a modular architecture, bringing ease and simplicity to web development. Not surprisingly, Nuxt.js has seen remarkable growth in adoption by the developer community along with accolades galore. At this writing, Nuxt has earned over 30K stars on GitHub and 96 active modules with over a million downloads per month. And the upward trend is ongoing.

This post describes the benefits Nuxt affords modern web development and the procedures for uploading and optimizing media files in Nuxt with its new Cloudinary module.
What Benefit Does Nuxt Offer?
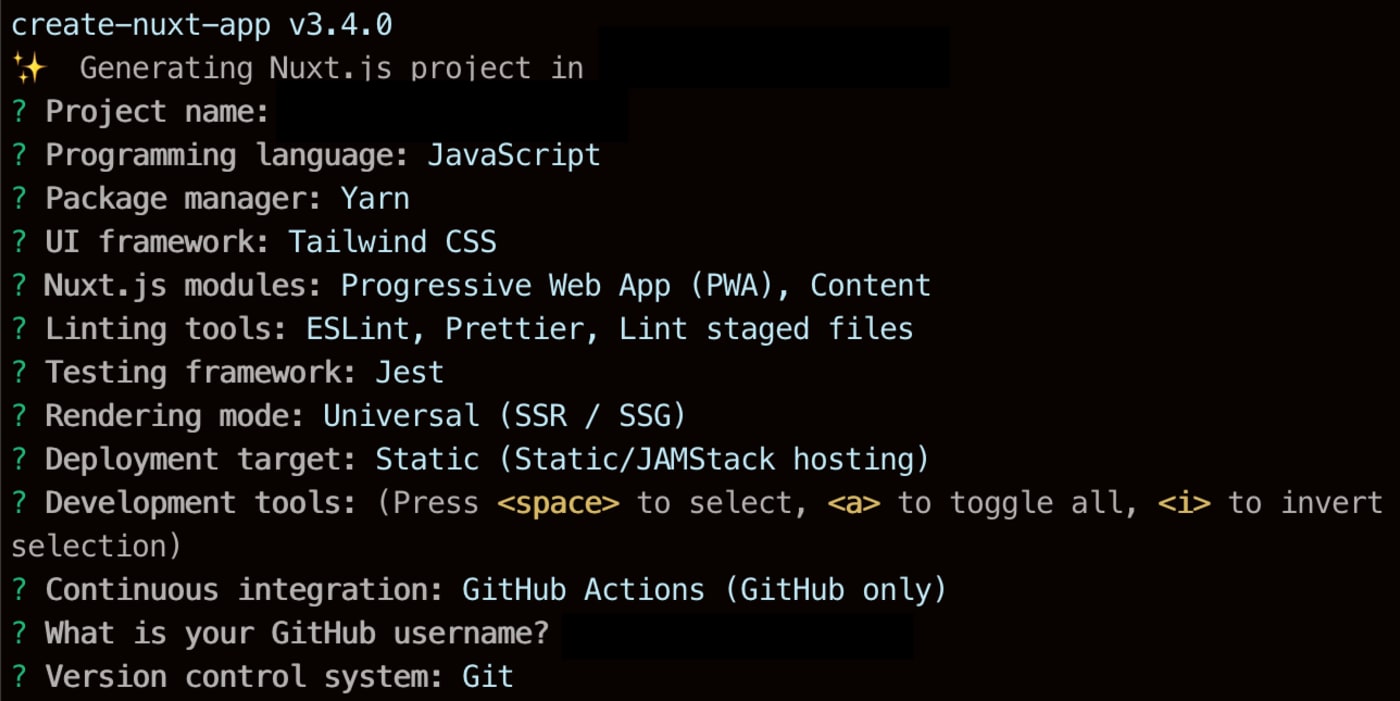
By eliminating code distribution of server and client, Nuxt offers a straightforward and intuitive project-starter template:
Conveniently, you can configure your project settings while installing Nuxt, for example:

Nuxt’s built-in, folder-based routing system automates the generation of routes.
 Structure of the Nuxt Project Template
Also, with a few codelines, you can output your project’s codebase as regular server-side rendering, as a full static site, or as a single-page application (SPA), like this:
/* nuxt.config.js */
export default {
 mode: 'universal', // or 'spa'
 target: 'static', // for static site generation
}
That's not all. Read on for three more amazing capabilities offered by Nuxt.
SEO Improvements
Unlike regular SPAs, Nuxt's SPA build mode combines the server side’s auto pre-generating the static content before sending it back to the browser as static markup. Such a step reduces loading time while enabling Google to crawl the site at ease.
Full Static Site (Jamstack) Rendering With Nuxt SPA
To keep up with the Jamstack trend, Nuxt introduced a while ago the nuxt generate command with smart build-caching, which is probably the most significant innovation move in the framework’s history. That command does the following:
- Build a static version of your web project.
- Generate all the pages during the build process and place them in their
routedirectory. - Cache the previous build and, if the command detects no changes in the codebase during the new deployment, reuse that build, eliminating the need for a web server.
Headless CMS Through Nuxt’s Content Module
Nuxt’s content module (@nuxt/content) acts as a Git-based, headless CMS for managing content from Markdown, YAML, and CSV files stored in the same project directory, displaying it in your Nuxt app. Perform these two steps to adopt this module:
Install the package:
yarn add @nuxt/content #OR npm i @nuxt/contentAdd the module to
nuxt.config.js:Now you can fetch content with the instance
$contentand display the content with the Vue component<nuxt-content>:<template> <nuxt-content :document="document" /> </template> <script> export default { async asyncData({ $content }) { /* fetch content from the file "hello-world" located in content/posts folder */ const document = await $content('posts/hello-world').fetch() return { document } } } </script>
Dynamic and Inspired Community
Nuxt boasts a very well-maintained developer community, complete with a host of useful resources:
- Nuxt modules: Modules for Nuxt projects.
- Nuxt community on GitHub: Community projects and modules
- Nuxt Discord: Official forum for discussions and exchanges on Nuxt news
What is the Procedure for Uploading and Optimizing Media Assets in Nuxt With Cloudinary?
The latest Nuxt integration module from Cloudinary offers you straightforward APIs to efficiently upload and optimize media files. To set up Cloudinary in Nuxt, run this command:
Next, configure your Cloudinary module:
/*nuxt.config.js*/
export default {
    modules: [
        "@nuxtjs/cloudinary"
    ],
    cloudinary: {
        cloudName: "your-cloud-name",
        apiKey: "your-API-key",
        apiSecret: "your-API-secret"
    }
}
You can then use Cloudinary in your Nuxt app. For instance:
* To transform an image and get its delivery URL:
$cloudinary.image.url("image-public-id", {
    width: 300,
    height: 300,
    crop: "thumbnail"
})
To fetch a remote image and transform it:
To transform a video and get its URL:
$cloudinary.video.url("video-publid-id", {
width: 300,
height: 300,
crop: "crop"
})
To upload and transform media assets:
Server-Side Upload
/* server-side */
const image = $cloudinary.upload("file-base64-url",{
public_id: 'example',
eager: [{
    gravity: 'auto',
    width: 300,
    height: 300,
    crop: 'crop'
}]
}
Client-Side Upload With an Upload Preset
To optimize and display an image with a placeholder through a component:
What’s Next With Cloudinary’s Capabilities?
Now that Cloudinary is integrated with Nuxt, you can optimize further in numerous ways, especially in combination with the Nuxt Content module, e.g.: * Retrieve and display media assets in your app during build time. * Upload and optimize local assets with content hooks before displaying the content. Also, you can seamlessly serve images and videos with ready-to-use components. Do have a try!


