Cloudinary Blog

Vue.js Tutorial: Image Optimization for Web Apps

Vue.js Tutorial: Image Optimization for Web Apps

Launched in 2014 as an open-source JavaScript framework for building user interfaces for web apps, Vue.js has become a tool of choice for many developers. Currently, Vue.js is the most starred front-end JavaScript framework on GitHub with over 145,000 stars.

Optimizing images that reside in Vue.js apps with the Cloudinary Vue SDK is a cinch. This article explains why and describes the steps.

Background

The smaller an image, the faster the browser can download it for display. Optimizing images means delivering them in the smallest-possible size without losing visual quality, leading to bandwidth savings and faster loading of websites.

That image optimization is mandatory for all websites is a case that can easily be made. That’s because faster image loading on websites invariably lifts audience conversion rates. In fact, studies have shown that half the online visitors expect a website to load within two seconds.

Cloudinary the Media Full-Stack Platform

With Cloudinary, you can effectively and efficiently optimize digital media—regardless of the programming language in which you code—because Cloudinary automatically performs most of the related tasks by default. Besides, the platform’s delivery process through integrated content delivery networks (CDNs) ensures prompt transmission to both desktop and mobile audiences.

After uploading images to Cloudinary, you can leverage its major capabilities, as described in the subsections below. For details on other Cloudinary options for optimizing images, read the documentation section Image Transformations.

Automatic Quality Adjustment and Encoding

Adding the q_auto parameter to an image’s URL enables Cloudinary to select the optimal quality-compression level and encoding settings according to the image content, format, and viewing browser. The result is, gratifyingly, a smaller image that still retains its original visual quality. See this example:

Ruby:
Copy to clipboard
cl_image_tag("woman.jpg", :quality=>"auto")
PHP v1:
Copy to clipboard
cl_image_tag("woman.jpg", array("quality"=>"auto"))
PHP v2:
Copy to clipboard
(new ImageTag('woman.jpg'))
  ->delivery(Delivery::quality(Quality::auto()));
Python:
Copy to clipboard
CloudinaryImage("woman.jpg").image(quality="auto")
Node.js:
Copy to clipboard
cloudinary.image("woman.jpg", {quality: "auto"})
Java:
Copy to clipboard
cloudinary.url().transformation(new Transformation().quality("auto")).imageTag("woman.jpg");
JS:
Copy to clipboard
cloudinary.imageTag('woman.jpg', {quality: "auto"}).toHtml();
jQuery:
Copy to clipboard
$.cloudinary.image("woman.jpg", {quality: "auto"})
React:
Copy to clipboard
<Image publicId="woman.jpg" >
  <Transformation quality="auto" />
</Image>
Vue.js:
Copy to clipboard
<cld-image publicId="woman.jpg" >
  <cld-transformation quality="auto" />
</cld-image>
Angular:
Copy to clipboard
<cl-image public-id="woman.jpg" >
  <cl-transformation quality="auto">
  </cl-transformation>
</cl-image>
.NET:
Copy to clipboard
cloudinary.Api.UrlImgUp.Transform(new Transformation().Quality("auto")).BuildImageTag("woman.jpg")
Android:
Copy to clipboard
MediaManager.get().url().transformation(new Transformation().quality("auto")).generate("woman.jpg");
iOS:
Copy to clipboard
imageView.cldSetImage(cloudinary.createUrl().setTransformation(CLDTransformation().setQuality("auto")).generate("woman.jpg")!, cloudinary: cloudinary)
woman

To further adjust the visual quality, edit q_auto to read q_auto:best, q_auto:low, q_auto:good, or q_auto:eco.

Automatic Formatting

Adding the f_auto parameter to an image’s URL enables Cloudinary to analyze the image content and select the best format for delivery, such as WebP for Chrome browsers or JPEG-XR for Internet Explorer browsers. For all other browsers, Cloudinary delivers images in their original format.

Note
With f_auto and q_auto set, Cloudinary would, as a rule, pick WebP or JPEG-XR for display on Chrome or IE, respectively. However, if the quality algorithm determines that PNG-8 or PNG-24 is optimal, Cloudinary might pick either of those formats for certain images.

Resizing and Cropping

To resize an image, add either or both of these two parameters to the URL: width (w) and height (h). Cloudinary leaves the aspect ratio as is while performing resizing tasks.

Here are three examples:

Ruby:
Copy to clipboard
cl_image_tag("sample.jpg", :width=>0.5, :crop=>"scale")
PHP v1:
Copy to clipboard
cl_image_tag("sample.jpg", array("width"=>"0.5", "crop"=>"scale"))
PHP v2:
Copy to clipboard
(new ImageTag('sample.jpg'))
  ->resize(Resize::scale()->width(0.5));
Python:
Copy to clipboard
CloudinaryImage("sample.jpg").image(width="0.5", crop="scale")
Node.js:
Copy to clipboard
cloudinary.image("sample.jpg", {width: "0.5", crop: "scale"})
Java:
Copy to clipboard
cloudinary.url().transformation(new Transformation().width(0.5).crop("scale")).imageTag("sample.jpg");
JS:
Copy to clipboard
cloudinary.imageTag('sample.jpg', {width: "0.5", crop: "scale"}).toHtml();
jQuery:
Copy to clipboard
$.cloudinary.image("sample.jpg", {width: "0.5", crop: "scale"})
React:
Copy to clipboard
<Image publicId="sample.jpg" >
  <Transformation width="0.5" crop="scale" />
</Image>
Vue.js:
Copy to clipboard
<cld-image publicId="sample.jpg" >
  <cld-transformation width="0.5" crop="scale" />
</cld-image>
Angular:
Copy to clipboard
<cl-image public-id="sample.jpg" >
  <cl-transformation width="0.5" crop="scale">
  </cl-transformation>
</cl-image>
.NET:
Copy to clipboard
cloudinary.Api.UrlImgUp.Transform(new Transformation().Width(0.5).Crop("scale")).BuildImageTag("sample.jpg")
Android:
Copy to clipboard
MediaManager.get().url().transformation(new Transformation().width(0.5).crop("scale")).generate("sample.jpg");
iOS:
Copy to clipboard
imageView.cldSetImage(cloudinary.createUrl().setTransformation(CLDTransformation().setWidth(0.5).setCrop("scale")).generate("sample.jpg")!, cloudinary: cloudinary)
sample
Ruby:
Copy to clipboard
cl_image_tag("sample.jpg", :height=>200, :crop=>"scale")
PHP v1:
Copy to clipboard
cl_image_tag("sample.jpg", array("height"=>200, "crop"=>"scale"))
PHP v2:
Copy to clipboard
(new ImageTag('sample.jpg'))
  ->resize(Resize::scale()->height(200));
Python:
Copy to clipboard
CloudinaryImage("sample.jpg").image(height=200, crop="scale")
Node.js:
Copy to clipboard
cloudinary.image("sample.jpg", {height: 200, crop: "scale"})
Java:
Copy to clipboard
cloudinary.url().transformation(new Transformation().height(200).crop("scale")).imageTag("sample.jpg");
JS:
Copy to clipboard
cloudinary.imageTag('sample.jpg', {height: 200, crop: "scale"}).toHtml();
jQuery:
Copy to clipboard
$.cloudinary.image("sample.jpg", {height: 200, crop: "scale"})
React:
Copy to clipboard
<Image publicId="sample.jpg" >
  <Transformation height="200" crop="scale" />
</Image>
Vue.js:
Copy to clipboard
<cld-image publicId="sample.jpg" >
  <cld-transformation height="200" crop="scale" />
</cld-image>
Angular:
Copy to clipboard
<cl-image public-id="sample.jpg" >
  <cl-transformation height="200" crop="scale">
  </cl-transformation>
</cl-image>
.NET:
Copy to clipboard
cloudinary.Api.UrlImgUp.Transform(new Transformation().Height(200).Crop("scale")).BuildImageTag("sample.jpg")
Android:
Copy to clipboard
MediaManager.get().url().transformation(new Transformation().height(200).crop("scale")).generate("sample.jpg");
iOS:
Copy to clipboard
imageView.cldSetImage(cloudinary.createUrl().setTransformation(CLDTransformation().setHeight(200).setCrop("scale")).generate("sample.jpg")!, cloudinary: cloudinary)
sample
Ruby:
Copy to clipboard
cl_image_tag("sample.jpg", :width=>200, :height=>100, :crop=>"scale")
PHP v1:
Copy to clipboard
cl_image_tag("sample.jpg", array("width"=>200, "height"=>100, "crop"=>"scale"))
PHP v2:
Copy to clipboard
(new ImageTag('sample.jpg'))
  ->resize(Resize::scale()->width(200)->height(100));
Python:
Copy to clipboard
CloudinaryImage("sample.jpg").image(width=200, height=100, crop="scale")
Node.js:
Copy to clipboard
cloudinary.image("sample.jpg", {width: 200, height: 100, crop: "scale"})
Java:
Copy to clipboard
cloudinary.url().transformation(new Transformation().width(200).height(100).crop("scale")).imageTag("sample.jpg");
JS:
Copy to clipboard
cloudinary.imageTag('sample.jpg', {width: 200, height: 100, crop: "scale"}).toHtml();
jQuery:
Copy to clipboard
$.cloudinary.image("sample.jpg", {width: 200, height: 100, crop: "scale"})
React:
Copy to clipboard
<Image publicId="sample.jpg" >
  <Transformation width="200" height="100" crop="scale" />
</Image>
Vue.js:
Copy to clipboard
<cld-image publicId="sample.jpg" >
  <cld-transformation width="200" height="100" crop="scale" />
</cld-image>
Angular:
Copy to clipboard
<cl-image public-id="sample.jpg" >
  <cl-transformation width="200" height="100" crop="scale">
  </cl-transformation>
</cl-image>
.NET:
Copy to clipboard
cloudinary.Api.UrlImgUp.Transform(new Transformation().Width(200).Height(100).Crop("scale")).BuildImageTag("sample.jpg")
Android:
Copy to clipboard
MediaManager.get().url().transformation(new Transformation().width(200).height(100).crop("scale")).generate("sample.jpg");
iOS:
Copy to clipboard
imageView.cldSetImage(cloudinary.createUrl().setTransformation(CLDTransformation().setWidth(200).setHeight(100).setCrop("scale")).generate("sample.jpg")!, cloudinary: cloudinary)
sample

To have Cloudinary crop an image, add the crop (c) parameter to the URL and specify one of these modes: scale, fit, mfit, fill, lfill, limit, pad, lpad, mpad, crop, thumb, imagga_crop, or imagga_scale.

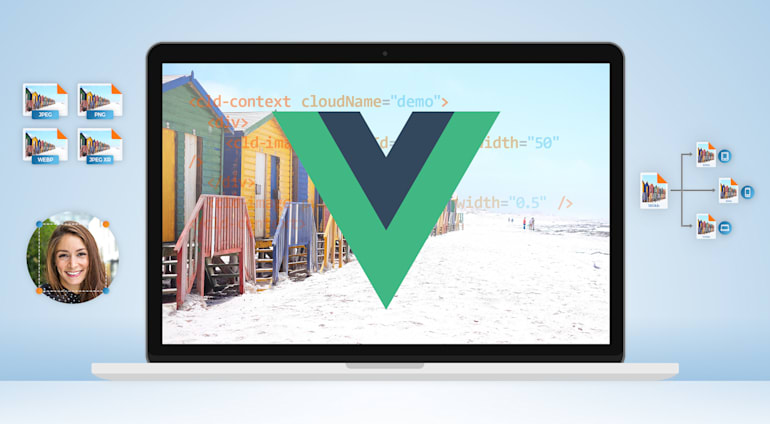
Vue.js Tutorial: Image Optimization in Web Apps

This section describes how to optimize images in Vue.js apps with the Cloudinary SDK.

Automatic Quality and Encoding

You can edit the quality level of images in Vue.js apps with JavaScript code, for example:

Copy to clipboard
<cld-image publicId="cave.jpg" ><cld-transformation quality="50" /></cld-image>

Here, under quality, 50 is your choice of quality level on a 0-100 scale. The lower the level, the smaller the image size. The higher the level, the larger the size and the better the quality.

But why do it manually like that? Instead, automate that compression task by taking advantage of Cloudinary with this code:

Copy to clipboard
<cld-image publicId="prosper.jpg" >
  <cld-transformation quality="auto" />
</cld-image>

Adding the quality=”auto” parameter is the best way to significantly reduce image size through automation.

To further narrow the size or to ensure higher-than-average quality, replace auto with auto:best , auto:good, auto:eco, or auto:low, for example:

Copy to clipboard
<cld-image publicId="prosper.jpg" >
  <cld-transformation quality="auto:low" />
</cld-image>

Automatic Formatting

Adding the fetchFormat=”auto” parameter is the best way to ensure that Cloudinary delivers your images in the optimum format to the viewing browser in question. See this code example:

Copy to clipboard
<cld-image publicId="prosper.jpg" >
  <cld-transformation width="500" fetchFormat="auto" crop="scale" />
</cld-image>

Vue.js

Image Resizing and Cropping

By adding the relevant parameters to the <cld-image> and <cld-transformation> Vue.js components, you can resize and crop images, for example:

Copy to clipboard
<cld-image publicId="family_bench.jpg" >
  <cld-transformation width="150" height="150" gravity="faces" crop="fill" />
</cld-image>

The fill cropping method generates an image size of 150 x 150 pixels while retaining the original aspect ratio.

To change the size, assign new values to the width and height parameters. Note this neat Cloudinary capability: if you set only width or height, Cloudinary automatically updates the other parameter to maintain the aspect ratio. An example:

Copy to clipboard
<cld-image publicId="prosper.jpg" >
  <cld-transformation width="0.5" crop="scale" />
</cld-image>

Here, despite the width adjustment with the 0.5 value, the aspect ratio remains intact.

Another example:

Copy to clipboard
<cld-image publicId="prosper.jpg" >
  <cld-transformation width="200" height="100" crop="scale" />
</cld-image>

Here, too, the aspect ratio stays the same notwithstanding the resizing to a width of 200 and a height of 100 pixels.

Conclusion

This Vue.js tutorial for Image optimization is paramount for the performance of web apps. Do mount the effort to properly optimize and cache their images. For an excellent insight and suggestions on how to optimize JPEG images without compromising quality, read this Cloudinary article.


Further Reading on Image Optimization

Recent Blog Posts

Our $2B Valuation

By
Blackstone Growth Invests in Cloudinary

When we started our journey in 2012, we were looking to improve our lives as developers by making it easier for us to handle the arduous tasks of handling images and videos in our code. That initial line of developer code has evolved into a full suite of media experience solutions driven by a mission that gradually revealed itself over the course of the past 10 years: help companies unleash the full potential of their media to create the most engaging visual experiences.

Read more
Direct-to-Consumer E-Commerce Requires Compelling Visual Experiences

When brands like you adopt a direct–to-consumer (DTC) e-commerce approach with no involvement of retailers or marketplaces, you gain direct and timely insight into evolving shopping behaviors. Accordingly, you can accommodate shoppers’ preferences by continually adjusting your product offering and interspersing the shopping journey with moments of excitement and intrigue. Opportunities abound for you to cultivate engaging customer relationships.

Read more
Automatically Translating Videos for an International Audience

No matter your business focus—public service, B2B integration, recruitment—multimedia, in particular video, is remarkably effective in communicating with the audience. Before, making video accessible to diverse viewers involved tasks galore, such as eliciting the service of production studios to manually dub, transcribe, and add subtitles. Those operations were costly and slow, especially for globally destined content.

Read more
Cloudinary Helps Minted Manage Its Image-Generation Pipeline at Scale

Shoppers return time and again to Minted’s global online community of independent artists and designers because they know they can count on unique, statement-making products of the highest quality there. Concurrently, the visual imagery on Minted.com must do justice to the designs into which the creators have poured their hearts and souls. For Minted’s VP of Engineering David Lien, “Because we are a premium brand, we need to ensure that every single one of our product images matches the selected configuration exactly. For example, if you pick an 18x24 art print on blue canvas, we will show that exact combination on the hero images in the PDF.”

Read more
Highlights on ImageCon 2021 and a Preview of ImageCon 2022

New year, same trend! Visual media will continue to play a monumental role in driving online conversions. To keep up with visual-experience trends and best practices, Cloudinary holds an annual conference called ImageCon, a one-of-a-kind event that helps attendees create the most engaging visual experiences possible.

Read more