TL;DR In our last article, we saw how Cloudinary is the perfect email image hosting solution for launching email marketing campaigns at scale. Today, we’ll explore this topic further, looking at how Cloudinary can create dynamic image banners that can be used to create highly personalized email marketing campaigns.
While email marketing is still a dominant channel to reach your customers, blindly sending generic emails doesn’t work well. Personalizing emails is key to a successful marketing campaign. This is where merge tags come in. Merge tags are one of the best features in email marketing. They enable us to send highly customized emails to our subscribers and eventually turn them into customers.
However, until now, most of us were restricted to personalize only the textual content in our email campaigns by using merge tags. In this article, we'll learn how to dynamically generate images using Cloudinary and merge tags. By the end of this tutorial, you’ll be able to create highly personalized email marketing campaigns with customized email banners, using nothing but the content from your merge tags and Cloudinary.
Before we get started, let’s quickly revisit the topic of merge tags and how to use them in our campaigns. If you’re familiar with merge tags, you can skip this section and jump to the next one.
What are Merge Tags?
Merge tags are placeholders of information used in email marketing campaigns. There are two steps to using a merge tag.
- You need to define the merge tag
- You need to have a data source for your merge tag (this is typically your email list)
One of the most famous examples of a merge tag is the |*FNAME*| tag, which is nothing but the first name of the person who you are emailing.
Take this email list for example:
 Table 1: Sample Email List
The table without any entry represents what is known in technical terms, the schema. In other words, it’s an empty table with only the columns. It gives you a pretty good idea as to what data to enter into the table.
How Do We Identify Merge Tags?
The first row of each column is the identifier of that column. In the first column of Table 1, the first row reads “First Name”, which is the identifier for that column. The merge tag maps to this identifier.
Each column’s identifier can have its own merge tag, but we typically use the common ones, i.e. First Name, Last Name and some more.
 Table 2: Merge Tags
By default, your email service provider would allocate the common merge tags to your email lists. Table 2 shows some of the most commonly used merge tags.
How do Merge Tags Work?
Merge tags are embedded in the body of the email. When sending the email, the ESP replaces the value of the merge tag for that particular email address, picked from the email list.
Take a look at this example, where we embed the |*FNAME*| merge tag in the email body:
Hi |*FNAME*|,
Thanks for subscribing to our newsletter. Here’s a copy of the ebook “Responsive Images with Cloudinary” we promised you.
Download Now
To your email marketing success,
Team ESP
Let’s assume that the email is being sent to mike@box.com.
When the actual email is sent, the merge tag points to the First Name field, whose value is replaced in the body of the email. (Refer Table 1)
The actual sent email would look something like this:
Hi Sam,
Thanks for subscribing to our newsletter. Here’s a copy of our ebook “Responsive Images with Cloudinary” we promised you.
Download now.
To your email marketing success,
Team ESP
Merge Tags in Subject Lines?
Merge tags enable us to use the word ‘Sam’ instead of a generic ‘Hi there’ or ‘Hello’. In fact, merge tags are pretty useful in crafting compelling email subject lines.
A generic email subject line for an ebook download would run:
Download your copy of Responsive Images with Cloudinary.
Sure, it'll get you some open rates. But with merge tags available, you can craft a more personalized subject line:
Sam - download your free copy of Responsive Images with Cloudinary.
However in your ESP, you would use the following code in your subject line:
|*FNAME*| - download your free copy of Responsive Images with Cloudinary.
Research has shown that the second option has higher open-rates. Personalizing emails helps a brand resonate with the reader. As a result, the reader feels more connected with the brand.
Where do Merge Tags Fall Short?
We know that merge tags enable us to send customized emails. However, it has only been linked to the text elements of the email. For example, the email body, the subject line or the recipient’s name. We weren’t able to generate customized images based on the content of the merge tags.
Cloudinary, on the other hand, is a platform built for on-the-fly image optimization and transformation. It makes perfect sense to connect the two pieces, which would enable us to create truly personalized email marketing campaigns.
For the remainder of this tutorial, we’ll learn how to use Cloudinary’s advanced image manipulation capabilities and the data from the merge tags, to craft highly customized images for our email marketing campaigns.
Use Case: Personalized Images in Email Marketing
Let’s take an example of a fictional SaaS company - HashMetrics - which operates a freemium business model. HashMetrics has two sets of active customers:
- People on the trial plan
- Paying customers
HashMetrics wants to run a promotional campaign, offering a flat 10 percent discount to paying customers, and a 20 percent discount to trial account customers.
For the purpose of simplicity, let’s assume that our HashMetric’s ESP has a similar dataset for the target email list, as shown in the table below:
 Table 3: Sample email list with discount information for HashMetric’s promotional campaign
The available merge tags are:

Let’s see how we can generate a customized email banner using Cloudinary’s on-demand image transformation and optimization platform.
Here’s the email campaign with the merge tags:
Hey |*FNAME*|,
We hope HashMetrics is helping you keep track of your digital marketing campaigns.
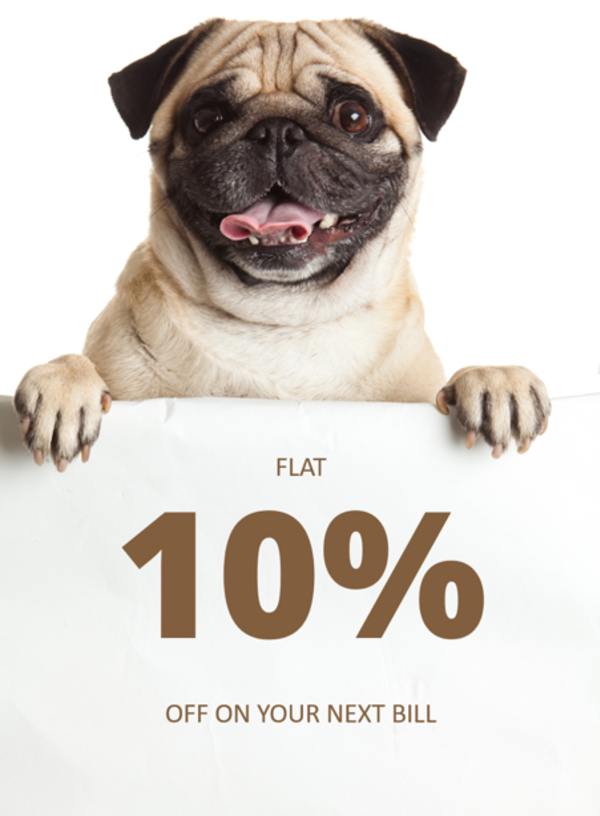
Holidays are around the corner and we have a special gift for you - a flat |*DISCOUNT*| percent off on your next bill, no matter your subscription.
We hope you’re enjoying using HashMetrics as much as we enjoy building it.
If you ever have any questions, please feel free to reach out to us via email at support@hasmetrics.io or by simply tweeting your query to @hashmetrics.
To your marketing success,
Team HashMetrics
The only thing missing in the email is the merge tag for the discount value. Here’s how we can dynamically generate the image with Cloudinary.
We start with the base image:
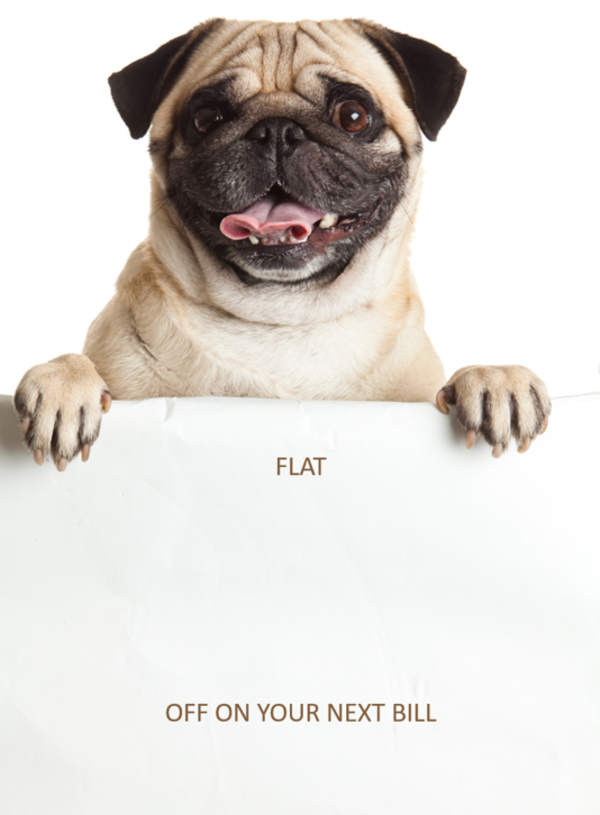 Base image for a typical promotional email marketing campaign
We then apply the discount code to the image using Cloudinary’s on-the-fly image transformation capabilities. Let’s examine the following piece of code:
cl_image_tag("image1.png", array("transformation"=>array(
  array("quality"=>"auto", "flags"=>"lossy"),
  array("overlay"=>array("font_family"=>"ttf", "font_size"=>220, "font_weight"=>"bold", "text"=>"10%25"), "color"=>"#815e3d", "y"=>240, "crop"=>"scale"),
  array("width"=>400, "crop"=>"scale")
  )))
(new ImageTag('image1.png'))
  ->delivery(Delivery::format(Format::auto())
    ->lossy())
  ->delivery(Delivery::quality(Quality::auto()))
  ->overlay(
      Overlay::source(
          Source::text('10%', (new TextStyle('OpenSans-ExtraBold.ttf', 220))
            ->fontWeight(FontWeight::bold()))
          ->textColor(Color::rgb('815e3d'))
          ->transformation((new ImageTransformation())
            ->resize(Resize::scale())))
        ->position((new Position())
          ->offsetY(240)))
          ->resize(Resize::scale()->width(400));
<cld-image publicId="image1.png" >
  <cld-transformation quality="auto" flags="lossy" />
  <cld-transformation :overlay="{fontFamily: 'ttf', fontSize: 220, fontWeight: 'bold', text: '10%25'}" color="#815e3d" y="240" crop="scale" />
  <cld-transformation width="400" crop="scale" />
</cld-image>
<cl-image public-id="image1.png" >
  <cl-transformation quality="auto" flags="lossy">
  </cl-transformation>
  <cl-transformation overlay="text:OpenSans-ExtraBold.ttf_220_bold:10%25" color="#815e3d" y="240" crop="scale">
  </cl-transformation>
  <cl-transformation width="400" crop="scale">
  </cl-transformation>
</cl-image>
cloudinary.Api.UrlImgUp.Transform(new Transformation()
  .Quality("auto").Flags("lossy").Chain()
  .Overlay(new TextLayer().FontFamily("ttf").FontSize(220).FontWeight("bold").Text("10%25")).Color("#815e3d").Y(240).Crop("scale").Chain()
  .Width(400).Crop("scale")).BuildImageTag("image1.png")
MediaManager.get().url().transformation(new Transformation()
  .quality("auto").flags("lossy").chain()
  .overlay(new TextLayer().fontFamily("ttf").fontSize(220).fontWeight("bold").text("10%25")).color("#815e3d").y(240).crop("scale").chain()
  .width(400).crop("scale")).generate("image1.png");
imageView.cldSetImage(cloudinary.createUrl().setTransformation(CLDTransformation()
  .setQuality("auto").setFlags("lossy").chain()
  .setOverlay("text:OpenSans-ExtraBold.ttf_220_bold:10%25").setColor("#815e3d").setY(240).setCrop("scale").chain()
  .setWidth(400).setCrop("scale")).generate("image1.png")!, cloudinary: cloudinary)

We’ve added the text 10% to the image. That’s the bit in the image URL that’s highlighted in bold. However, the text needs to be URL encoded, which means special characters get encoded in a URL.
- Message: 10%
- Actual URL encoded text: 10%25
Marketing would need to work closely with a developer to generate this URL. If you use Google Fonts, then you’re in luck - Cloudinary supports Google Fonts right out of the box!
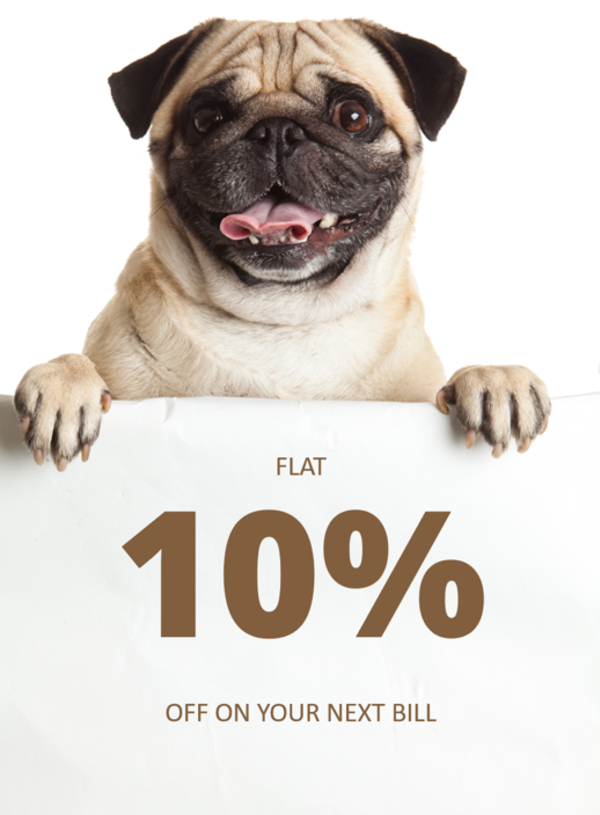 Dynamically generated email promo banner using Cloudinary
The above image was generated by adding 10 as the URL parameter. We now take a step further to replace 10 with the merge tag used in our email campaign.
- Our merge tag is: |*DISCOUNT*|
- URL Encoded merge tag: |*DISCOUNT*|%25 (the %25 stands for the percentage symbol that should appear after the discount amount).
Thus, the new URL containing the merge tag would look something like this:
https://res.cloudinary.com/chriszak/image/upload/q_auto,f_auto,fl_lossy/c_scale,l_text:OpenSans-ExtraBold.ttf_220_bold:|*DISCOUNT*|%25,co_rgb:815e3d,y_240/w_400/image1.png
We then simply include it in our email campaign. Now the content of our email campaign is as follows:
https://res.cloudinary.com/chriszak/image/upload/q_auto,f_auto,fl_lossy/c_scale,l_text:OpenSans-ExtraBold.ttf_220_bold:|*DISCOUNT*|%25,co_rgb:815e3d,y_240/w_400/image1.png
Hey |*FNAME*|,
We hope HashMetrics is helping you keep track of your digital marketing campaigns.
Holidays are around the corner and we have a special gift for you - a flat |*DISCOUNT*| percent off on your next bill, no matter your subscription.
We hope you’re enjoying using HashMetrics as much as we enjoy building it.
If you ever have any questions, please feel free to reach out to us via email at support@hasmetrics.io or by simply tweeting your query to @hashmetrics.
To your marketing success,
Team HashMetrics
Once sent, each image would be generated on-the-fly based on the image URL, which is in turn, generated by the merge tag from the ESP.
Further Image Customization for Email Campaigns
HashMetics’ example is one of the many use cases possible using Cloudinary’s platform. Other examples include:
- Adding an offer expiry date to a promo code
- Embedding a name in the image
Let’s take a look at the code that’s used to generate these images.
Feedback Campaigns
 A personalized banner for a feedback campaign
This images can be used in thank-you emails sent as a response to someone who leaves a feedback or completes a survey.
As you can see, the person’s name is embedded in the image. With Cloudinary, you can use the following code to dynamically generate these images from the base image:
https://res.cloudinary.com/chriszak/image/upload/q_auto,f_auto,fl_lossy/c_scale,l_text:Calibri.ttf_100_bold:Jonathan,co_rgb:002060,g_west,x_80/w_600/image2.png
Here’s a before and after version of the same image, showcasing Cloudinary’s on-demand transformation feature.
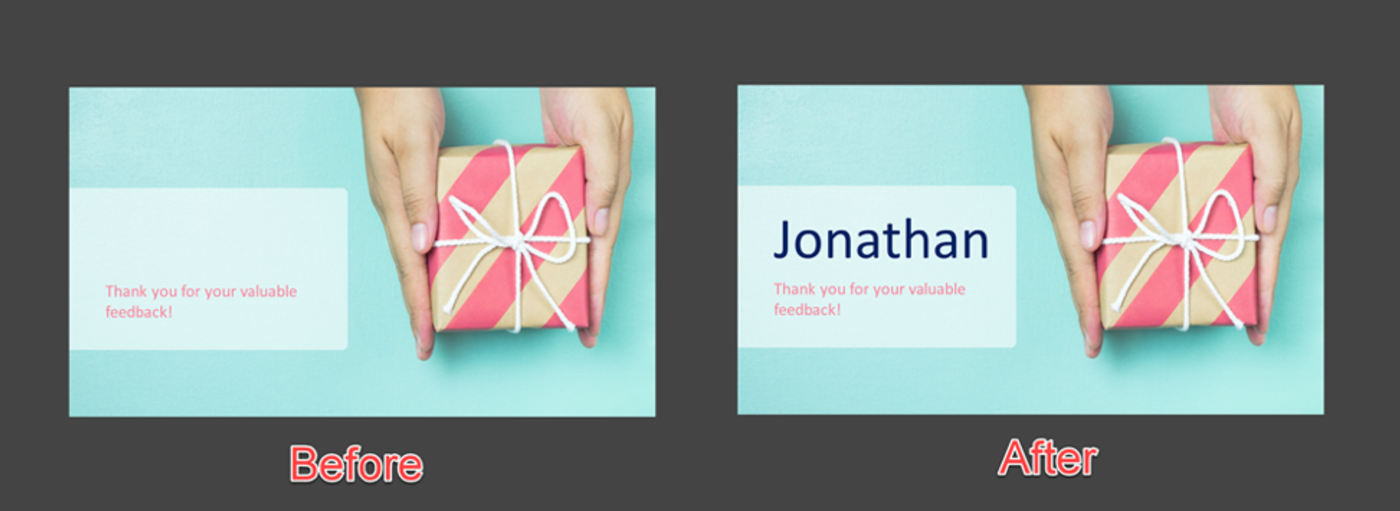 Example of an on-demand image transformation using Cloudinary
Promotional Campaigns
Another useful application of dynamically generated banners are offer banners. Similar to the example in our first use case (HashMetrics), we could add an offer expiration date to the discount code. This would strengthen the marketing message by using the classic FOMO or Fear of Missing Out technique.
Here’s an example:
 Promotional Banner using the FOMO technique
Here’s the code to generate customized offer expiration text on the image:
https://res.cloudinary.com/chriszak/image/upload/q_auto,f_auto,fl_lossy/w_200,c_scale,l_text:Montserrat-Light.otf_100_bold:!*EXPIRES*!,co_rgb:ff8f7e,g_south,y_10/image3.png
Here’s a before and after version of the banners:
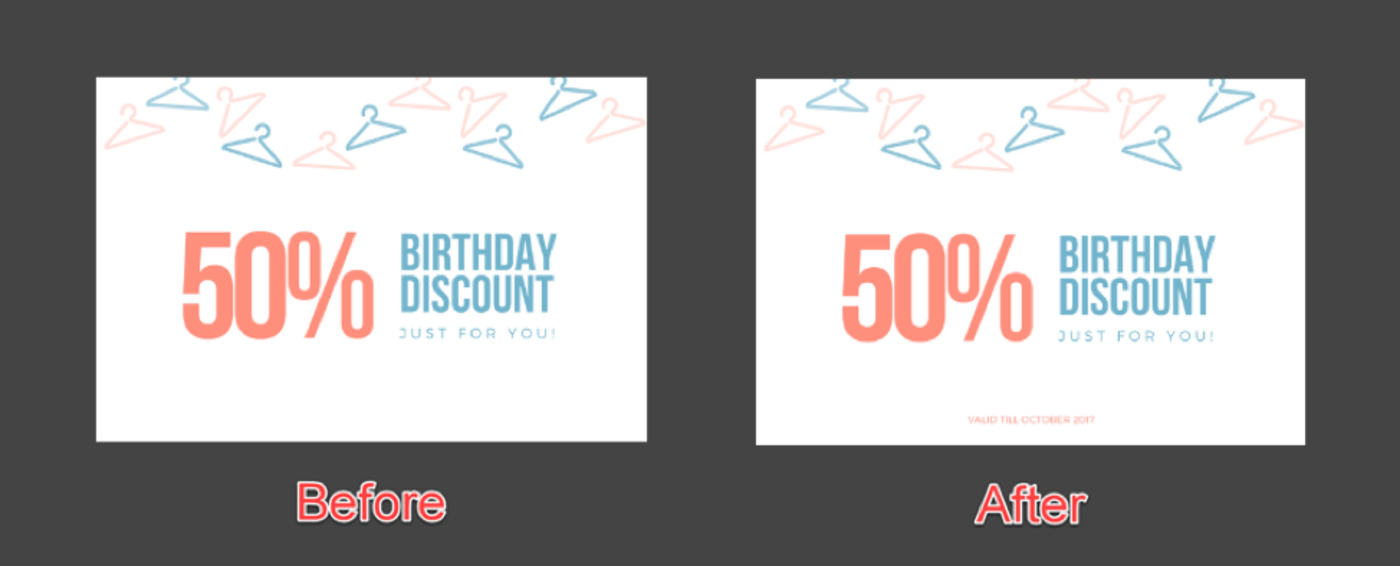 Example of an on-demand image transformation using Cloudinary
Summary
Here’s a quick look at the things we’ve covered in this tutorial:
- Merge tags are extremely resourceful for personalizing email campaigns
- Cloudinary can dynamically add text to specified regions on an image, by simply selecting the parameters in the image URL
- The input for these dynamically generated images can come from merge tags, as defined in the ESP
- Using Cloudinary’s on-demand image transformation capabilities, we can send highly personalized emails in our email marketing campaigns.
Conclusion
The past decade has seen business transform from vertical, exclusive practices to more horizontal, inclusive practices. Personalization is an important step toward a business’ success. Right from online ad campaigns, to SMS and emails sent - everything is personalized.
However, generating customized images for every email sent in an email marketing campaign requires enterprise-level marketing automation tools that cost several thousand dollars every month. With a bit of tweaking, you can achieve the similar results using Cloudinary and merge tags in your ESP.
Cloudinary’s on-the-fly image transformation capabilities open the door to numerous possibilities not only in email marketing, but overall marketing campaigns, as well.
Do you use Cloudinary in your email marketing campaigns? How? Let us know in the comments below!
 |
Sourav Kundu is an avid marketer with a passion for all things digital. From email marketing to app re-engagement campaigns, he loves putting on multiple hats during the workday. He's available for consultation over Twitter or his website. |


