Following Naveen's post on integrating Cloudinary into your Shopify store, here are all the technical details you need to:
- Upload images automatically from Cloudinary to Shopify
- Deliver Shopify product images from Cloudinary
- Integrate Cloudinary's Product Gallery into Shopify.
Note that the above tasks are just the starting points for making Cloudinary DAM work with Shopify through APIs and showcasing the benefits, not an official procedure for integrating Cloudinary with Shopify. Feel free to expand on these tasks to create your own solutions.
Uploading Images from Cloudinary to Shopify
Here's the dilemma: you want to maintain a single source of truth for all your images and you've chosen Cloudinary because of the great DAM features that it offers, but you also need the images to be uploaded to Shopify. So, do you store them on Cloudinary, or Shopify? The answer is both. Keep your single source of truth as Cloudinary, but use the Cloudinary-Shopify Zap to upload them to Shopify automatically, triggered simply by adding a tag in Cloudinary.
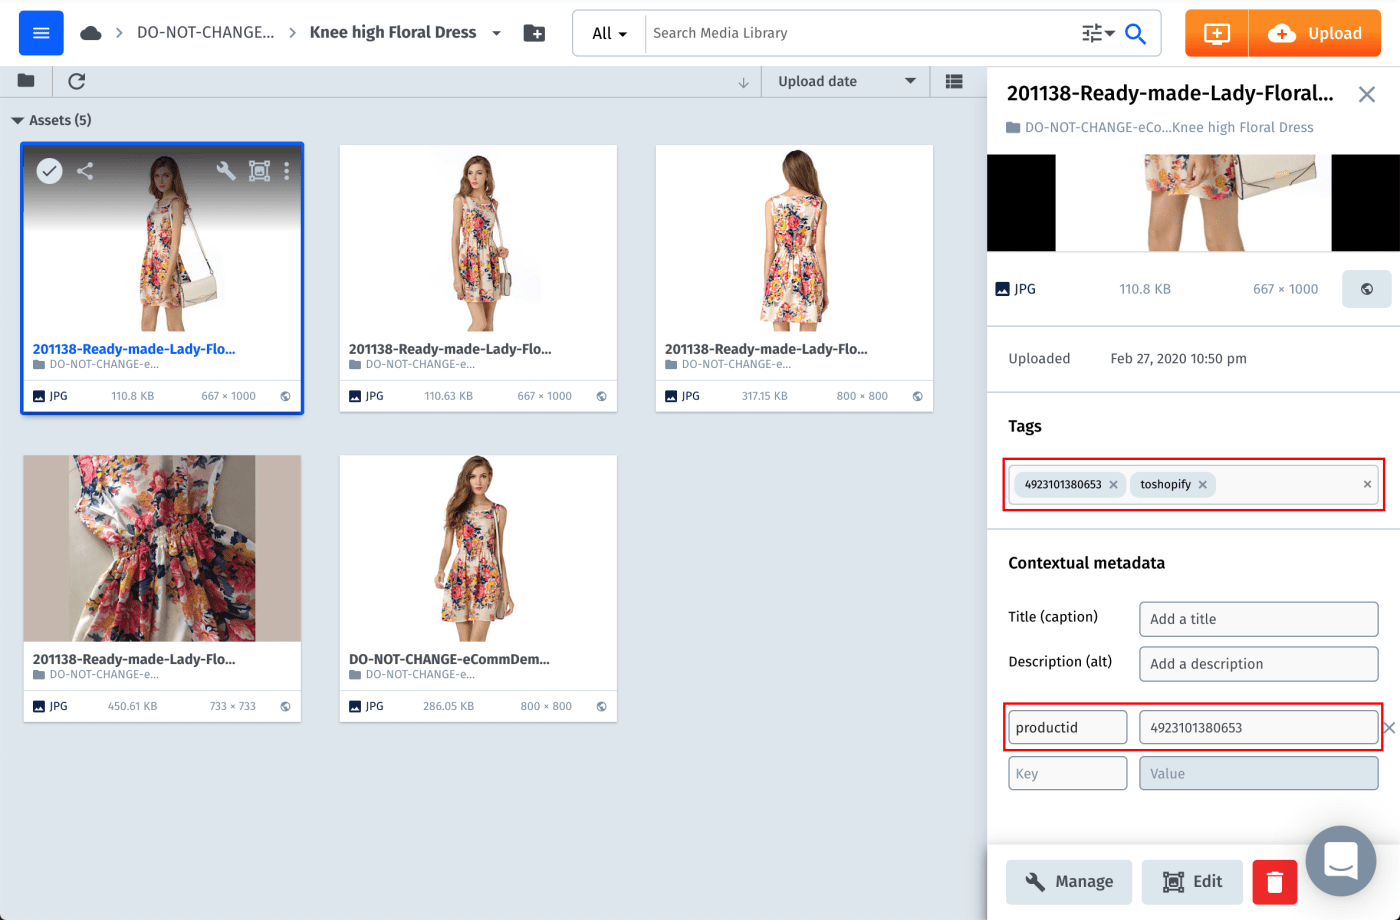
In order for Shopify to know to which product an image belongs, add the product ID as a tag and contextual metadata to the image in Cloudinary. So, for a product ID of 4923101380653, add:
- Contextual metadata: Key:
productidand Value:4923101380653 - Tag:
4923101380653
When you add the toshopify tag, it triggers the Zap to upload the image to the specified product page in Shopify:
You can find information on downloading the Zap, and a video tutorial showing how to configure it, in Cloudinary's documentation.
Currently, the Zap only works for images, but Shopify has recently introduced its GraphQL API which could be used to allow videos to be uploaded in a similar way in the future.
Imported Metadata
When a Cloudinary image is uploaded to Shopify, it includes all metadata and tags:
- Alt text for the image in Shopify is taken from the Description contextual metadata entry in Cloudinary.
- Any tags that are applied in Cloudinary are transferred across to Shopify, aggregated to the product.
- The value of the
positionkey, set in the contextual metadata in Cloudinary, is used to specify the position of the image in Shopify's product gallery. For example, settingpositionto3places the image third in the gallery. If you want the image to be the main image that's shown in the catalog, setpositionto1. Note that when Cloudinary's product gallery is used instead of Shopify's, the assets are ordered alphanumerically by public ID.
Delivering Images from Cloudinary
Using the Cloudinary-Shopify Zap gives you an easy way to upload your Cloudinary images to Shopify, but to make use of Cloudinary's on-the-fly delivery features such as optimizations and transformations you also need to make changes to Shopify's underlying JSON and liquid files.
Download the zip file containing all the code changes that we've made to Shopify's default theme. These files allow you to copy and paste the Cloudinary specific changes into your own themes.
Log into your Shopify admin console and navigate to Online Store > Themes, then click Actions > Edit code for the theme you want to change.

Select settings_schema.json under the Config folder. From settings_schema.json in the zip file, copy and paste the block with
"name": "Cloudinary".

Under Snippets click Add a new snippet, and create a new snippet called cloudinary.liquid. Copy and paste the whole contents of cloudinary.liquid in the zip file.

Select theme.liquid under the Layout folder. From theme.liquid in the zip file, copy and paste the code to add the Cloudinary JavaScript files.

Select product-card-grid.liquid under the Snippets folder. From product-card-grid.liquid in the zip file, copy and paste the whole block starting from the comment,
This whole block is to get cloudinary urls.

Select settings_data.json under the Config folder. From settings_data.json in the zip file, copy and paste the Cloudinary settings at the top of the file, and replace
shopify-demowith the name of your cloud.
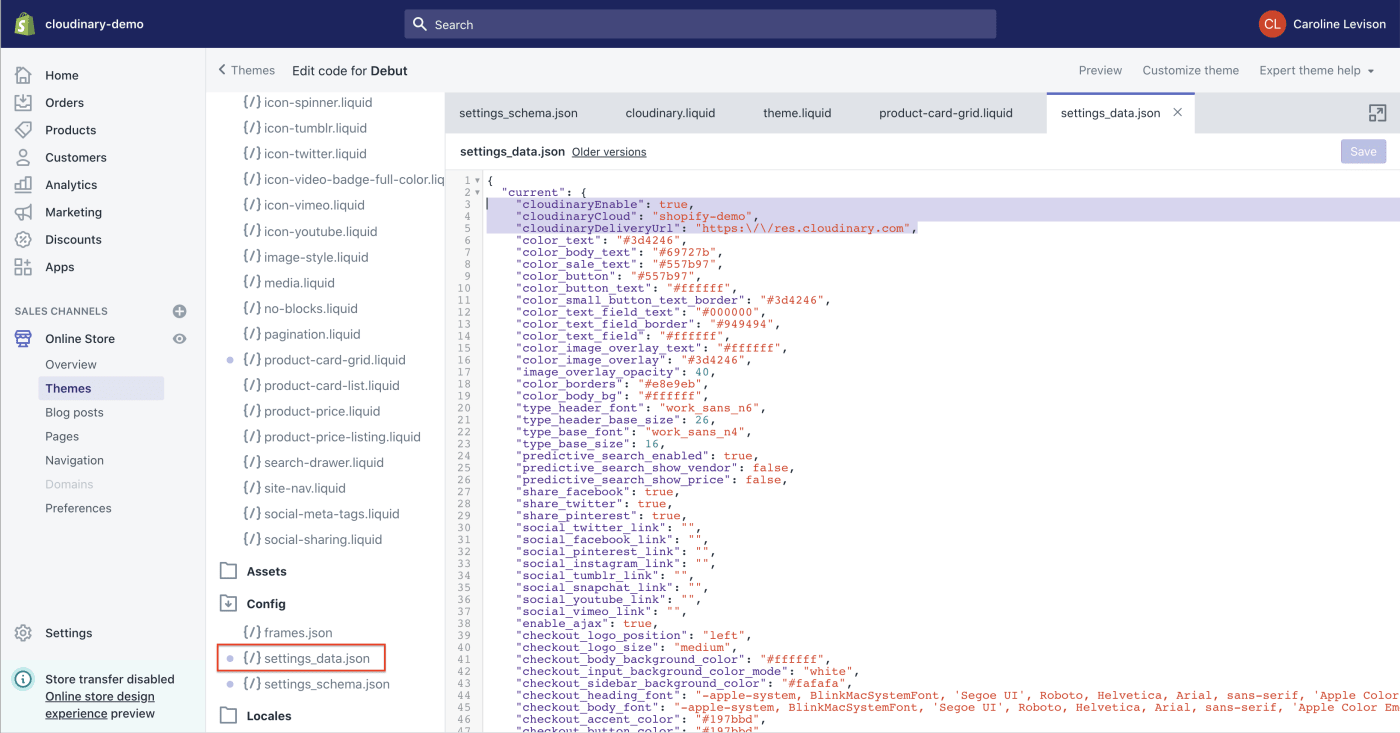
Having made all the code changes, navigate to Online Store > Themes then click Actions > Edit in online store for the theme you just changed. You'll see Cloudinary in Theme Settings.

In the Cloudinary settings you can configure whether or not to enable delivery of assets from Cloudinary, point to a different cloud and change your delivery URL.

With Cloudinary enabled, you can inspect the images on your published Shopify site, and see that they are now being delivered from Cloudinary.

Notice how the URL includes the transformations from cloudinary.liquid:
  {%assign cld_optimization_options = "f_auto,q_auto" %}
{%assign cld_responsive_options = "w_auto,c_scale" %}- f_auto and q_auto deliver your media at the optimal format and quality for the end-user, making your pages load super fast.
- The options, w_auto,c_scale, enable responsive resizing of your assets, so your pages will look great no matter what device your customer is using.
You can even add other transformations to customize all the media on your site.
Using Cloudinary's Product Gallery
The same code bundle also includes an integration with Cloudinary's Product Gallery. This replaces the Shopify product gallery on each product page. For each product, all the images and videos from the configured Cloudinary account that are tagged with the product ID, are automatically added to the product gallery. There's no need to upload these assets to Shopify.
Here are the additional steps you need:
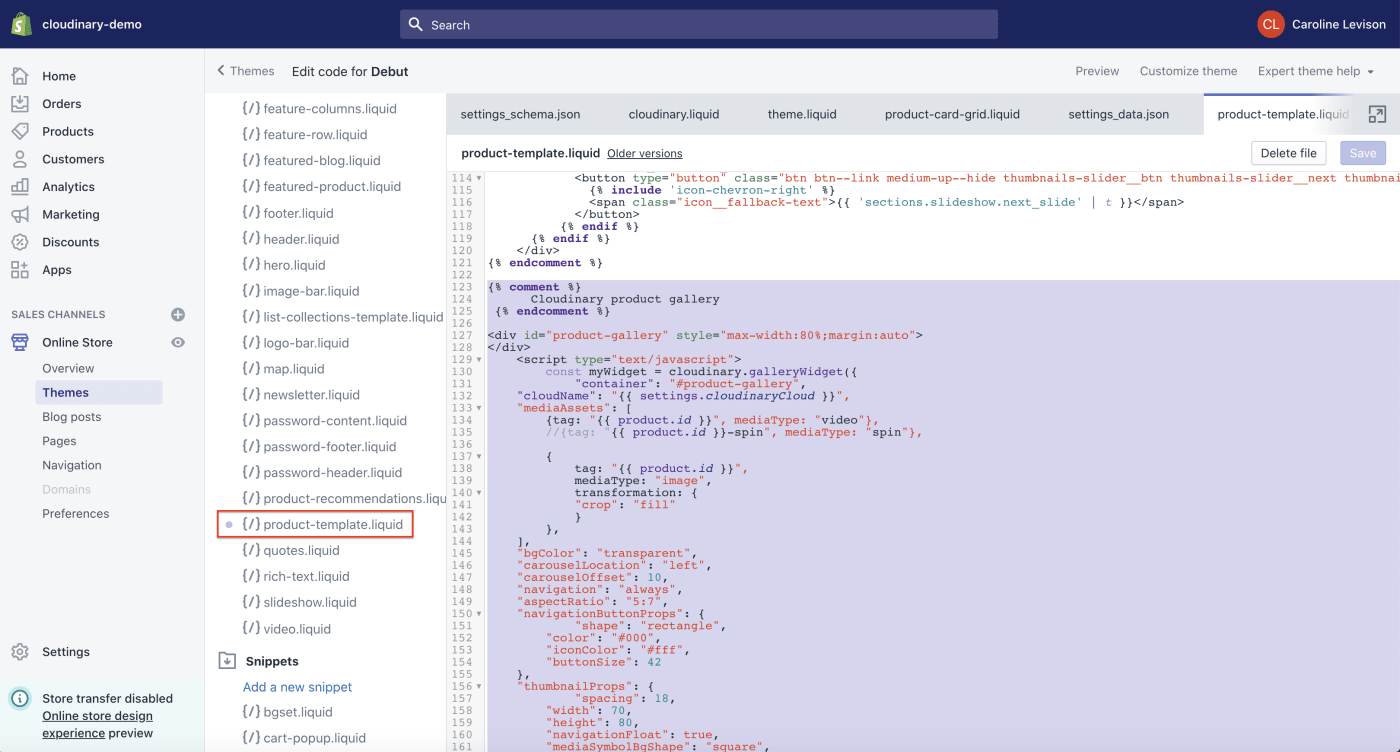
Back in the code editor, select product-template.liquid under the Sections folder. From product-template.liquid in the zip file, copy and paste the code from the
Cloudinary product gallerycomment toCloudinary changes end.
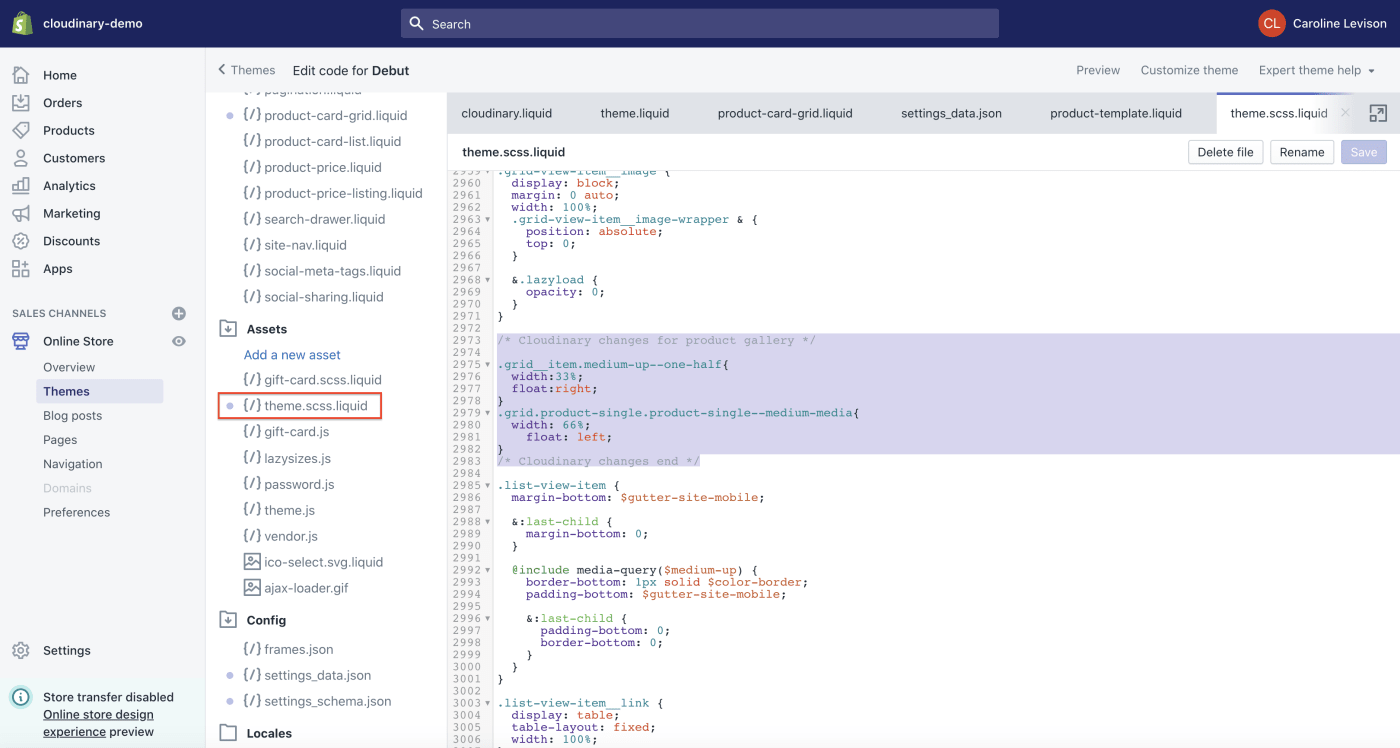
Select theme.scss.liquid under the Assets folder. From theme.scss.liquid in the zip file, copy and paste the CSS within the comments starting
/* Cloudinary changes.
Now, go ahead and tag some images and videos in Cloudinary with one of your product IDs, and see them magically appear in the product's gallery. It'll look something like this:
There are many ways in which the product gallery can be configured, so it's worth taking a look at the Product Gallery Demo to try out some of the customization options.
Summing Up
Now you've seen how easy it is to upload your images from Cloudinary to Shopify, deliver optimized and responsive media, and integrate Cloudinary's product gallery, we hope you'll give it a go and reward your customers with a superior shopping experience. Let us know how you get on!
