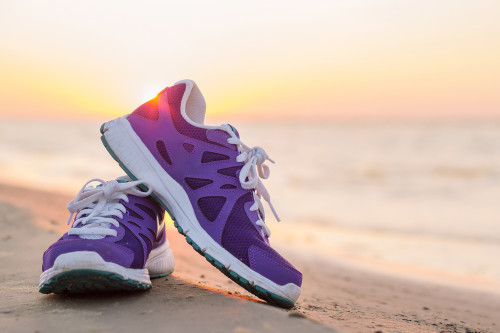
It is common for e-commerce, media, and news sites to remove image backgrounds or make them transparent in order to place the main element of the image on either white or color backgrounds. The final result better integrates an image into a site or specific page’s graphic design. For example, a fashion site that presents clothes or shoes should have the main element of a photo (e.g. shoes) extracted from the original image background, then edited to fit the site’s catalogue design and structure.

We are glad to introduce the Remove-The-Background editing add-on, a third party image processing add-on that supports image background removal. This add-on is brought to you by Pixelz, a leading vendor of image editing solution components, including professional background removal, that is performed by a team of human experts. We, at Cloudinary, have tried it multiple times and the results were pretty impressive.
There are tools that can aid in the automatic background change or removal. Nonetheless, if your goal is to create perfect results, utilizing a graphic editor/designer would be your best bet. However, instead of hiring an in-house or freelance designer, Cloudinary’s Remove-The-Background add-on makes this process much simpler. Since the new add-on is fully integrated into Cloudinary's image management pipeline), when you upload an image, you can easily and automatically have it edited by Remove-The-Background experts.
We’d like to demonstrate this process, starting with the picture below:
Ruby:
cl_image_tag("shoes_orig.jpg")
PHP v1:
cl_image_tag("shoes_orig.jpg")
PHP v2:
(new ImageTag('shoes_orig.jpg'));
Python:
CloudinaryImage("shoes_orig.jpg").image()
Node.js:
cloudinary.image("shoes_orig.jpg")
Java:
cloudinary.url().imageTag("shoes_orig.jpg");
JS:
cloudinary.imageTag('shoes_orig.jpg').toHtml();
jQuery:
$.cloudinary.image("shoes_orig.jpg")
React:
<Image publicId="shoes_orig.jpg" >

</Image>
Vue.js:
<cld-image publicId="shoes_orig.jpg" >

</cld-image>
Angular:
<cl-image public-id="shoes_orig.jpg" >

</cl-image>
.NET:
cloudinary.Api.UrlImgUp.BuildImageTag("shoes_orig.jpg")
Android:
MediaManager.get().url().generate("shoes_orig.jpg");
iOS:
imageView.cldSetImage(cloudinary.createUrl().generate("shoes_orig.jpg")!, cloudinary: cloudinary)

You can begin the process either while the photo is being uploaded to Cloudinary, using the upload API demonstrated in the code sample below, or by using the Admin API for images that have already been uploaded. Simply specify the background_removal parameter in either API.
Ruby:
Cloudinary::Uploader.upload("shoes.jpg",
  :public_id => "shoes",
  :background_removal => 'remove_the_background')
PHP:
\Cloudinary\Uploader::upload("shoes.jpg",
  array(
    "public_id" => "shoes",
    "background_removal" => "remove_the_background"
  ));
Python:
cloudinary.uploader.upload("shoes.jpg",
  public_id = "shoes",
  background_removal = "remove_the_background")
Node.js:
cloudinary.uploader.upload("shoes.jpg",
  function(result) { console.log(result); },
  { public_id: "shoes",
    background_removal: "remove_the_background" });
Java:
cloudinary.uploader().upload("shoes.jpg", Cloudinary.asMap(
  "public_id", "shoes",
  "background_removal", "remove_the_background"));
As mentioned above, the automatic background change or removal is performed by Remove-The-Background’s team of experts and it could therefore take up to 24 hours to complete. Cloudinary processes the request asynchronously, then when the background removal is complete, the original uploaded image is replaced by an edited one. A backup of the original image is automatically saved to Cloudinary. It is also possible to receive a notification that indicates when the editing process is complete. Below, you can see how the picture's background was removed with great results:
Ruby:
cl_image_tag("shoes.jpg")
PHP v1:
cl_image_tag("shoes.jpg")
PHP v2:
(new ImageTag('shoes.jpg'));
Python:
CloudinaryImage("shoes.jpg").image()
Node.js:
cloudinary.image("shoes.jpg")
Java:
cloudinary.url().imageTag("shoes.jpg");
JS:
cloudinary.imageTag('shoes.jpg').toHtml();
jQuery:
$.cloudinary.image("shoes.jpg")
React:
<Image publicId="shoes.jpg" >

</Image>
Vue.js:
<cld-image publicId="shoes.jpg" >

</cld-image>
Angular:
<cl-image public-id="shoes.jpg" >

</cl-image>
.NET:
cloudinary.Api.UrlImgUp.BuildImageTag("shoes.jpg")
Android:
MediaManager.get().url().generate("shoes.jpg");
iOS:
imageView.cldSetImage(cloudinary.createUrl().generate("shoes.jpg")!, cloudinary: cloudinary)

Pictures can be further transformed to fit your own graphics and design using Cloudinary's transformation URLs. For example, below, you can see the same image cropped to 250 x 250, with increased saturation.
Ruby:
cl_image_tag("shoes.jpg", :width=>250, :height=>250, :effect=>"saturation:80", :crop=>"fill")
PHP v1:
cl_image_tag("shoes.jpg", array("width"=>250, "height"=>250, "effect"=>"saturation:80", "crop"=>"fill"))
PHP v2:
(new ImageTag('shoes.jpg'))
  ->resize(Resize::fill()->width(250)->height(250))
  ->adjust(Adjust::saturation()->level(80));
Python:
CloudinaryImage("shoes.jpg").image(width=250, height=250, effect="saturation:80", crop="fill")
Node.js:
cloudinary.image("shoes.jpg", {width: 250, height: 250, effect: "saturation:80", crop: "fill"})
Java:
cloudinary.url().transformation(new Transformation().width(250).height(250).effect("saturation:80").crop("fill")).imageTag("shoes.jpg");
JS:
cloudinary.imageTag('shoes.jpg', {width: 250, height: 250, effect: "saturation:80", crop: "fill"}).toHtml();
jQuery:
$.cloudinary.image("shoes.jpg", {width: 250, height: 250, effect: "saturation:80", crop: "fill"})
React:
<Image publicId="shoes.jpg" >
  <Transformation width="250" height="250" effect="saturation:80" crop="fill" />
</Image>
Vue.js:
<cld-image publicId="shoes.jpg" >
  <cld-transformation width="250" height="250" effect="saturation:80" crop="fill" />
</cld-image>
Angular:
<cl-image public-id="shoes.jpg" >
  <cl-transformation width="250" height="250" effect="saturation:80" crop="fill">
  </cl-transformation>
</cl-image>
.NET:
cloudinary.Api.UrlImgUp.Transform(new Transformation().Width(250).Height(250).Effect("saturation:80").Crop("fill")).BuildImageTag("shoes.jpg")
Android:
MediaManager.get().url().transformation(new Transformation().width(250).height(250).effect("saturation:80").crop("fill")).generate("shoes.jpg");
iOS:
imageView.cldSetImage(cloudinary.createUrl().setTransformation(CLDTransformation().setWidth(250).setHeight(250).setEffect("saturation:80").setCrop("fill")).generate("shoes.jpg")!, cloudinary: cloudinary)

This add-on can remove the background from any type of photo, including pictures of people.
Ruby:
cl_image_tag("woman.jpg")
PHP v1:
cl_image_tag("woman.jpg")
PHP v2:
(new ImageTag('woman.jpg'));
Python:
CloudinaryImage("woman.jpg").image()
Node.js:
cloudinary.image("woman.jpg")
Java:
cloudinary.url().imageTag("woman.jpg");
JS:
cloudinary.imageTag('woman.jpg').toHtml();
jQuery:
$.cloudinary.image("woman.jpg")
React:
<Image publicId="woman.jpg" >

</Image>
Vue.js:
<cld-image publicId="woman.jpg" >

</cld-image>
Angular:
<cl-image public-id="woman.jpg" >

</cl-image>
.NET:
cloudinary.Api.UrlImgUp.BuildImageTag("woman.jpg")
Android:
MediaManager.get().url().generate("woman.jpg");
iOS:
imageView.cldSetImage(cloudinary.createUrl().generate("woman.jpg")!, cloudinary: cloudinary)


The images below have been dynamically created using Cloudinary's transformation URLs. 200x200 face-detection based thumbnails were created. The image on the left is a thumbnail of the original image while the image on the right is a thumbnail with the background removed.
Ruby:
cl_image_tag("woman.jpg", :width=>200, :height=>200, :gravity=>"face", :crop=>"thumb")
PHP v1:
cl_image_tag("woman.jpg", array("width"=>200, "height"=>200, "gravity"=>"face", "crop"=>"thumb"))
PHP v2:
(new ImageTag('woman.jpg'))
  ->resize(Resize::thumbnail()->width(200)->height(200)
    ->gravity(Gravity::focusOn(FocusOn::face())));
Python:
CloudinaryImage("woman.jpg").image(width=200, height=200, gravity="face", crop="thumb")
Node.js:
cloudinary.image("woman.jpg", {width: 200, height: 200, gravity: "face", crop: "thumb"})
Java:
cloudinary.url().transformation(new Transformation().width(200).height(200).gravity("face").crop("thumb")).imageTag("woman.jpg");
JS:
cloudinary.imageTag('woman.jpg', {width: 200, height: 200, gravity: "face", crop: "thumb"}).toHtml();
jQuery:
$.cloudinary.image("woman.jpg", {width: 200, height: 200, gravity: "face", crop: "thumb"})
React:
<Image publicId="woman.jpg" >
  <Transformation width="200" height="200" gravity="face" crop="thumb" />
</Image>
Vue.js:
<cld-image publicId="woman.jpg" >
  <cld-transformation width="200" height="200" gravity="face" crop="thumb" />
</cld-image>
Angular:
<cl-image public-id="woman.jpg" >
  <cl-transformation width="200" height="200" gravity="face" crop="thumb">
  </cl-transformation>
</cl-image>
.NET:
cloudinary.Api.UrlImgUp.Transform(new Transformation().Width(200).Height(200).Gravity("face").Crop("thumb")).BuildImageTag("woman.jpg")
Android:
MediaManager.get().url().transformation(new Transformation().width(200).height(200).gravity("face").crop("thumb")).generate("woman.jpg");
iOS:
imageView.cldSetImage(cloudinary.createUrl().setTransformation(CLDTransformation().setWidth(200).setHeight(200).setGravity("face").setCrop("thumb")).generate("woman.jpg")!, cloudinary: cloudinary)


Remove The Background supports additional editing profiles that can be specified via Cloudinary’s API (e.g. keep/remove shadow, transparent/white background, and more). Please contact us if you need a custom editing profile. For more details about this add-on check out our Remove-The-Background add-on documentation.
Cloudinary’s Remove-The-Background add-on helps preserve your site or app’s professional look, without the need for in-house graphic designers or long and complex editing processes. Customers of the Basic plan or higher can try the Remove-The-Background add-on for free then later subscribe to a plan that best meets your specific requirements.
If you don't have a Cloudinary account yet, sign up for a free account here.
![]()


